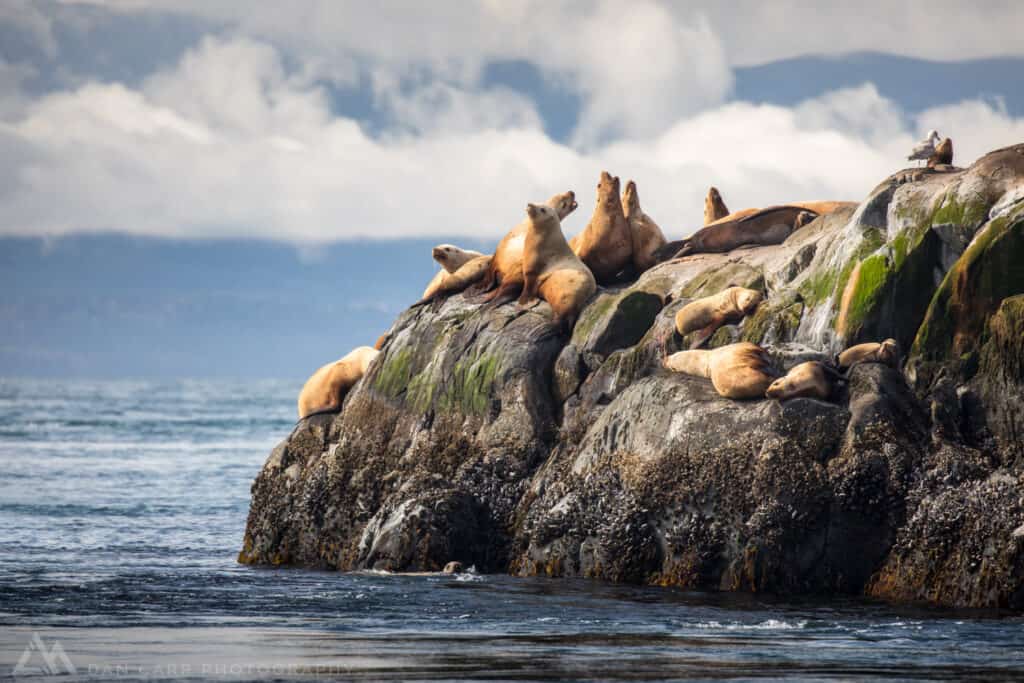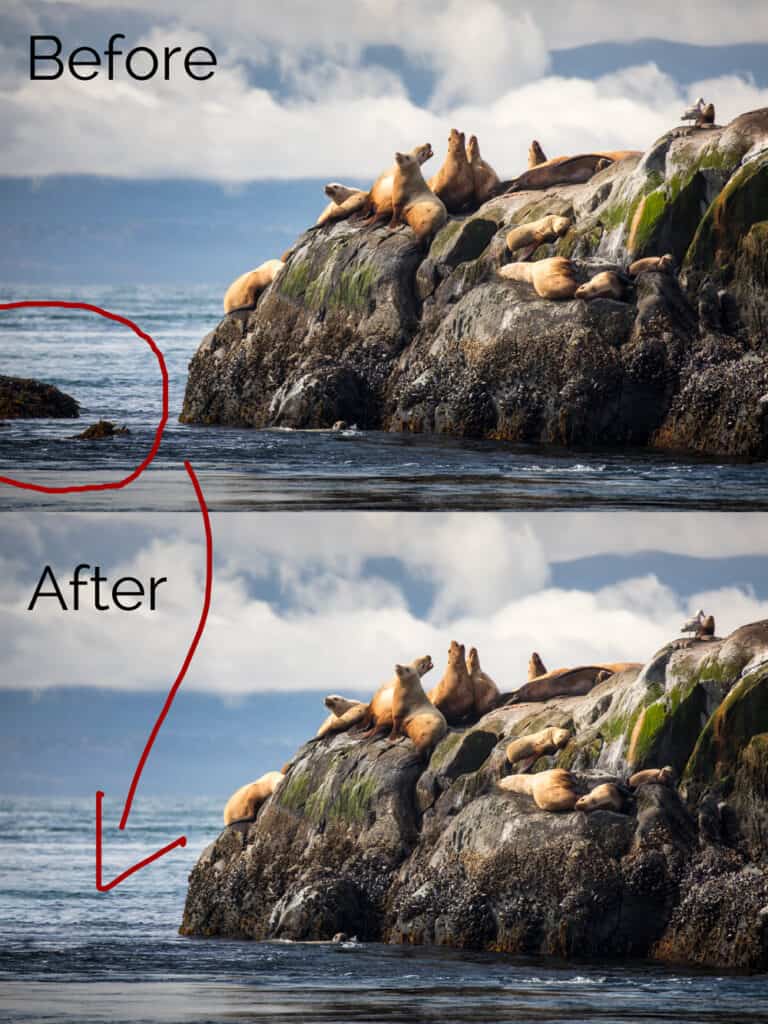
This photo was taken from a zodiak on a recent outing in Nanaimo, BC. I really liked the clouds in the background, the great textures on the rocks and the sea lions barking away on the rocks. As you’ll see from the original image though, there was a distraction that had to be removed in Photoshop, so I thought it would be a good candidate for a BTS post!
Equipment Used for This Shot
- Canon 5D Mark IV
- Canon 100-400 f/4.5-5.6 L IS II
- Lexar Professional 128GB CF Cards
- Adobe Lightroom CC
- Adobe Photoshop CC
- A boat!
Photographing from a Boat
It’s highly beneficial to use a lens with image stabilization if you’re going to be shooting from a small boat like this. The Canon 100-400 f/4.5-5.6 L IS II is the perfect tool because it’s small enough to hand-hold, and has powerful 4-stop image stabilization. That said, I also made sure I had a reasonably fast shutter speed to counter the boat’s movement. The exposure was f/5.6, ISO 500, 1/640.
A polarizing filter was also used to help reduce the glare on the water and the wet rocks, and also bring out some of the texture in the background clouds. A polarizing filter does cut down the light that’s coming into the camera, so it forces you into using a higher ISO or a wider aperture to achieve the same shutter speed. In this case, the day was quite bright, so ISO 500 was just fine, and on the 5D Mark IV this produces such a clean file that I didn’t bother with any noise reduction at all.
Lightroom Image Edit


The bulk of the editing was done in Lightroom, and it was pretty simple stuff that should be becoming familiar if you have been following along with the BTS series. Firstly I straightened out the horizon with the crop/rotate tool, since the rocking boat had left it askew. Then I applied a small crop to the image to focus a little tighter on the sea lions. At this point I began to work with my favourite selective adjustment tools, starting with a graduated adjustment in the lower part of the image to reduce the brightness of the water which was proving to be something of a distraction.
Next I added a graduated adjustment to the clouds to darken them slightly and push people toward the right side of the image. Note that this adjustment was applied at an angle from the top left corner.
Following this, I used a radial filter over the sea lions to brighten them up slightly, relative to the rest of the image, and then I applied some global adjustments in vibrance and saturation. The clarity slider in Lightroom usually works well with textures, so I Added some of this to bring out the detail in the rocks and barnacles. The clarity slider works to add contrast to the mid tones of an image, whilst ignoring the shadows and highlights.
Finally, I chose to open up the shadows a little with the shadows slider as I felt like some of the detail on the rocks was being a little lost. All pretty simple stuff really, but it’s what I did next that really made me want to include this image in the BTS series…
Rock Removal

Once the majority of the editing had been completed in Lightroom, I right-clicked on the photo and used the “Open In Photoshop” option. Once there, I drew rough selections around the two problematic rocks in the ocean using the lasso tool, and hit the backspace key to bring up the content-aware fill dialogue box. I find that content-aware fill is often a pretty good starting point when you want to remove distractions from an image, but when you run the tool in areas of complex texture, such as this choppy ocean scene, it’s always going to get a few things wrong. Sure enough, it did a reasonable job, but not perfect, so I used the clone stamp tool to pain over the problem areas with textures from points that were in the same plane of focus. That point is VERY important! When you have an image like this that has been shot with a telephoto lens, the difference in sharpness is quite dramatic if you accidentally clone an area from too far fore or aft of the problem in the image. In this instance I was working to cover up something which had been in the thin plane of focus, so I had to be careful not to let the clone tool try and clone in any out of focus areas.
In total, it was probably 3 minutes of Photoshop work, at which point I hit the save button to automatically save the new image and import it back into Lightroom as a stacked file with the original RAW file. Sometimes the clone tool can be tricky to work with because it has a tendency to make visible repeating patterns if it’s not used carefully. The trick is to continuously vary where you are pulling your cloned data from. When I use the clone tool, my left finger hovers constantly on the option key to continuously select new target areas for the clone with every brush stroke.
What do you think? Do you agree that the image is better with those rocks removed from it?


