

I took this photo of Diamond Head mountain a few days ago while I was visiting the Sea To Sky Gondola in Squamish, BC. I planned the trip up the gondola to coincide with a spell of clear weather, and of course the best light at the end of the day. As the sun sets in the mountains, alpenglow can often be seen on the surrounding peaks and it makes for a beautiful photographic subject.
Two main things are worth discussing about this photo, and the first one is the focal length of 271mm. This was shot with my trusty Canon 100-400 f/4-5-5.6 L IS II on a 5D Mark III, recently featured in my 2015 Gear of the Year selection. Such a long lens is not usually though of as being used for landscape photography, but it really depends on photographic vision is wired. I actually find myself using long lenses quite often, and even though there was a blazing sunset visible right behind me, my choice was to focus on the opposite mountains and shoot longer instead. If you’ve never tried it, I urge you to give it a go at some point because you might just find that it suits you too.
The next thing we look at is the inclusion of the silhouetted trees in the foreground. This image wouldn’t be half as impactful if those weren’t included, it would lack overall contrast, and contrast is hugely important to us when trying to captivate people’s attention. The black trees also create an interesting sense of depth and a feeling of peering out across the valley from an opposing mountain, whereas without them it would have been hard to tell anything of my location at all. It would have looked similar to taking a photo from a tall office block that was opposite a mountain range. The foreground trees help complete the story in this case – yes, I’m also outdoors on a mountain.

When you’re shooting at longer focal lengths like this with close foreground objects, the smallest sideways movement will create a big adjustment in the foreground placement relative to the background. Had I stepped 5 paces to the left, for example, the tallest of the trees would have probably been dead inline with the tallest peak in the background. It’s therefore important to carefully consider your placement and how these things line up. Standing where I did has place the tallest tree to the left side and it nicely balances the tallest peak, creating a symmetry in a way. This position has also left the biggest gap in the trees directly beneath the peak of the mountain and aI feel that open space invites you to look towards the peak and helps to make sure it doesn’t feel too crowded in the composition.
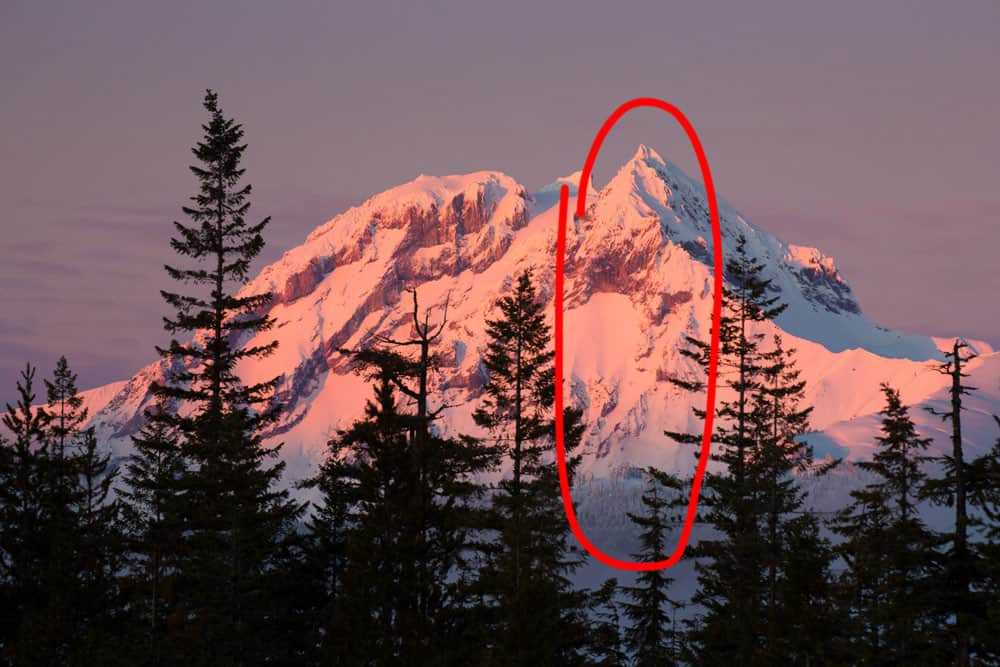
On top of this, I’ve also tried to keep tall trees away from the edges of the image because they would have commanded too much attention with their contrast, when really I want to focus people’s eyes towards the mountain, never the edges of the frame. You always want to try and avoid prominent visual items on the edge of the frame if your subject isn’t in that place as well.

