Last year at Photo Plus Expo in New York I came across a surprise as I was walking across the show floor to the Think Tank Photo booth. Attached to the side of their booth was a small table and a new banner; Mindshift Gear. I’m a big fan of Think Tank’s stuff, you guys have probably read a review or three on here in the past but whilst they make the best roller bags and sports/event photography gear in the business they have never produced a bag that suits my main needs as an outdoor and adventure sports photographer. Mindshift is changing all that right now and is an entirely new company formed from within the design studios of Think Tank Photo that will concentrate on the outdoor photography market. Their first bag was launched as a Kickstarter project and raised more than $130,000 in backing when the goal was just $30,000. That first bag, the Rotation 180 Pro, is now shipping to all those who backed it on Kickstarter and I’m lucky to be one of the first to receive one and the first to show it to all of you in detail.
Video Review
There’s so many features for this pack that it’s definitely worth watching the video as well to see how they all fit together.
The Rotation 180 Pro – Features, Design & Build
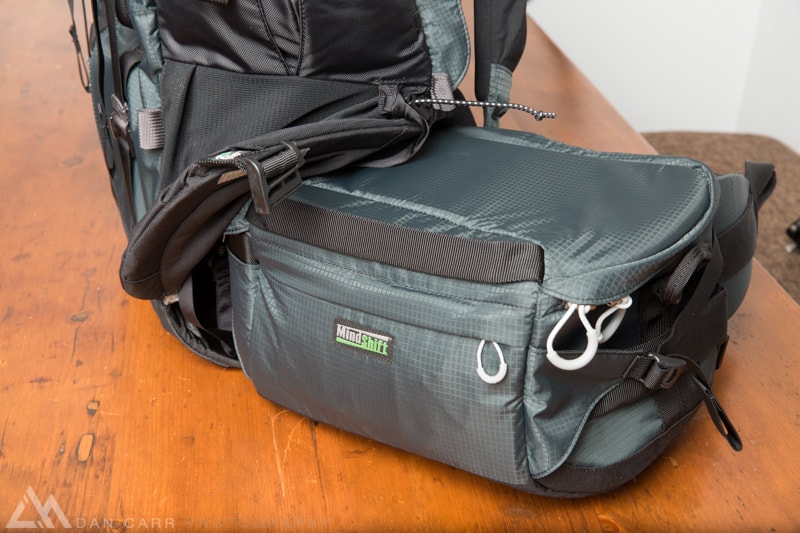
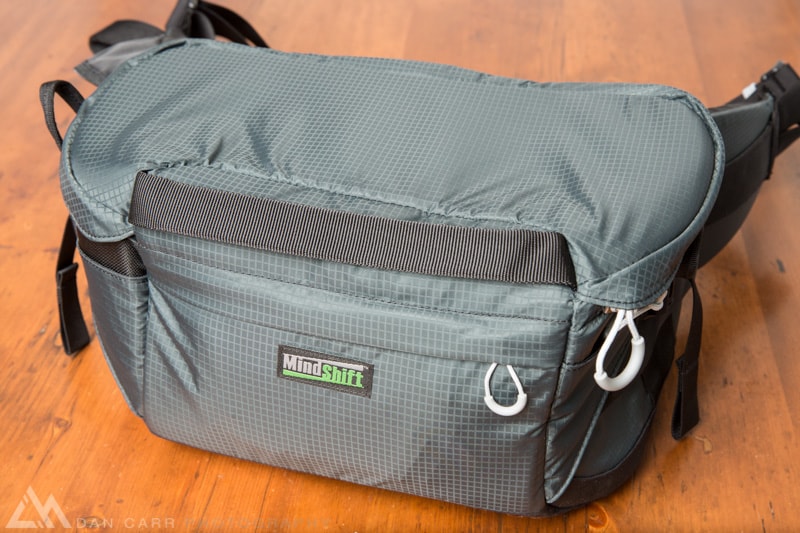
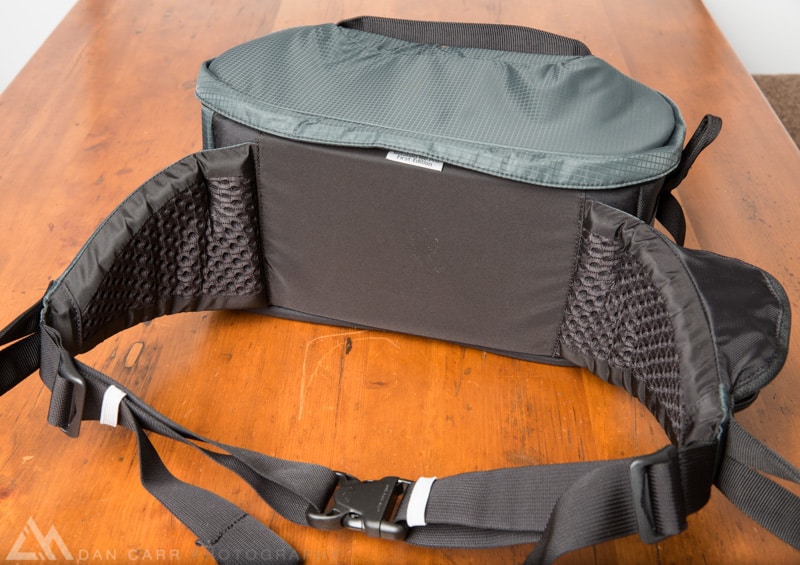
The R180 Pro is so chock full of intricate little features and details that photos and video are the best way for me to show these to you. This is a unique outdoor photography pack that divides the available space into two sections. The top half can be used either for your ‘other’ gear such as clothing food, stove, shelter or first aid kit, or with the addition of the optional camera insert it can also be used to store camera equipment. This top section can be accessed via a zippered back panel, or from the top of the bag. The bottom half of the bag is the R180 Pro’s secret sauce. An ingenious magnetic clip on the side of the bag can be released, at which point the hatch cover springs open and the entire bottom half of the bag can be rotated around to the front to provide you with access to your camera gear (see video below). This belt pack section can be easily pushed back into the pack and the magnetic latch closed to secure it, all with only one hand. The belt pack can also be worn on it’s own for lightweight missions or climbing purposes. On top of this, the pack features more other features than I think I’ve ever seen on a camera bag and I’ll cover every little detail with the images and video below.
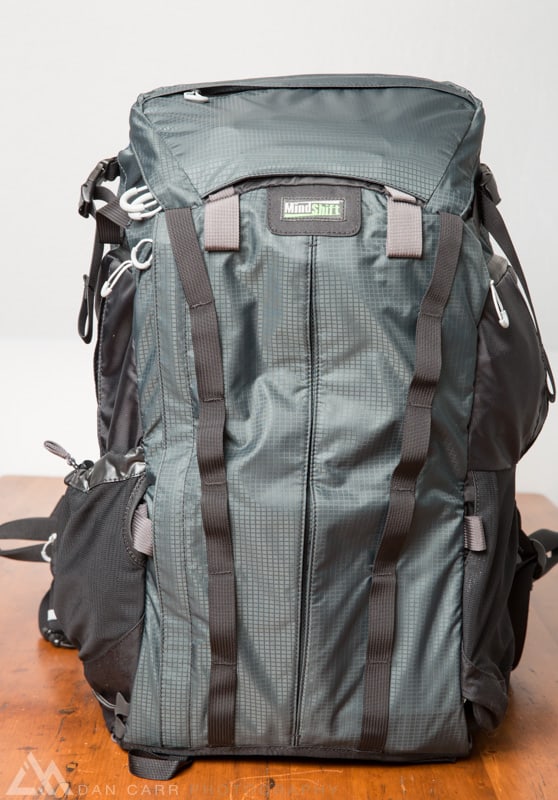
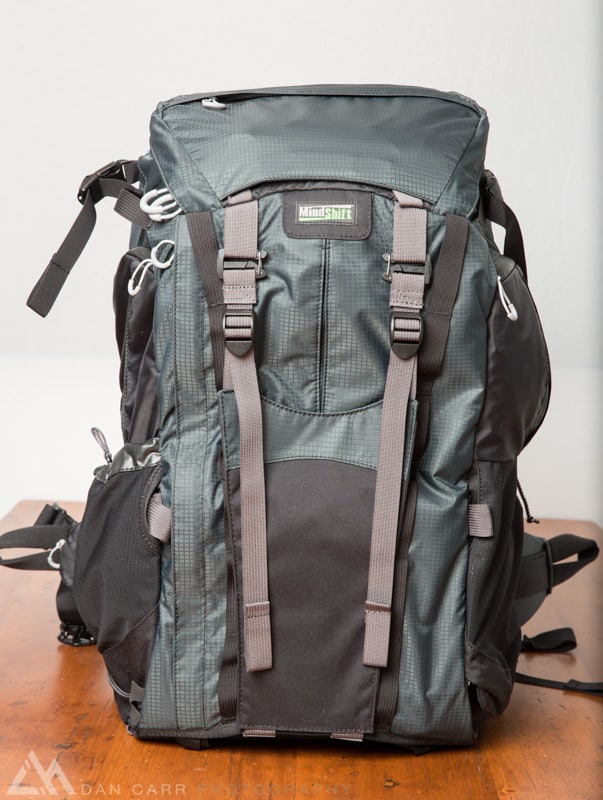
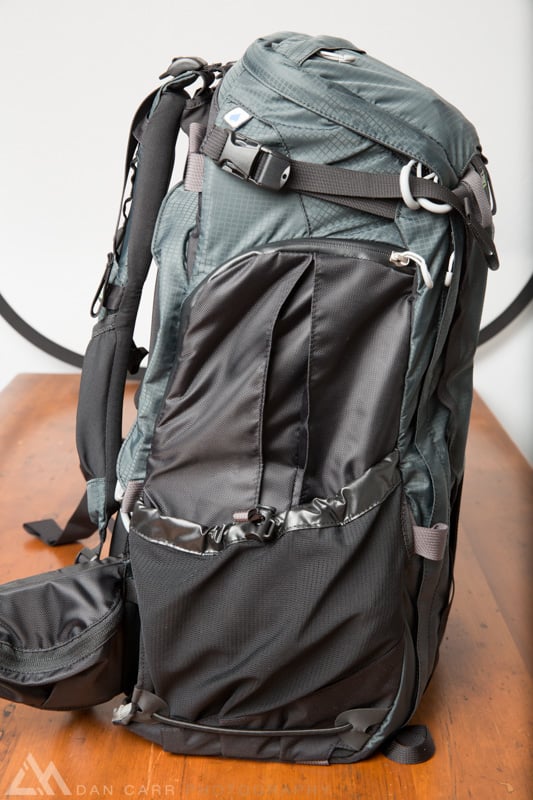
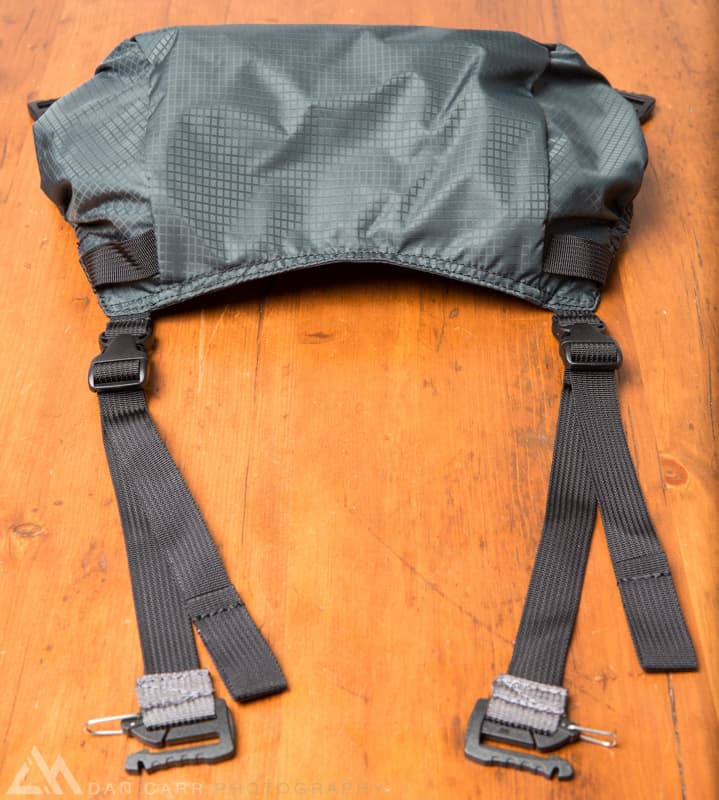
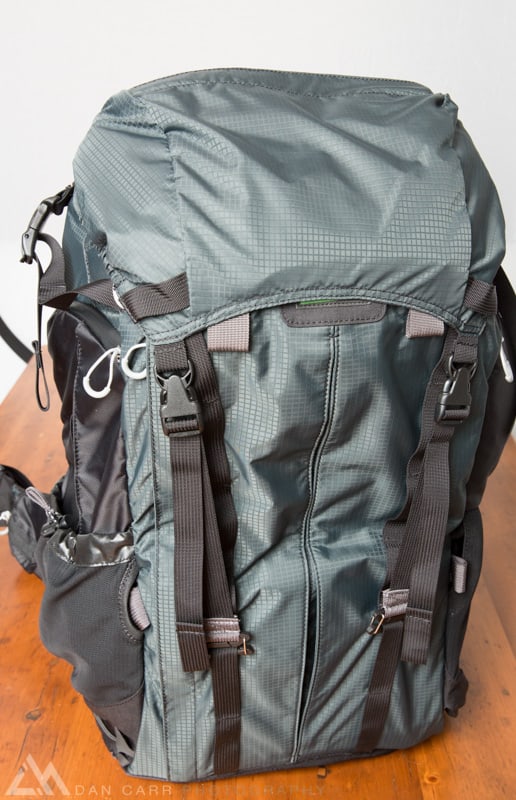
This is the pack in it’s most basic form with no accessories attached to it. If I’m traveling, this is how I would set it up, with the accessories hidden away in my checked luggage. Note how many possible attachment points there are on the front though.

All the packs come with this tripod cup as well which can be used for attaching a large tripod or securing other equipment to the front of the pack such as a shovel or camping gear.

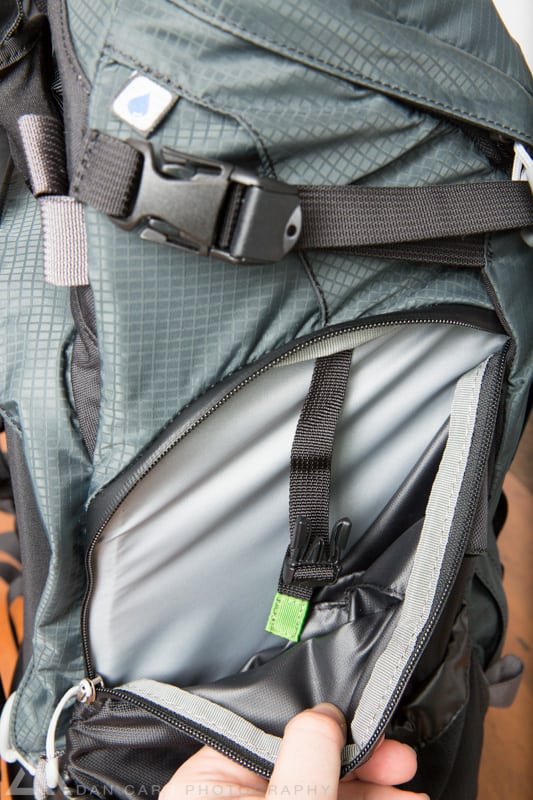


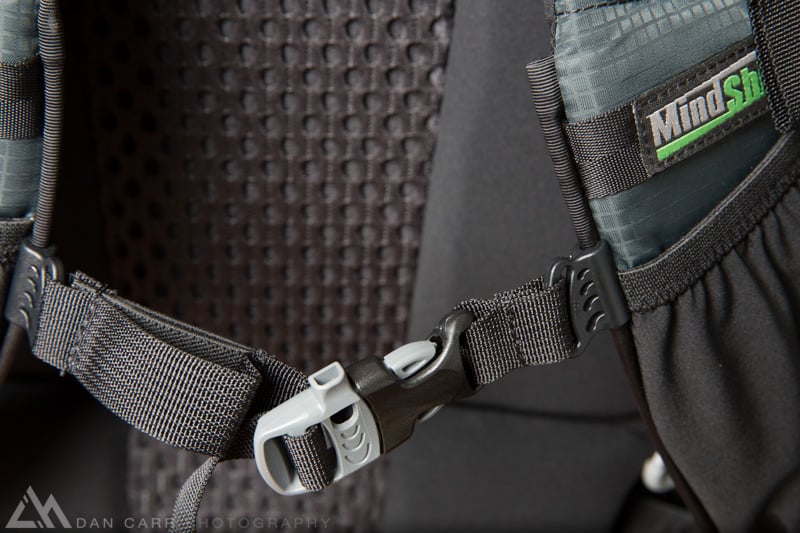
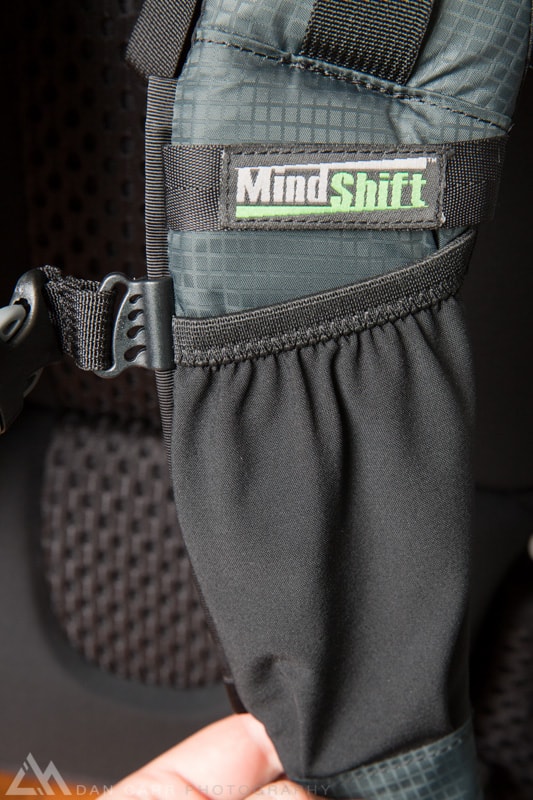

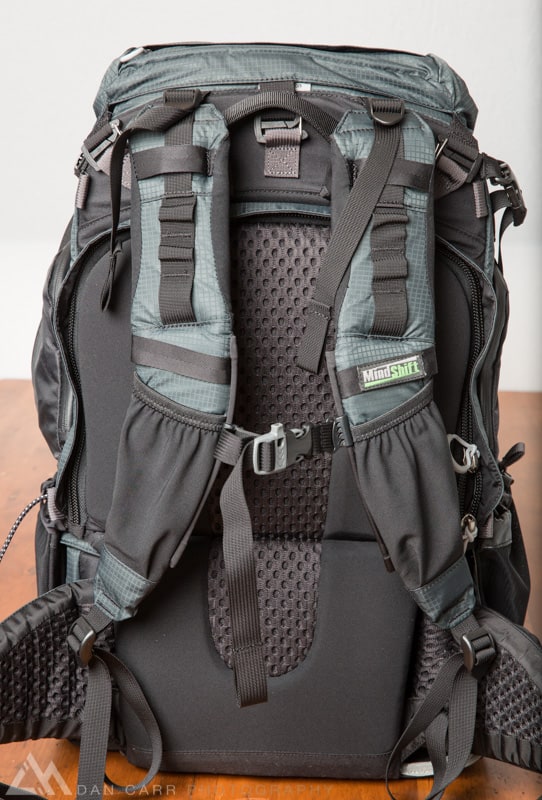
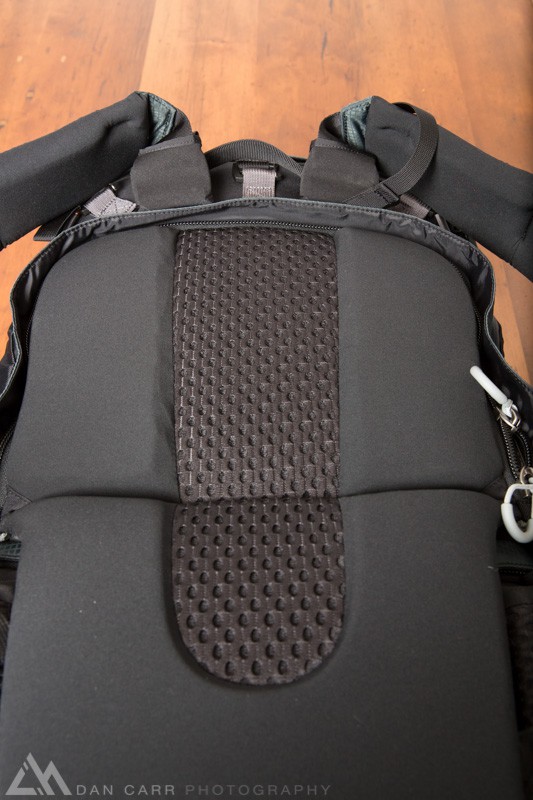
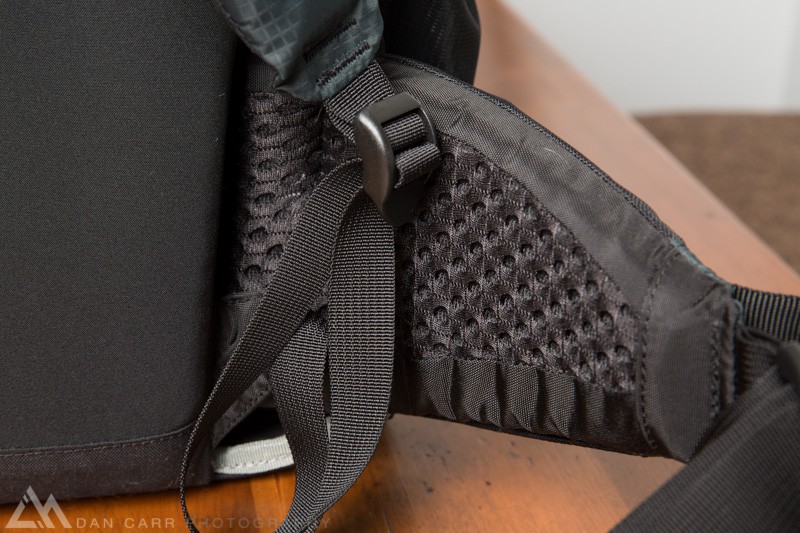
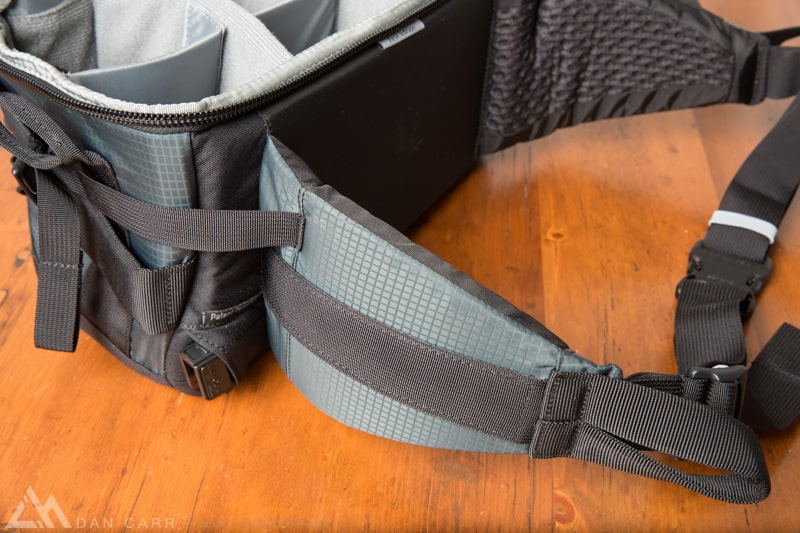
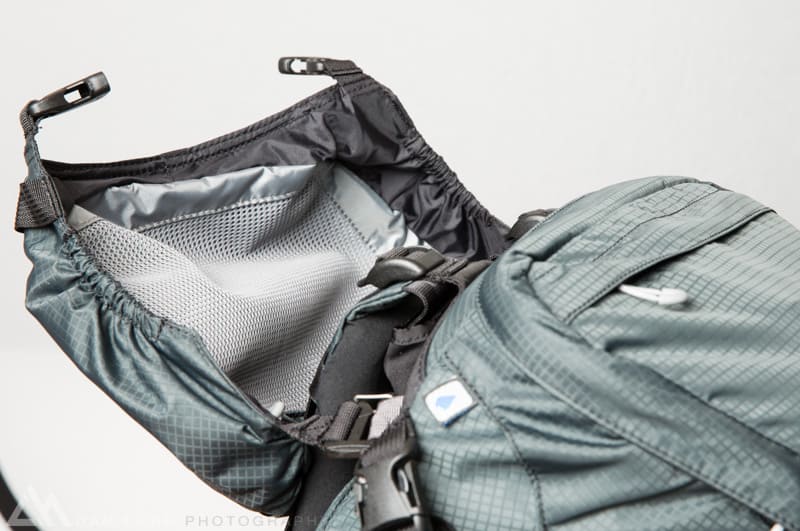
Those of you who have used a back panel access camera bag before will have come across the fact that the shoulder straps tend to get in the way of the back panel when you want to open it. You lie it on the ground and the straps naturally fall across the opening that you are trying to get into. This is one of those things where I’ve always figured it’s just something you have to deal with. But that’s not how the designers at Mindshift think about things like that. A simple change to the shoulder harness to add a non-padded section at the top and these straps fall perfectly to the sides without obscuring the back panel hatch at all. Little tweaks like this add up to what is surely the most thoughtful camera bag design ever seen.
Of course you don’t have to have camera equipment in this top section at all. Leaving out the camera insert leaves ample room for a change of clothes, a stove and some food for a one day mission. I dare say you could make this work for an overnight trip as well if you strapped the tent to the front of the pack and put a small air mattress inside here with some extra clothing. I’ll give it a try as soon as the weather warms up a little here in British Columbia.

I want One !! And I’d like FREE shipping!
You can get FREE FedEx ground shipping in the US when you order this bag from their site by clicking THIS LINK
Now For The Magic !
Some of you may remember a bag from five or six years ago by Think Tank called the Rotation 360. It employed a similar concept but in a much less refined manner. Mindshift have simply taken the concept and run with it. With this pack you can easily access a large amount of your camera gear without ever having to put you bag down on the ground. For situations when the ground is wet and muddy this is a real winner. For situations where you are moving quickly from shot to shot this is also a real winner. As most of you know I live in the mountains of BC and I’m a senior photographer at Skier magazine. Ski shoots often require me to navigate steep and dangerous terrain, stop halfway, remove my pack and pull my camera out to grab a shot as the skier comes past. Then pack it all away as quickly as possible to catch up with them. With the R180 Pro I need not take the pack off at all, simply swing it sound, grab my trusty 70-200 or even my 300mm (yes a 300mm f2.8 L fits in the belt pack!!) grab the shot and then be on my way again in a matter of seconds. No more putting the bag down in the snow hoping it doesn’t tumble down the triple black diamond slope.
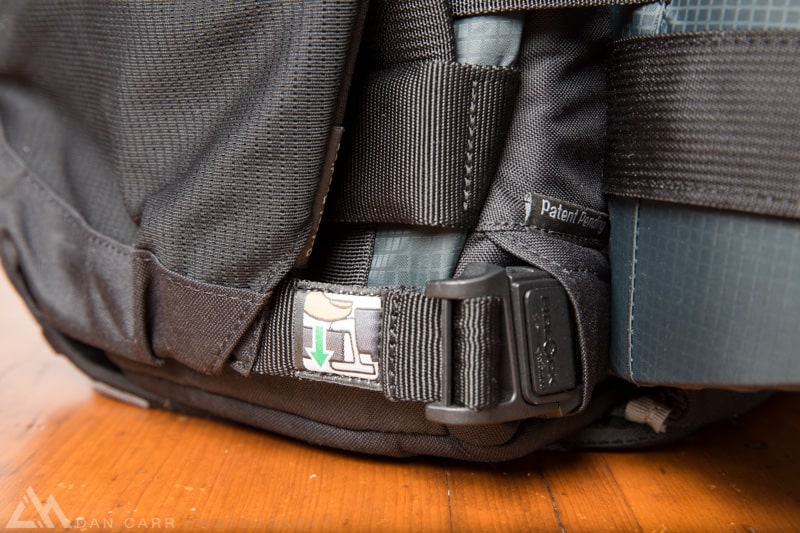
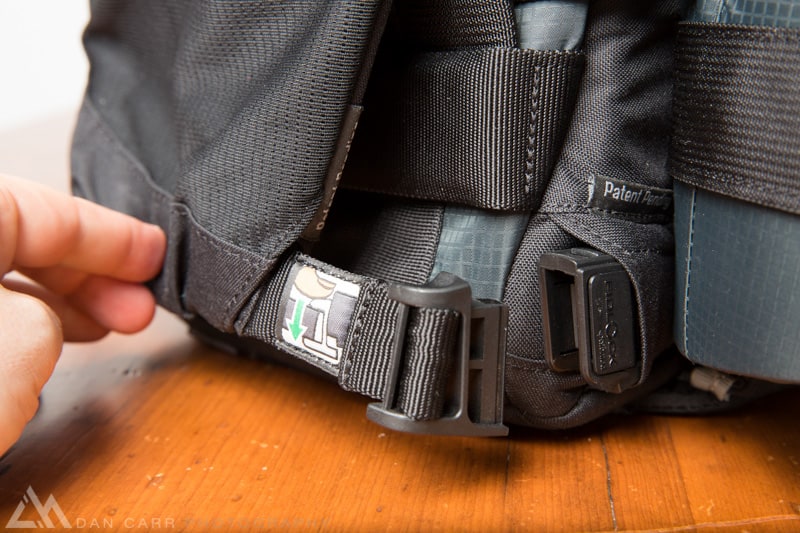
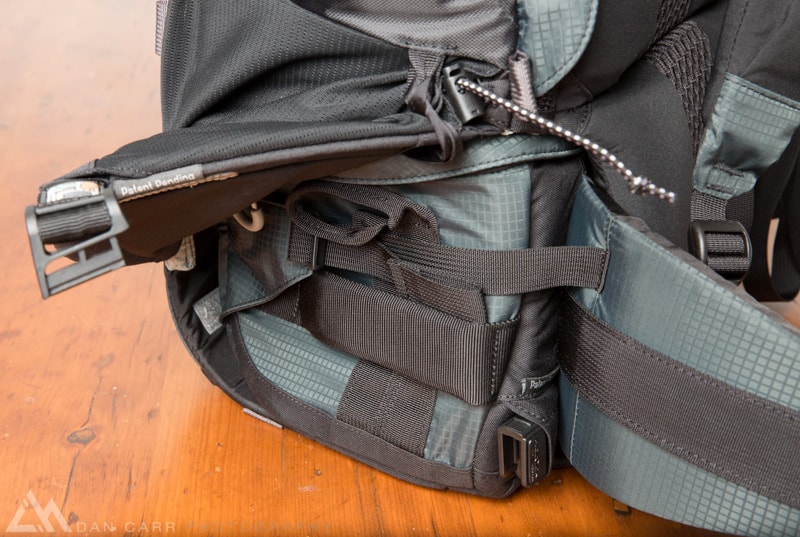
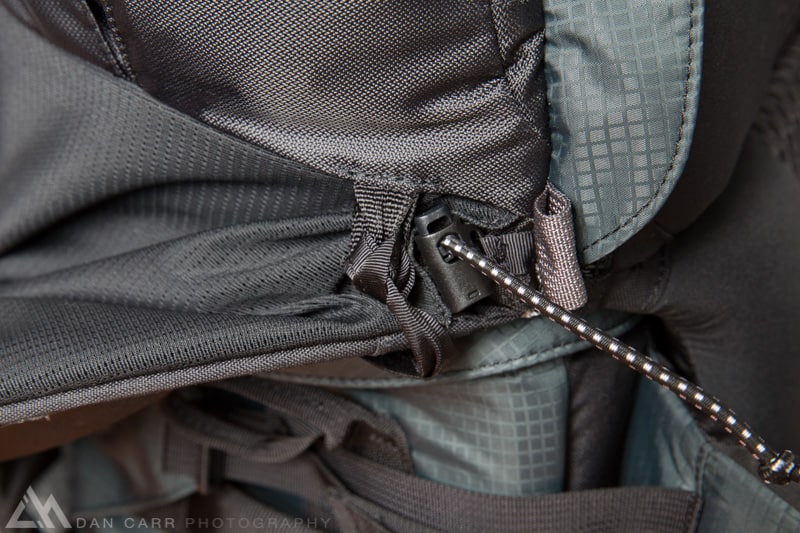
The way in which the belt pack is accessed is something I’ve never seen before on any bag. A strong magnetic latch can be released with a downward press of a finger allowing you to grab the loop on the belt pack and swing it around. When you are done, slide it back and reach around to pull the flap down. As long as you get the magnets close together, they do the rest of the work and slot back into each other so fast you really can’t even see how it works! Here’s a further video of Jerry Dodrill, one of the guys that put this company together, operating the pack himself at Photo Plus Expo.


Are you kidding me?! Now I really want one!
You can get FREE FedEx ground shipping in the US when you order this bag from their site by clicking THIS LINK
Tripod Attachment
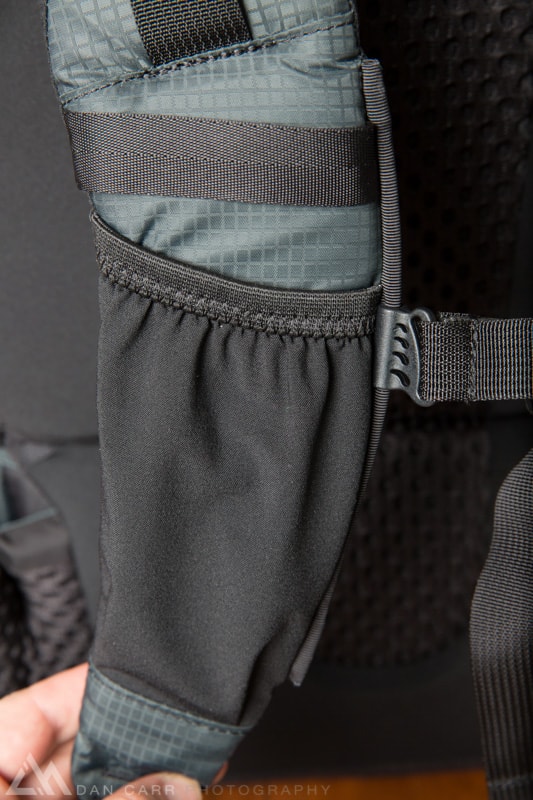
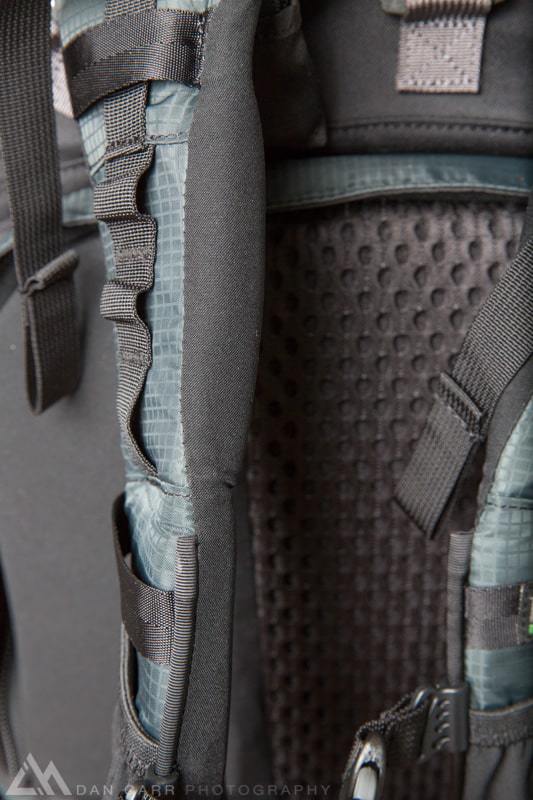
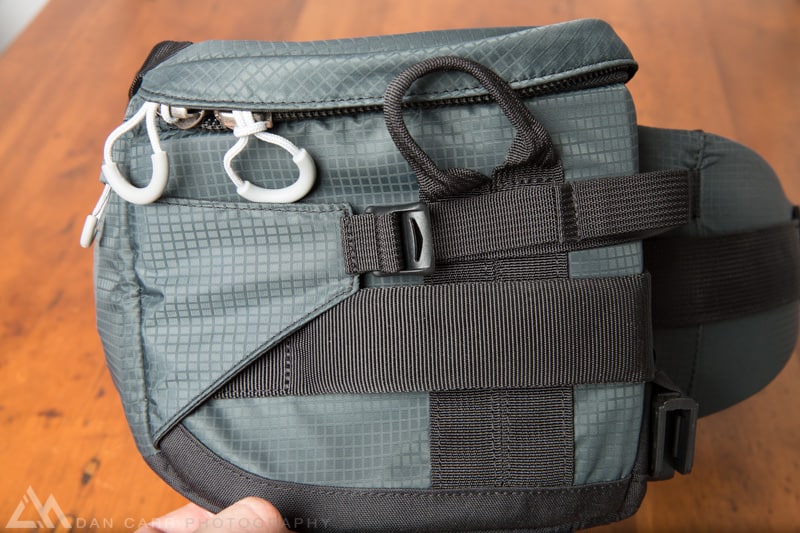
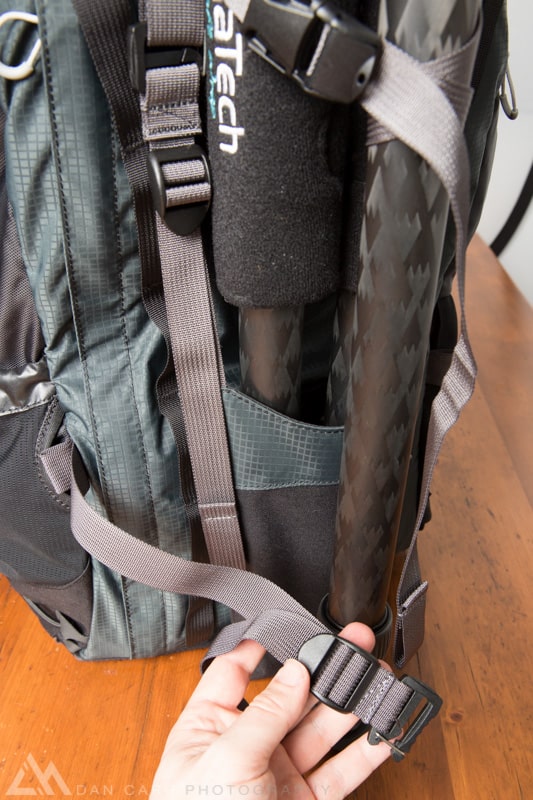
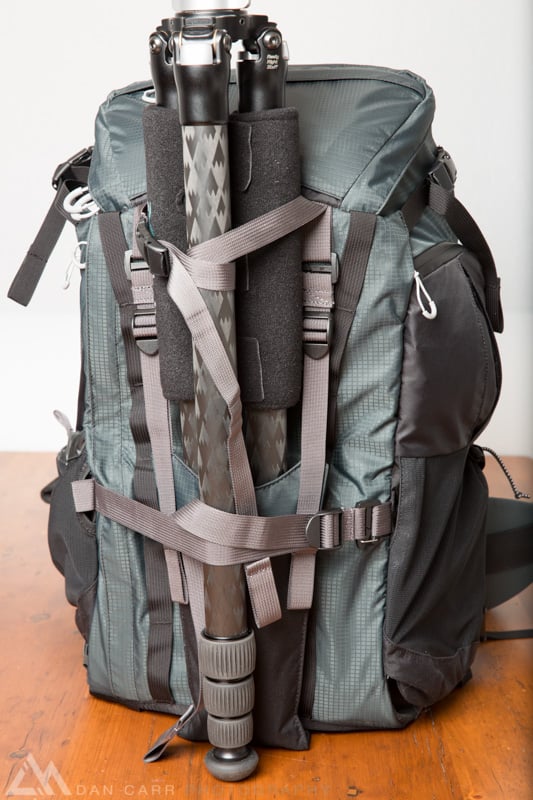
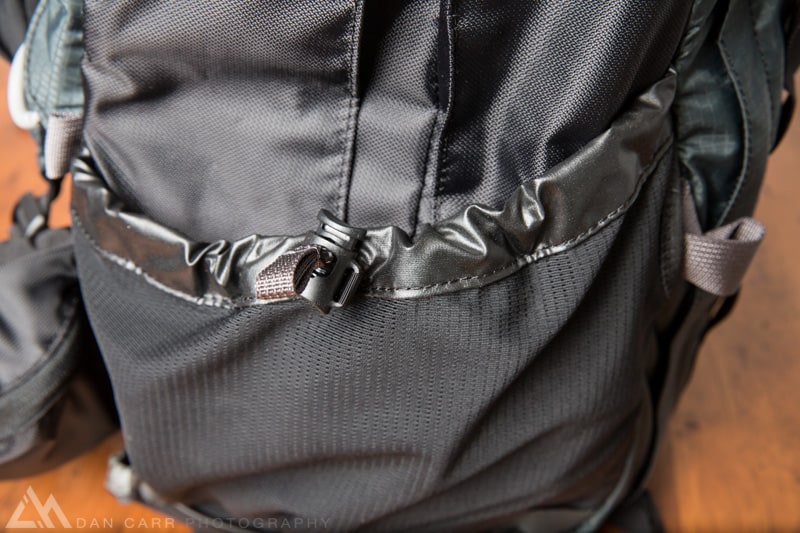
For an outdoor photography pack this is an important section and the R180 Pro offers several different ways you can carry a tripod. You can strap it to the side of the pack, with the legs in the expandable pocket or you can strap it to the front of the pack in one of two different ways. A hidden strap in the lid can be released and used to secure the top of the tripod, while a hidden lower strap comes out of a little hole and secures the bottom of the tripod. For smaller, lighter tripods this may be enough to secure it in a stable manner. For larger tripods you will want to use the included detachable tripod cup. This clips to the front of the bag in four points using spring loaded clips and provides a cup to place a couple of the tripod legs into. The cup can be adjusted to suit a large range of tripod sizes and the also has the additional virtue of providing an excellent way to secure other large objects to the front of your pack like a sleeping bag or even a shovel. Let’s take a closer look:

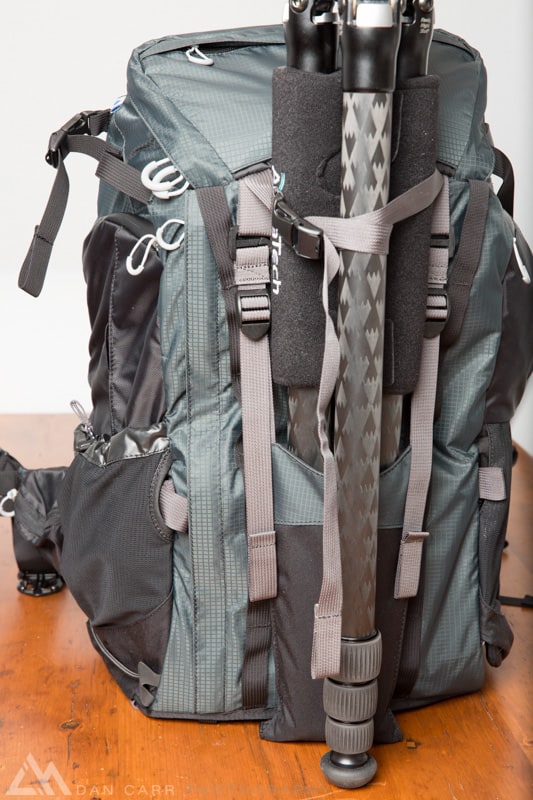


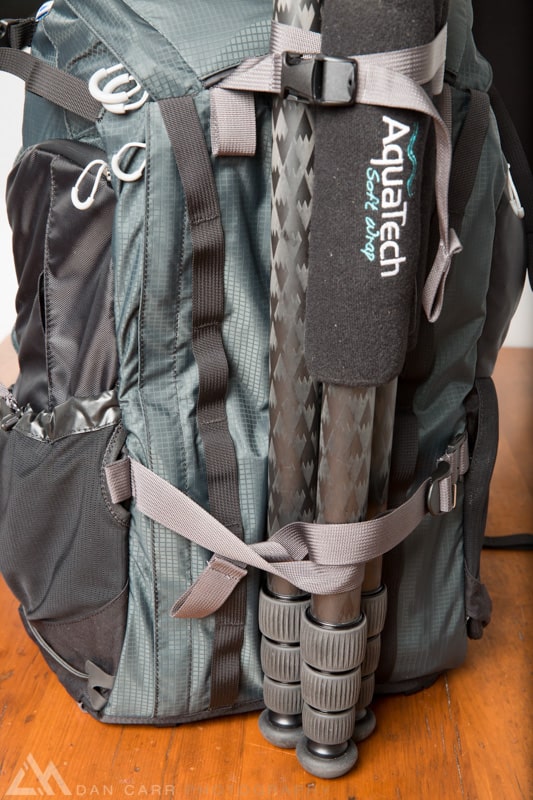
For those that want it you can securely attach the tripod to the side of the bag as well. This can be helpful if you also need to carry a lightstand or some other equipment on the back of the bag like a small tent or sleeping bag. The elasticated pocket on the side is large enough for the feet of the biggest tripod I could think of and the hidden horizontal strap from the first tripod setup can also be connected across the bottom of the tripod in this side carrying situation as well if needed. Alternatively you can use the additional accessory straps that are detailed further down in the article.
Options, options, options, that’s what I like to see. The plethora of attachment straps on this bag gives you all the options you might need for attaching a tripod. The guys at Mindshift have one other very special attachment method though which I will detail below in the optional accessories section…….. read on, you’re going to want to see it!
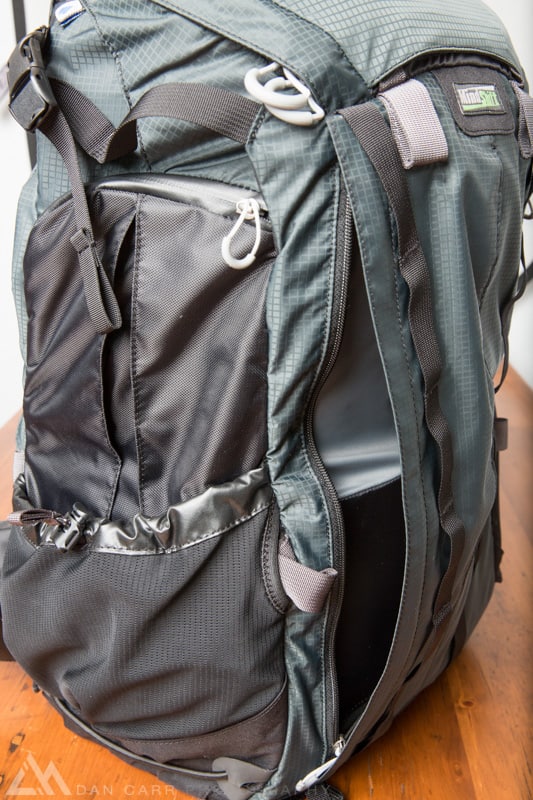
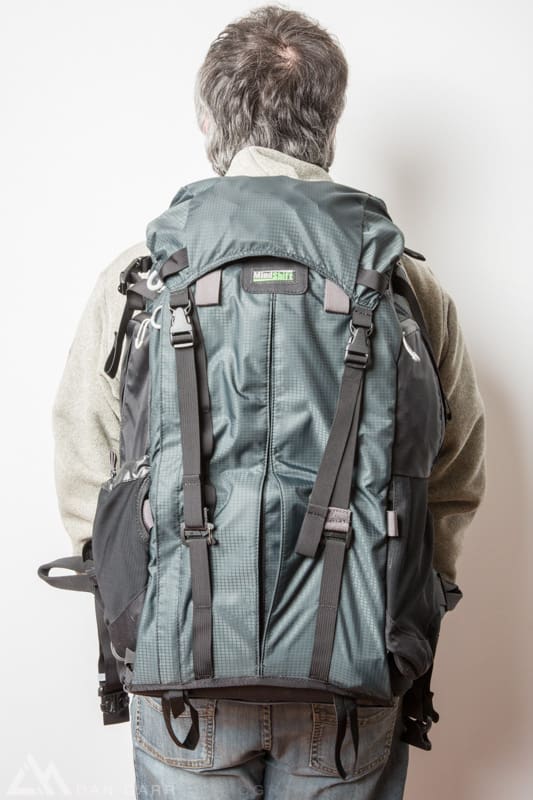
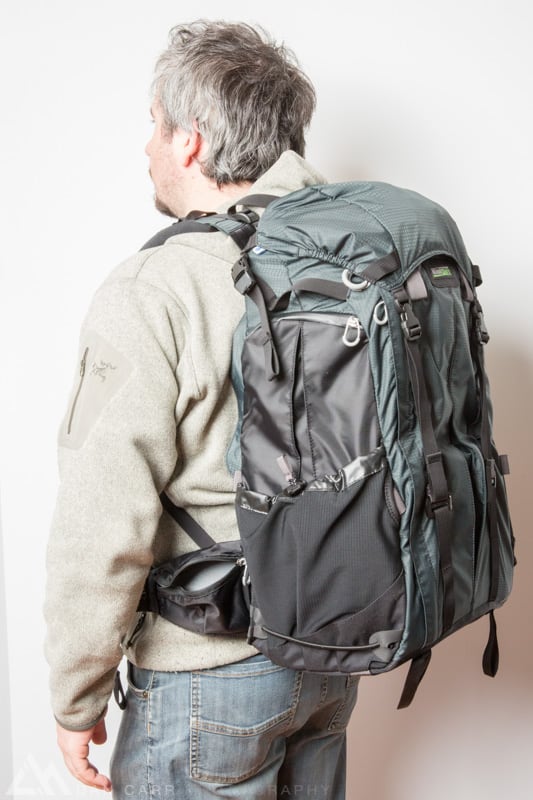
Fit Reference
I’ve learned by now that you guys get mad if I don’t post a photo of me wearing a particular pack. For reference I’m 5’9″. The side profile shows that whilst the pack is pretty large, it’s not bulbous and the volume is kept in check and as close to the body as possible.


Accessories For The Rotation 180 Pro
When the bags begin to ship there will also be a number of accessories available with it. Some specifically designed for the R180 Pro and some more general that will work with existing and future products as well as anything you might own already. The R180 Pro accessories will be available as a bundle or in a Deluxe package with the backpack. Pricing and details for the packages are detailed at the bottom of the post.
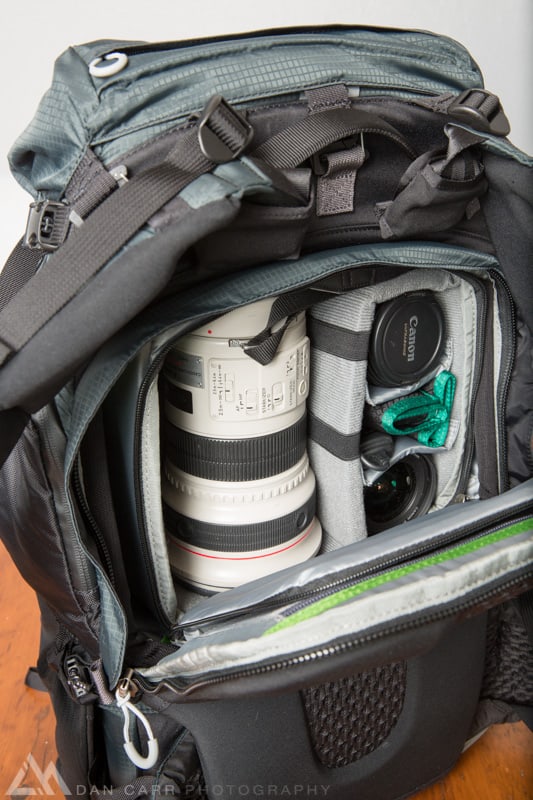
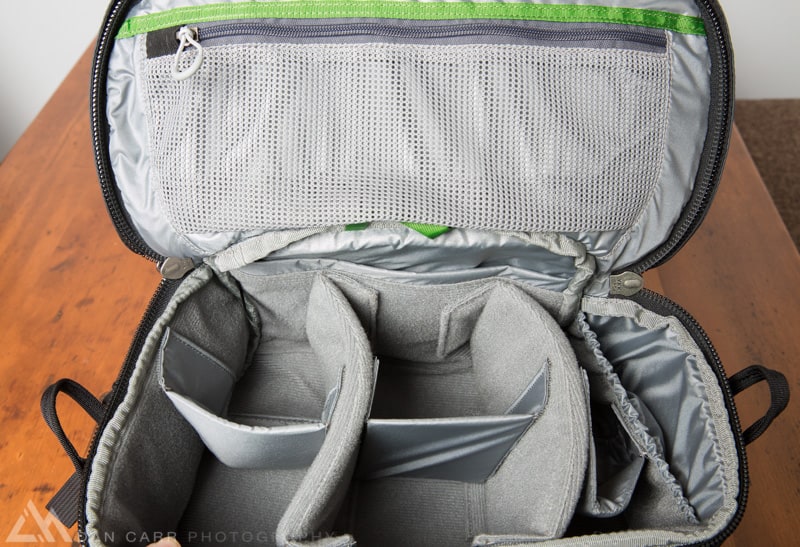
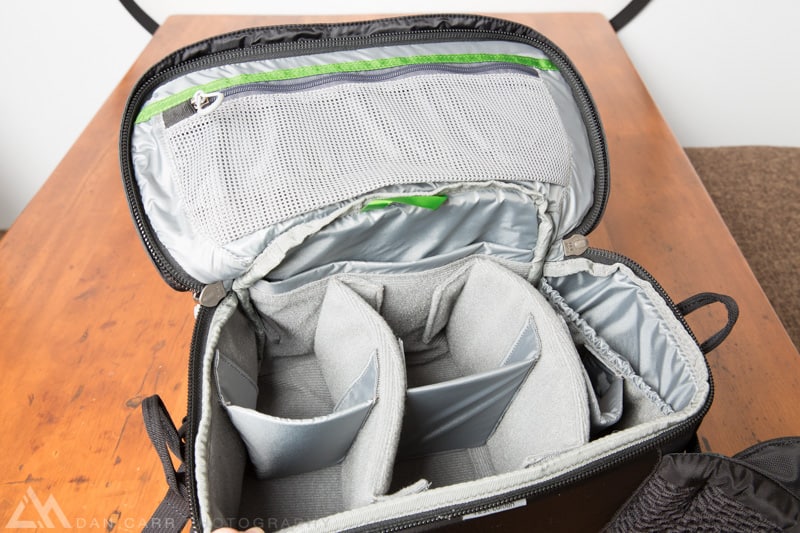
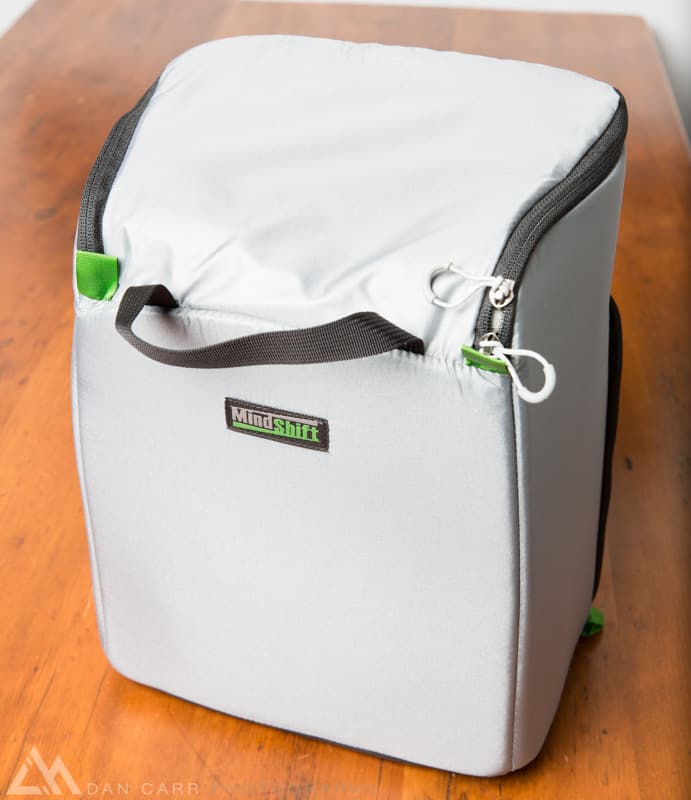
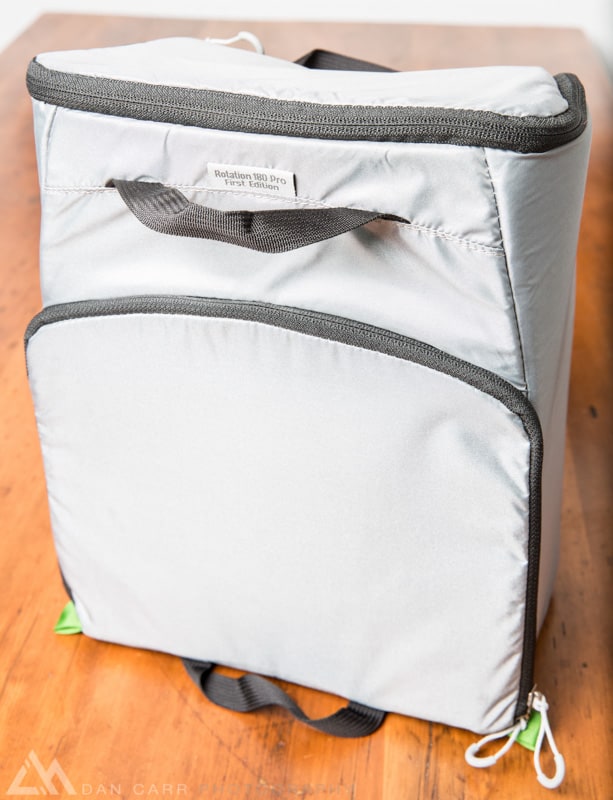
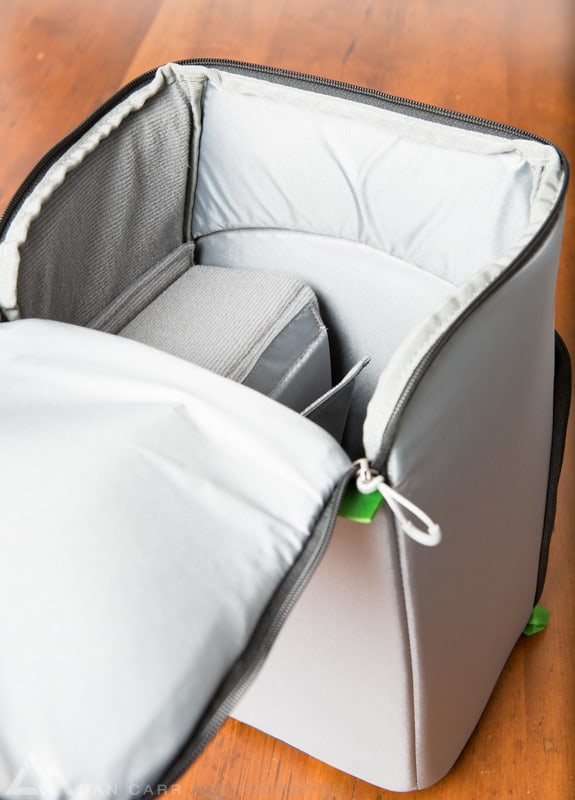
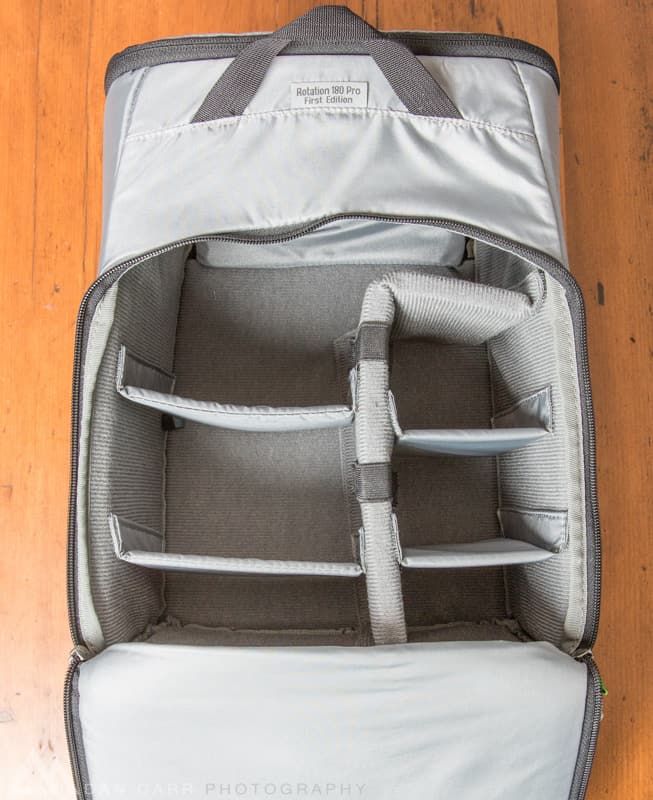
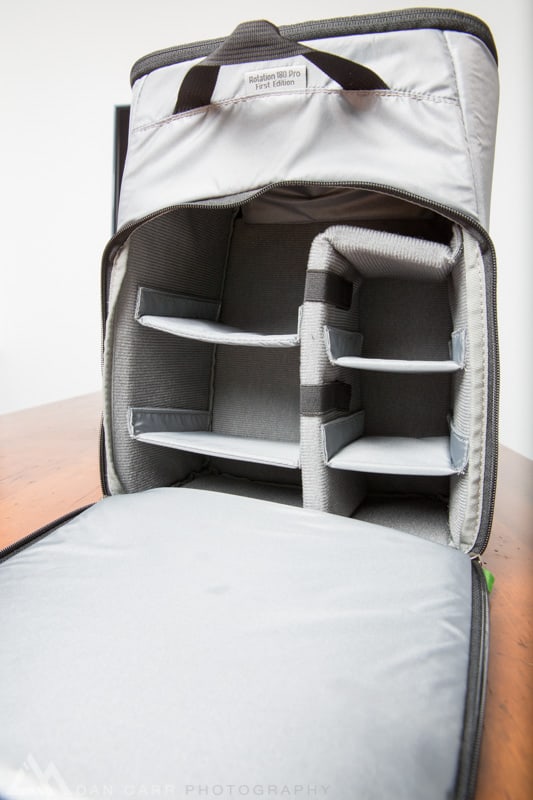
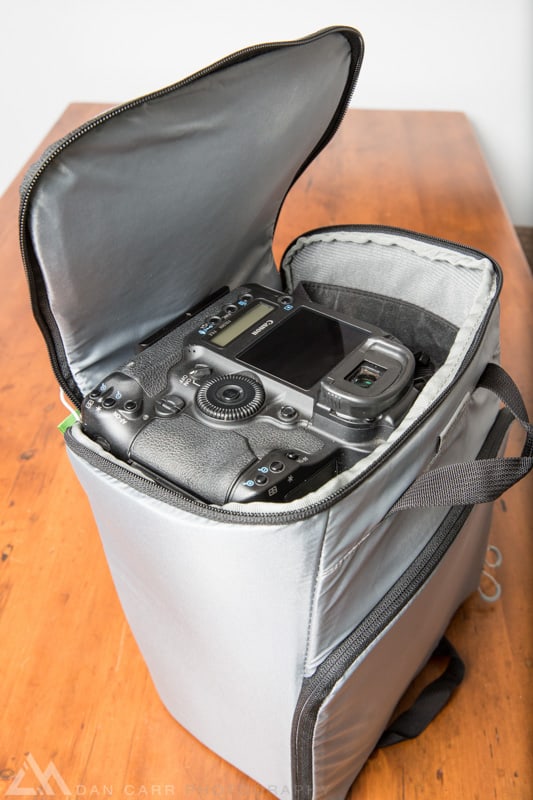
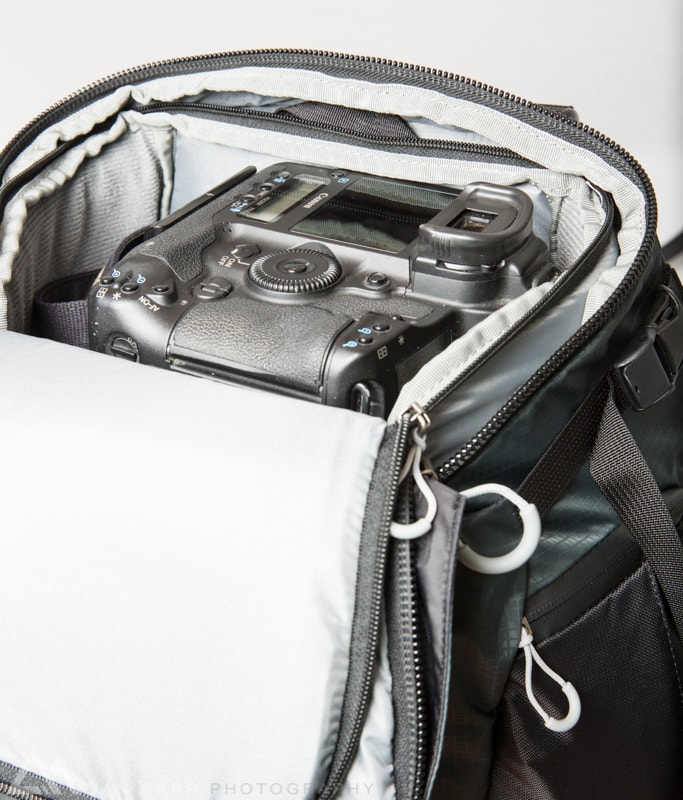
Padded Photo Insert For The R180 Pro – $59.99
For me this is a must-have accessory for the pack and you’ll find a package that includes it detailed further down in the pricing section. It slips into the top section of the bag and the zippered openings allow access from the top hatch or the back panel. The insert itself is made from much thinner materials than other similar products I have used in the past and this helps to keep the overall weight down. It’s still rigid enough to hold it’s shape though and offers plenty of protection for your gear.
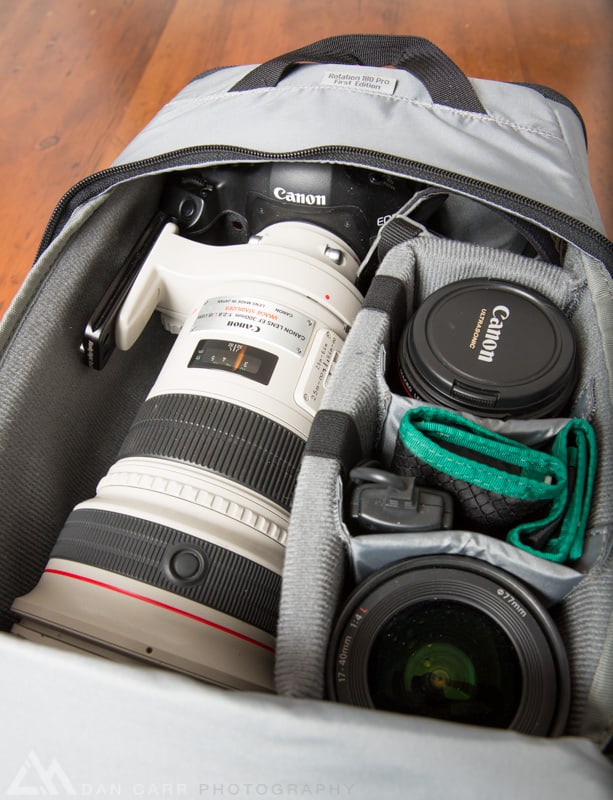
In terms of gear volume in the insert, I’ve put together a few likely scenarios below. As you can see, there’s plenty of room for a 300mm f2.8 and other lenses, or a battery powered strobe system like the PCB Einstein. Access through the top hatch allows you to easily retrieve a camera with lens attached, like a pro body with a 70-200.


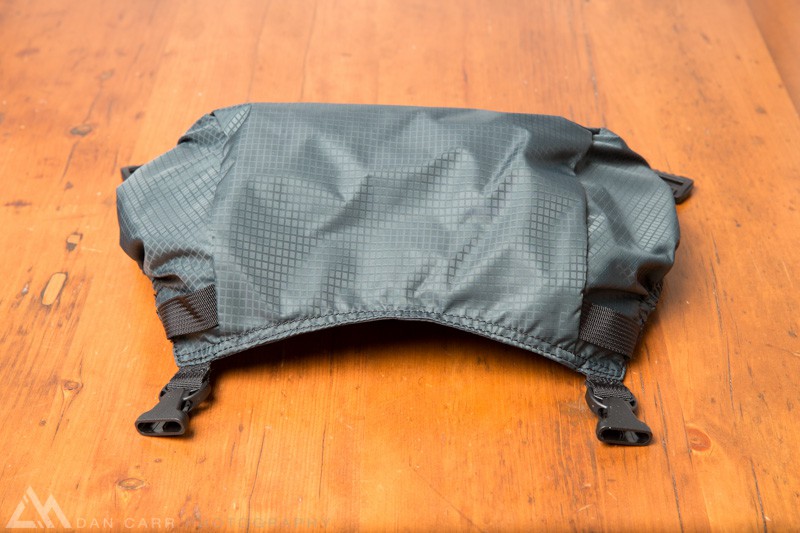
Top Pocket For The R180 Pro – $32.99
If you’re the kind of person who just can’t get enough pockets then this is the accessory for you. The R180 Top Pocket adds two additional pockets to the top of your bag. The exterior top pocket of the errrr….. top pocket , is roomy enough for a packable rain jacket and pants and the pocket on the underside is roomy enough for a pair of gloves as well so you could conceivably use this as your ‘bad weather kit’ and simply attach it to your pack on days when the weather is looking a little inclement. The pocket attached using another three of the very nicely designed spring clips on the back of the bag and front straps that are adjustable enough to be attached at any point along the front of the pack with the daisy loops.
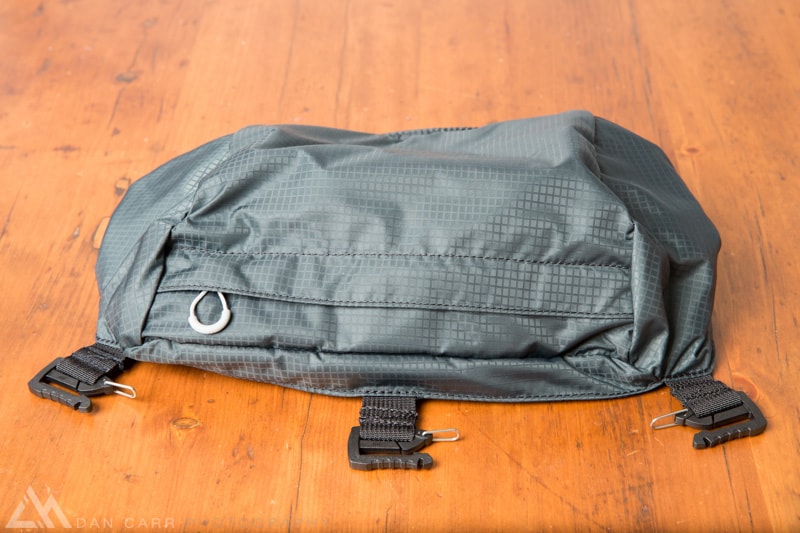
Another thing that I like about this little pocket is that if you are traveling with your gear you can put slightly less essential gear in the top pocket and then throw it in your checked luggage. The R180 Pro is then a little bit sleeker for travel though the airports but you still keep all your essential camera gear with you on the plane and simply attach the top pocket when you arrive at your destination.
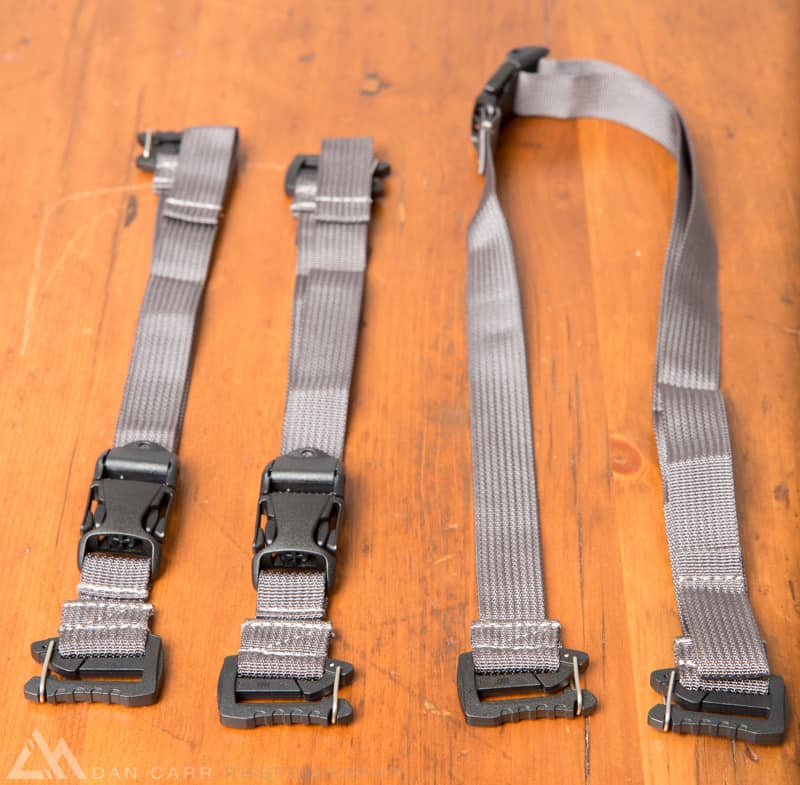
R180 Pro Extra Attachment Straps – $16.50
The strap kit adds a further three attachment straps to your bag if you find yourself coming up short. One for each side and one that wraps all the way around the front of the pack. Webbing loops are already in place on the bag and these would be best utilized if you are carrying a lightstand on the side of the bag or some other awkwardly shaped/sized piece of equipment. The R180 Pro already has a huge number of straps built into it for tripod carrying among other things, but it never hurts to have a few more options.
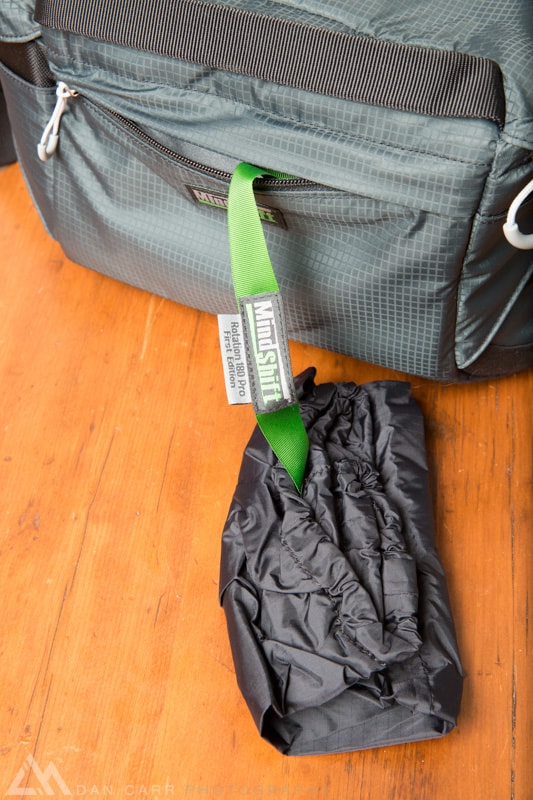
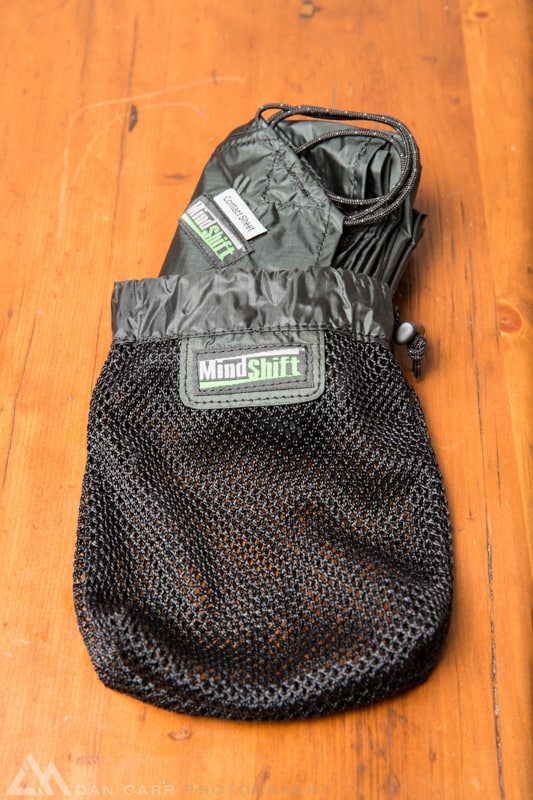
Mindshift Gear Contact Sheet – $39.99
Think of this a a photographer picnic blanket. Super lightweight nylon sheet measuring 3.5′ x 5′ that allows you to spread your gear out on the ground while you work your magic behind the camera. I know I’m not the only one here who has thrown their jacket on the ground in order to have a place to spread out some lenses, filters and other gear while shooting. In that moment when the sun is just dipping towards the horizon there’s not always time to keep things neat and tidy! The Contact Sheet is one of those ‘why didn’t anyone think of this before” products. Simple yet hugely effective and they have kept it incredibly lightweight.
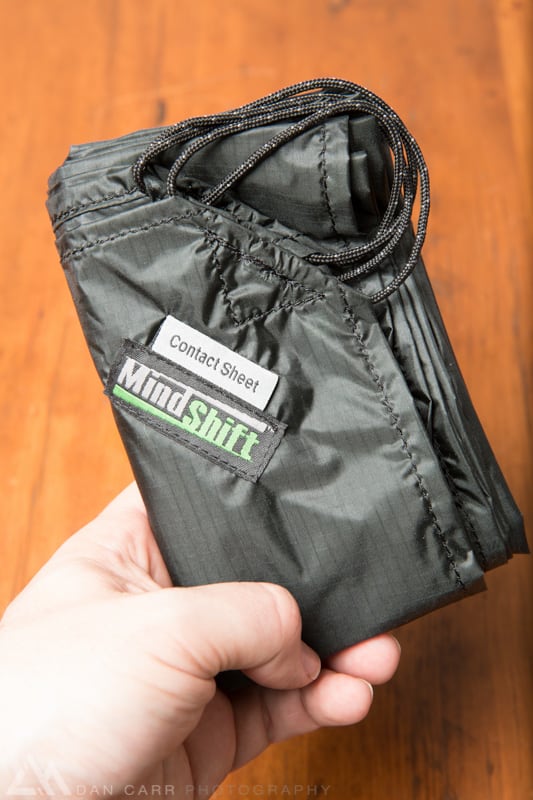
Elasticated loops in the corner of the contact sheet allow you the option of pegging it down or tying it up somewhere as an emergency rain shelter.
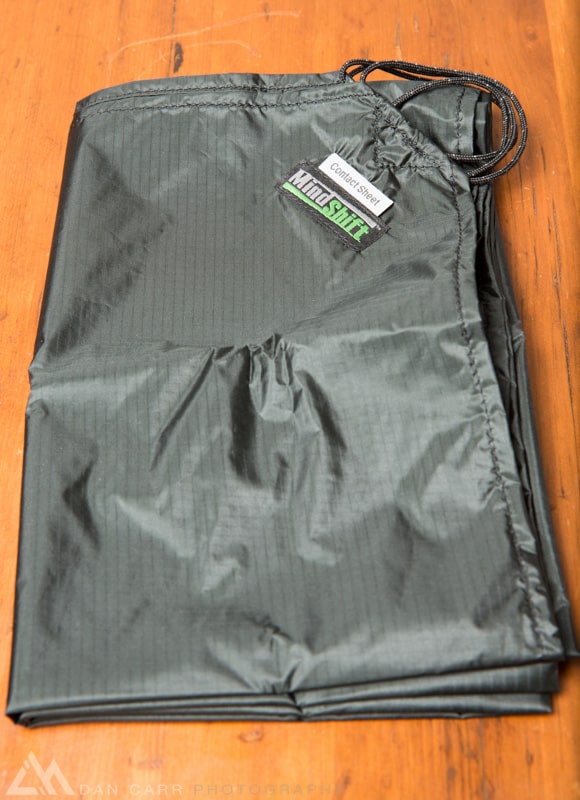
The mesh bag for the Contact Sheet keeps the weight down and allows the sheet to air out and dry once packed away.
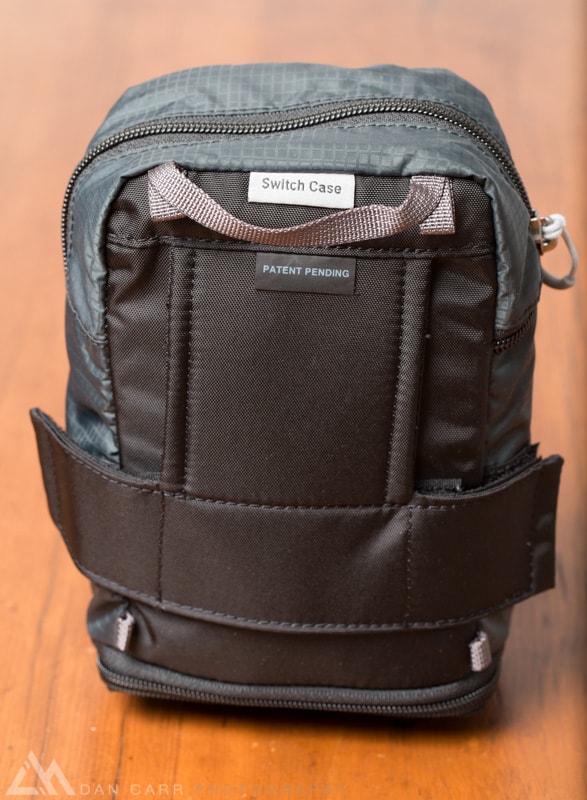
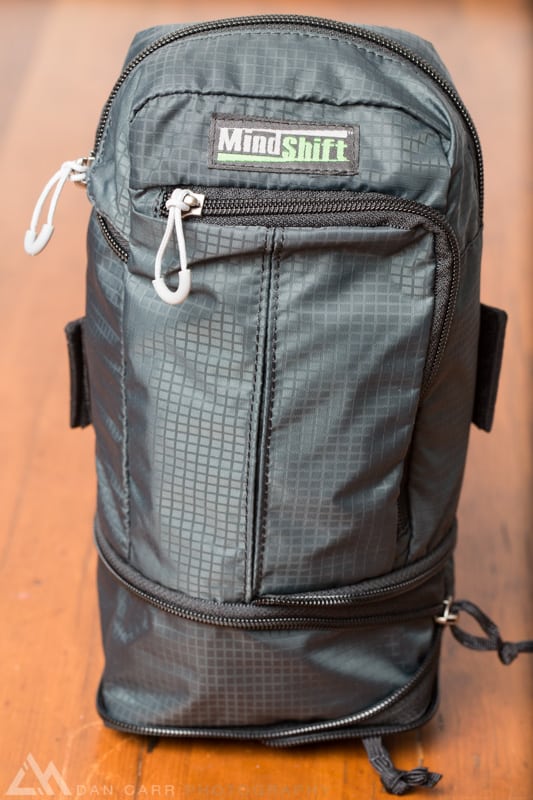
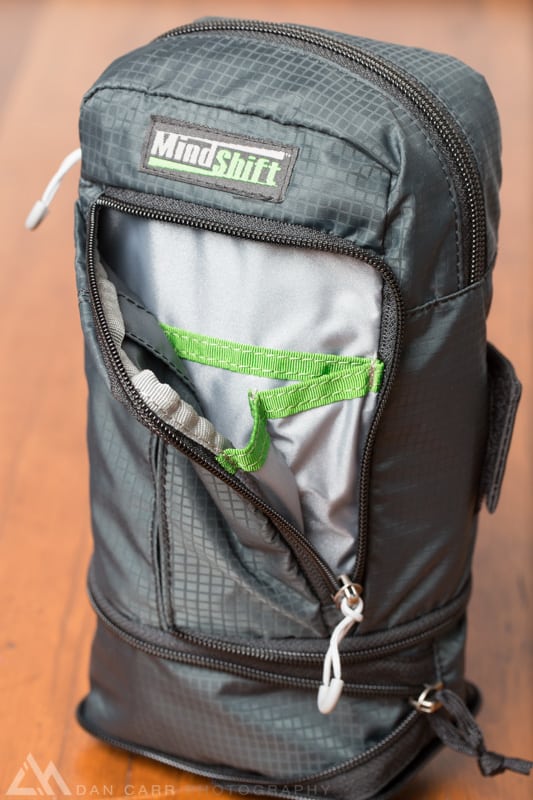
Mindshift Gear Lens Switch Case – $42.50
The Switch Case allows you to quickly add a little extra storage room to your pack or, in particular, to the belt pack portion of the R180 Pro. Users of Think Tank’s modular systems will be familiar with the overall design concept of this bag and it resembles the Think Tank Skin products in its lightweight , flexible design. I personally prefer the Skin gear over the standard modular accessories so I was very pleased to see this Switch Case following along the same lines. It keeps your gear less bulky for travel and much lighter. The switch case also incorporates the useful pop-down design that we’ve seen before, allowing you to quickly adjust it to a deeper size for longer lenses. In the extended position, the case is tall enough to hold your 70-200. It comes with one internal divider and an expandable zippered front pocket.

On the back of the case we have the same locking mechanism as you’ll find on Think Tank’s modular components so you can use this with your existing Speed Belt.
The belt pack from the R180 Pro offers up several possible attachment spots for the Switch Case but the best one is simply on the side of the hip belt. This keeps it easily accessible during rotation of the belt pack and right there while you are hiking along as well. A great spot for a larger accessory that you might need on a regular basis like a GPS unit and a pair of gloves. Things you want to reach without taking the pack off.
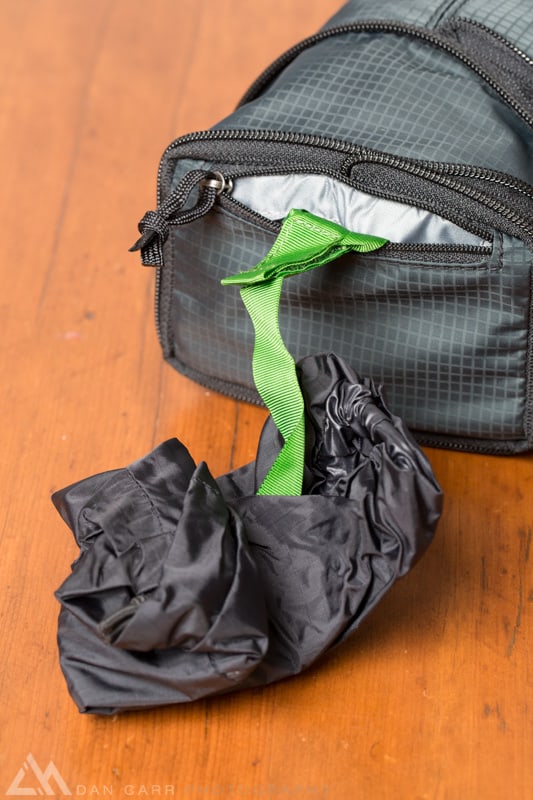
Of course the Switch Case also comes with its own rain cover as well.
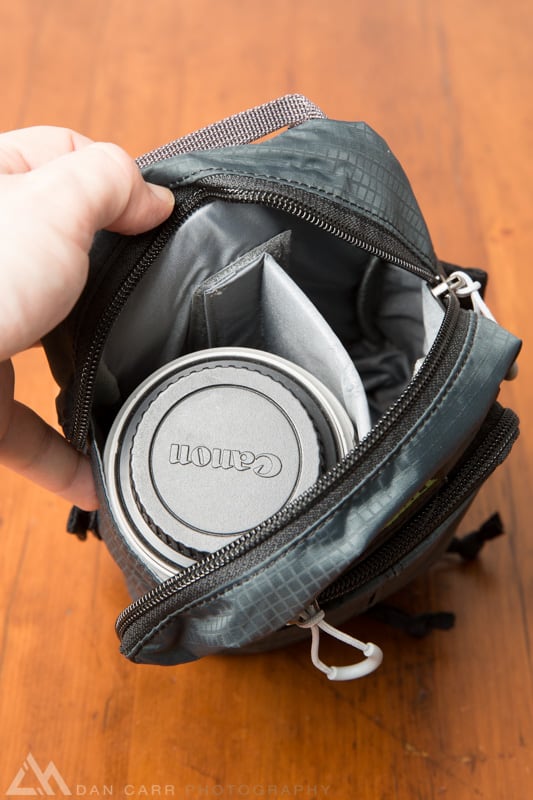
The front pocket is sizable enough for some snacks and your memory card holder.
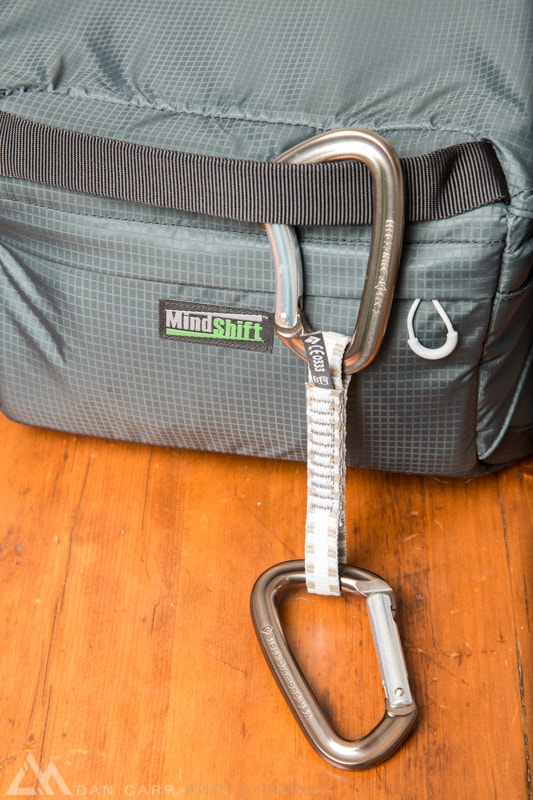
Mindshift Tripod Suspension Kit – $47.50
A truly unique offering from Mindshift is their innovative tripod suspension kit. The thinking here is that you can’t build a pack that allows quick access to your camera gear without removing the pack, if you then need to remove the pack to get to the tripod you strapped on the back of it. Some people like to hand hold their tripods but that can get tiresome with big sticks so the Tripod Suspension kit adds another way to carry your tripod with this pack, on top of the three ways I already detailed earlier on.

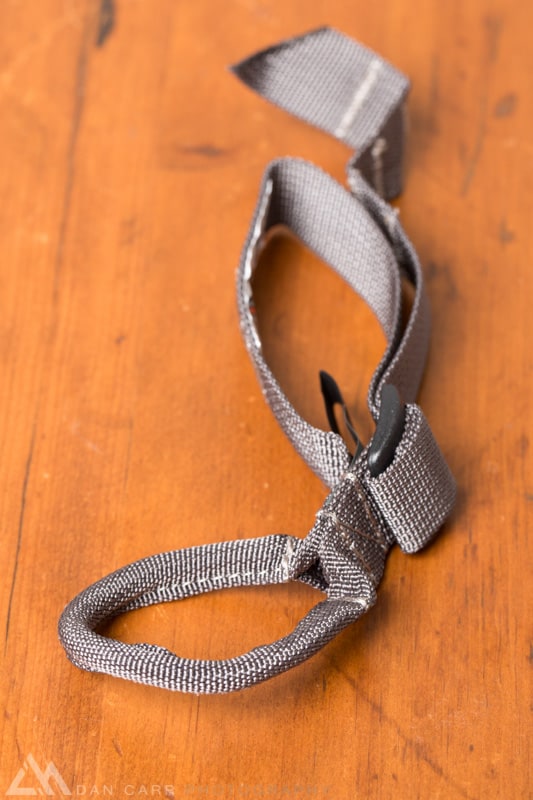
The kit consists of three parts. Two long straps that clip to the front of the bag’s shoulder straps and a nylon webbing loop that secures permanently around the neck of your tripod.
The main suspension straps coming down from the bag’s shoulder straps clip to the nylon webbing around the neck of your tripod, transferring the bulk of the tripods weight (which is at the top) through the comfortably padded shoulder straps.
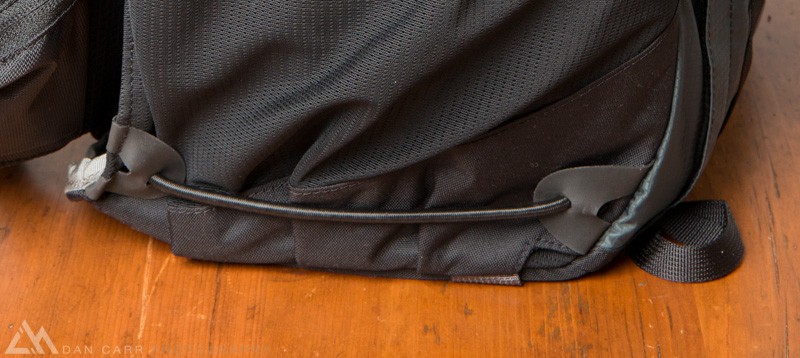
The legs of the tripod extend through an elasticated loop on the bottom of the pack. The elastic helps to absorb some of the movement of the tripod as you move about, adding to the comfort of this carrying solution.
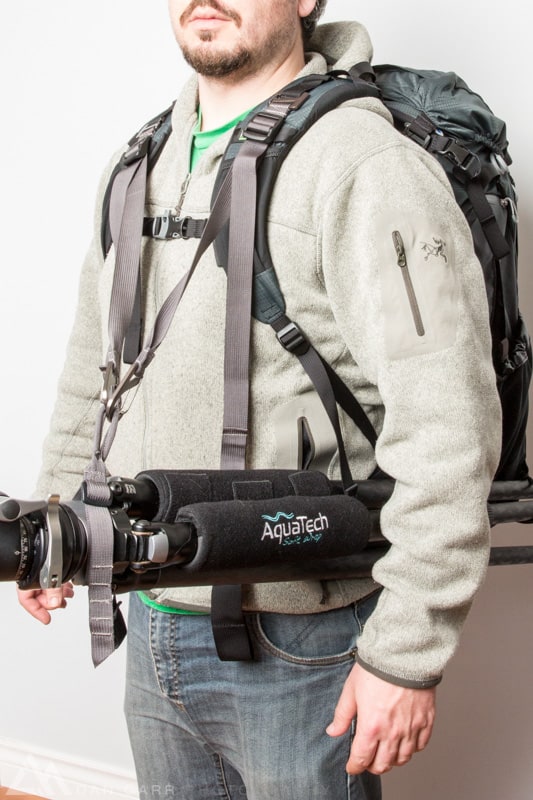
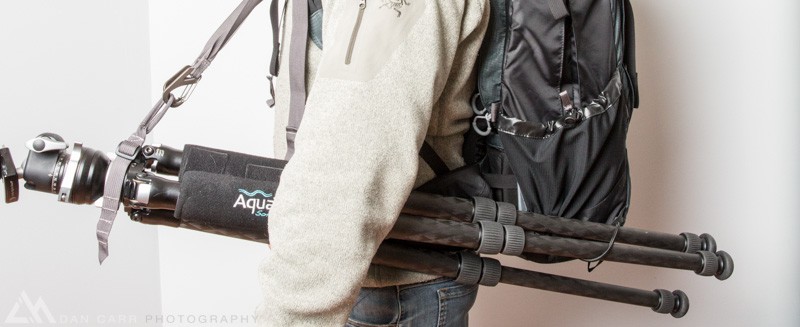
Most people will find this carrying method best utilized on shorter sections of your days shooting. If the start of my day involved a long hike then I would definitely still strap the tripod to the back of the pack for that, but once on location this provides a great way to go hands-free while quickly moving between locations. I have to say that I was a little skeptical about this particular setup until I tried it though. It’s easy to slide the tripod legs into the elastic strap while the bag is on your back (this was my main concern) and suspension straps on the front spread the weight so well you don’t even feel the extra tripod weight. Unexpectedly I also found it very comfortable to walk around with an arm on my tripod. It’s kind of like a portable arm rest and certainly doesn’t feel as unnatural as it looks at first glance. In this image above I only have two legs through the elastic strap but you could just as well do all three legs without issue. This was perhaps the biggest surprise to me about this bag because I wasn’t expecting to like this method of tripod transport but I’ll definitely be using it a lot! It’s just great to see so much innovation crammed into one pack system, I told you it was the Inspector Gadget of camera bags!
I received the bag this week and as luck would have it I’m heading away this weekend. I plan to take the R180 Pro on the plane with me to see how it handles the rigors of airport travel as well as shooting some landscape photography in Nevada and California. I’m already HIGHLY recommending this bag to people. Quite simply there is no other bag on the market that offers this number of features, let alone features that are so unique. For outdoor photographers you have the option to build up the bag to a package that suits your specific needs and uses on a per-shoot basis. You even have FOUR ways to carry a tripod and all of them work well. The ‘does it carry a tripod well ?’ question I always get can now be answered with ‘yes, four of them!’. On top of that , the build quality and materials used are top notch, just as we’ve come to expect from their sister company Think Tank Photo but now with more outdoorsy construction utilizing things like seam sealed zippers and larger zipper pulls for gloved operation. This would be a home–run product at any time, but for a first product it’s astoundingly well thought out. I see a bright future for Mindshift Gear so stay tuned!
If you found this review helpful then please click through one of the links below to make your purchase from Mindshift Gear. You’ll pay the same price but a small percentage will also come my way and it helps me to maintain this site and bring you more in-depth articles like this one. Please note that I NEVER recommend products unless I would use them myself for my photography business.
Pricing and Packages – Free shipping in the US with these links
- Rotation 180 Pro – $389.99 – Backpack with integrated belt pack and tripod cup.
- Rotation 180 Pro Deluxe – $499.99 – Backpack with integrated belt pack, tripod cup and Bundled Accessories Kit (Attachment straps, Photo Insert, Tripod Suspension Kit and Top Pocket)
- Bundled Accessory Kit – $139.99 – Attachment straps, Photo Insert, Tripod Suspension Kit and Top Pocket. This represents a 10% saving on purchasing all these accessories separately. A further $20 can be saved though by purchasing the R180 Pro Deluxe kit.
- R180 Pro Attachment Straps – $16.50
- R180 Pro Photo Insert – $59.99
- R180 Pro Top Pocket – $32.99
Other Mindshift Gear Accessories
Ordering the Mindshift Rotation 180 Pro
Order from MindShift Gear with THIS LINK and get yourself FREE FedEx ground shipping in the US!
Product Specifications
Fit
The Rotation180 has been tested by photographers from petite 5’2″ women to 6’4″ men. The torso length is 18″ (45.7cm). Upper and lower shoulder strap adjustments allow you to fine tune the pack to your size. The belt will fit waists approximately 28″ to 48″.
Volume
Total 2287 cubic inches or 37.5 liters (without the accessories)
Waist pack volume: 480” (7.87 liters)
Backpack volume (Empty): 1807” (29.63 liters)
Dimensions
Exterior dimensions with outside pockets empty: 13.5” W x 22.5” H x 10.5” D (57 x 27 x 34 cm)
Interior dimension of only the upper compartment: 12” W x 14” H x 8” D (30.5 x 35.5 x 20.3 cm)
Exterior dimension of the belt pack only: 13” W x 7” H x 7.5” D (33 x 17.8 x 19 cm)
Interior dimension of the belt pack only: 12.5” W x 7” H x 7” D (31.7 x 17.8 x 17.8 cm
Weight
Combined weight of both the beltpack and the backpack = 5.3 lbs (2.5 kg)
Beltpack weight: 1.8 lbs (0.8 kg)
Backpack weight: 3.5 lbs (1.6 kg) Generally used with the belt pack in place.
Optional Photo Insert for upper compartment (included in deluxe package): 0.9 lbs (0.4 kg)
Materials
YKK RC and RC Fuse zippers. Fabric: 500 D nylon, 210 D nylon, 100 D shadow ripstop nylon, 140 D silver toned nylon, 30D nylon ripstop (rain cover), Ultra Stretch mesh, nylon webbing. EVA foam and CLPE foam

