I’m going to start a series of Adobe Lightroom tips and tutorials because it has become such an integral part of my workflow these days. The first one I want to tackle is a common scenario for those of us who travel to shoot photos somewhere. So here’s the scenario; you keep a main Lighroom library that you work off when you are in the office using a desktop computer but you travel with a laptop to shoot an event or a specific project. While you are away you want to use Lightroom to import your photos from the camera, tag them with metadata and possibly do some further captioning and rating. When you return to the office from your trip you want to merge the catalog you were using on the road with your existing catalog on the desktop computer and also copy all the photos you shot on that trip into your image archive which is located on some sort of RAID system or server.
Step 1: On the road.
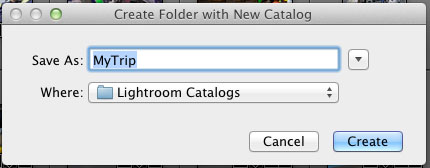
The first thing you need to do is simply create a brand new catalog on your laptop for your trip. Give it a descriptive name based on what or where you are shooting.
Anything you do in this catalog can be imported back to your central library when you get back home so feel free to caption images, flag them, give them star ratings, create collections or apply changes to the RAW file. You should apply metadata settings on import just as you would normally ( I will do a post on this in the coming weeks as well). My preference is to keep one set of images on the laptop hard drive and have Lightroom create a second backup set of images on an external drive during the import.
Step 2: Save metadata to file.
This is a precautionary step really. If you do everything correctly then there will be no need to do this but it doesn’t hurt. All of your captions and rating are currently in the Lighroom catalog file you created for your trip. We are going to combine this with your main catalog and simultaneously move your new images to your image archive. The metadata from the merged catalog will still relate to the images BUT if you happen to mess something up then you could lose those associations.
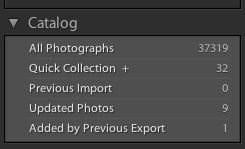
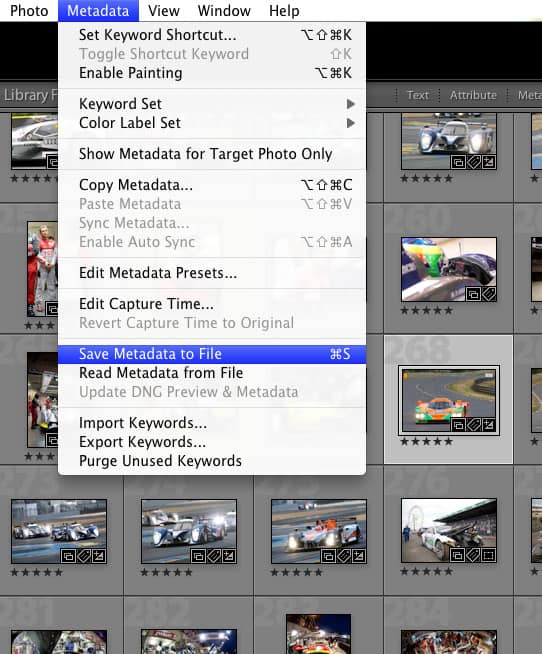
At the end of your trip open your catalog on the laptop and select all the images by first selecting All Images in the Catalog panel and then hitting cmd+A or Ctrl+A on a PC. All your images from the trip will be selected. Now go to Metadata on the menu bar at the top and click on Save Metadata to file. This will bake all the metadata settings you have changed right into the image. If you make a mistake during the combining of your catalogs, at very worst you can simply run an import on the whole image set and it will bring in all the metadata settings by pulling them right from the image file. Note that this is not the preferential way to do things though because you will loose any adjustments to the RAW file that were made in Lightroom. A simple precautionary step that takes just a couple of seconds to do.
Step 3: The Import
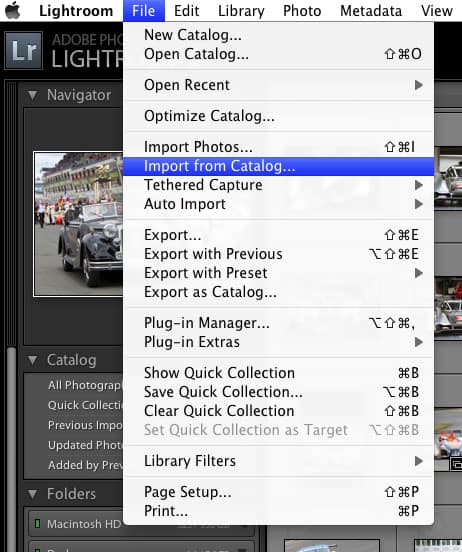
An important thing to remember here is that the path of the images relative to the laptops catalog must remain the same. Open you main image library on your desktop computer and go to the File menu and click on Import From Catalog. You will be presented with a file browser window and you need to select the catalog that you were using on your laptop. How do you do that you might ask , if you are on your desktop computer now? There’s a few easy ways:
1. Share the folder on your laptop that contains the catalog on your network. This process will vary from PC to Mac but when it’s shared on your network you can simply browse to the folder in the file browser window.
2. If you use a Mac as I do, you can plug your laptop into your desktop and boot it up in target disk mode. Your desktop computer will simply recognize your laptop as an external hard drive and you’ll be able to browse to your catalog there. To boot in target disk mode, connect your laptop to your desktop using a Firewire or Thunderbolt cable then simply turn the laptop on whilst holding the T key down. A symbol will appear on the screen to indicate it is in target mode and a new drive will appear in your Finder window. This is my preferred method.
3. If you use a PC and don’t know how to share folders on your network then the easiest way is to store both your lightroom catalog and your images on an external drive while you are travelling, instead of storing them on the internal drive of your laptop. That way you can simply plug in the external drive to your desktop hen you get home and the relative position of the image files to the catalog will always remain the same.
4. You could perform a catalog export, including the original negatives, from the catalog on the laptop. For me, any one of the above three methods is easier though so I’m going to leave exporting to a separate post of it’s own at another time.
Whichever way you choose to do it, select your catalog file when prompted and click Choose.
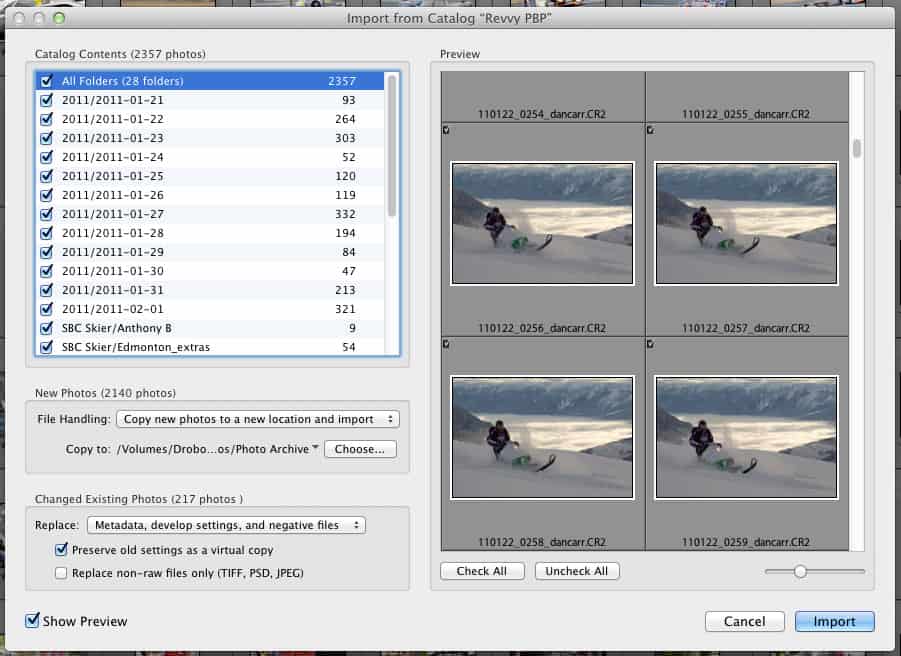
You will then be presented with the Catalog Import window
Lets take a look at each section individually:
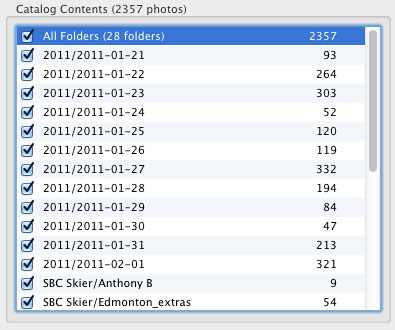
Catalog Contents
This section will list every folder that you imported into your catalog while you were on the road. If you wish, you can deselect any folders that you don’t need to be part of the import process. Mostly you will not have to do anything in this section though.
File Handling
A drop down menu will present you with three options.
In our case we want to select the middle one. Copy new photos to a new location and import. What this means is that Lightroom will look for new photos in your catalog (which will be all of them in our scenario) and it will import them all into your main image library. It will also copy these photos to a location that you specify in the section below the drop down menu. So now go ahead and in the Copy To section navigate to where you store your image archive.
Changed Existing Photos
This section of the dialog is only important of you have any photos in your laptop’s catalog that already exist in your main catalog. I’m going to our scenario here, so we will not have any existing images because we just shot all these ones on out assignment or trip. You won’t have to do anything in this section. I’ll cover a different usage for this section in another tutorial.
Click Import
And there you have it! Simple as that. Now you have all your photos from your trip added to your main image library with all metadata intact. It will also import any collections that you might have made while you were on the road !

