
The saying goes that the best camera is the one that you always have with you. I can’t really disagree with that, and as mobile technology has advanced over the last few years I’ve found myself reaching for my iPhone more and more often to capture the world around me. When you feel inspired, you should always take a photo, no matter what kind of camera you use!
For the second day of my 10-Day Challenge with Adobe, I want to encourage you not to shy away from using your mobile device, and in fact, to use it as a learning tool to improve your photography on a daily basis. Since we have our phones with us so often, they’re great for experimenting with.
Mobile Photography Tips

Shot on iPhone 6 last week in Kootenay National Park, then edited in Lightroom CC
1. Find a New Perspective
We’re used to seeing the world from eye level. Shake things up a bit and use a lower or higher angle to capture your photo. They will instantly catch people’s attention when they see something in a new way.
2. Steady the Shot
Whenever possible, stabilize your phone to get the sharpest image, especially when light levels are low. Some smartphones have optical image stabilization, which can help, but you should still be as steady as possible when shooting. This can be as simple as finding something to rest your elbows on, or you can use a small tripod adapter, like the MOS Kick, to secure your device and make sure it is isolated from your own movement. I’ve been using the Kick, attached to a small Gorillapod that’s designed for mobile devices.
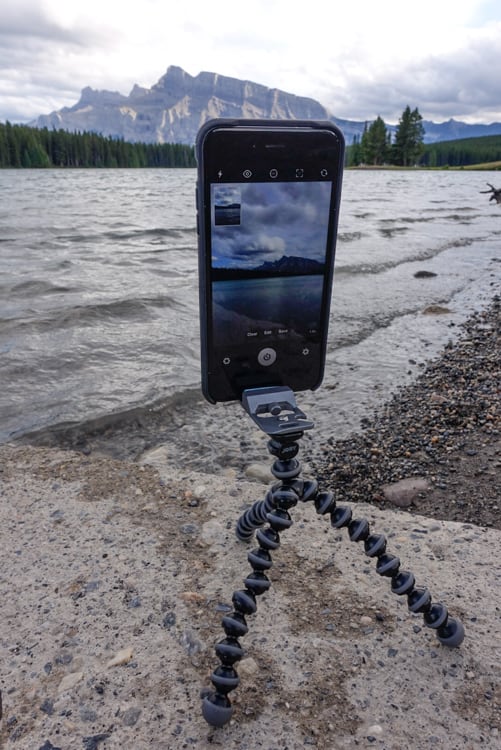
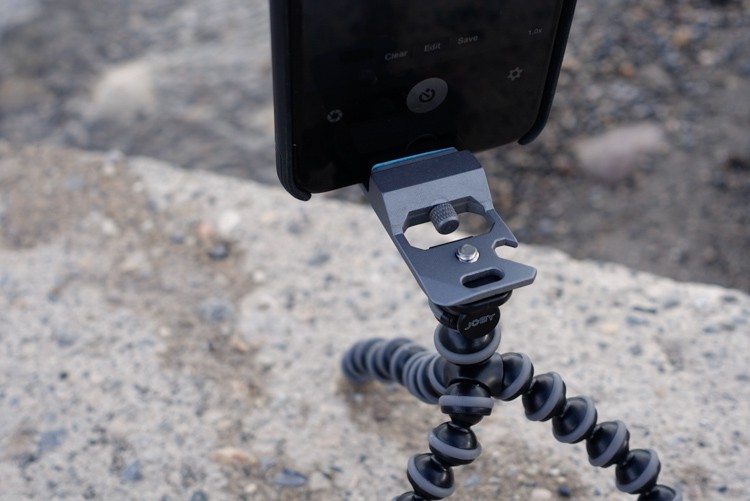
MOS Kick on Joby Gorillapod (Yes, that’s a bottle opener as well for when you’ve got the shot!)
3. Capture Vast Landscapes
Did you know that the panoramic mode in your phone has the power to create a photo with more megapixels than a typical DSLR? In the last few years, the automatic panoramic stitching in phones has become incredibly fast and reliable. When you can’t fit everything in with a single shot, take a panorama to accentuate wide open landscapes and vast mountain ranges. Their extra high resolution makes them great for printing!
Sample panoramas were all edited in Lightroom CC after Lightroom mobile synced the files automatically to my computer. Neat!

8000px wide iPhone 6 panorama from Abraham Lake in Alberta, Canada

8100px wide iPhone 6 panorama from the Bow River in Canmore, Canada

10,000px wide iPhone 6 panorama from Jasper National Park, Canada
4. Compose With Care
Taking a second to think about the composition of your photo can make all the difference. Some quick things to think about:
- Find a simple, uncluttered background for your subject.
- Use the “rule of thirds.” Make sure you don’t put your subject right in the center of the frame, it’s always better to position them a little to the left or right of center.
- Keep other distracting bright and colorful objects or areas out of your photo if they don’t add to the story you’re trying to tell.
- Find curves or lines in the landscape and use them to point towards your subject.

Shot on iPhone 6 with the Moment Lens 18mm, synched to computer with Lightroom mobile and processed in Lightroom CC
In this example you can see the careful use of leading lines from the bridge to move the viewer’s eyes across and into the image.

Lines are everywhere in our world! Shot on iPhone 6with the Moment Lens 18mm and edited in Lightroom mobile.
5. Tone Curve for Selective Adjustment
Recently added to Lightroom mobile is the Tone Curve tool. Sometimes we only want to brighten, or darken, a specific part of the image. The Tone Curve tool allows you to target your brightness adjustments to a selective part of your image’s tonal range. For example, use this tool to brighten up a dark foreground when your sky is already at the desired exposure level.
In this example I took this shot with my iPhone and adjusted the brightness of the snow and ice on the lake using the tone curve tool in Lightroom mobile. Click the images to view them larger.


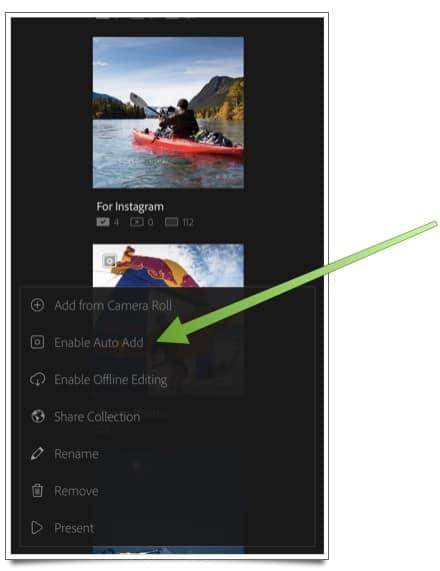
6. Sync Photos to Your Computer
I often share mobile photos to my Facebook or blog, and one of the things that I find most useful is the automatic import feature of Lightroom. Once you’ve created a collection, simply open the collection settings and select “Enable Auto Add,” which will import the latest photos from your phone’s camera roll to Creative Cloud. As an added bonus, you always have a backup of your photos should your phone get lost.
7. Understand the Networks
Every social network has its own nuances and should not be treated equally when it comes to sharing my photos. Take a little time to learn about each one, and how best to reach people with your photography. For example:
- Using relevant #hashtags on Instagram is likely to receive more double-taps
- Tag friends or brands in your photos on Facebook to increase their visibility, as well as yours
- Post your photo more than once on Twitter accounts for followers in different time zones

