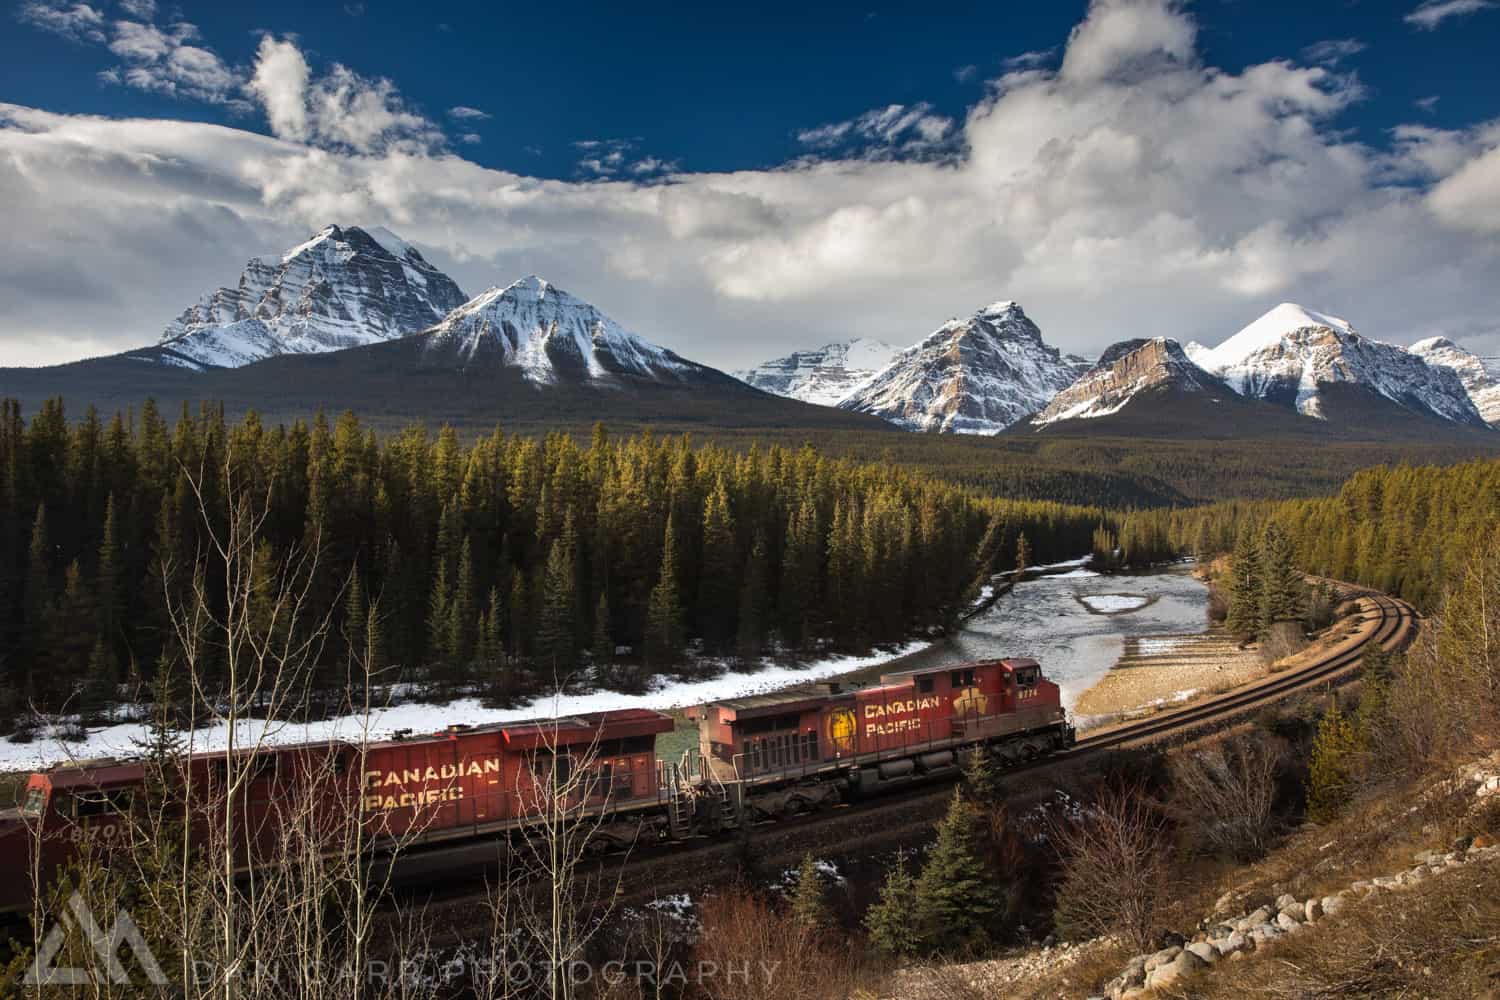
This photo was taken at a famous spot called Morant’s Curve, which is viewable from the edge of the Bow Valley Parkway, just outside Lake Louise, Alberta. It’s hard to imagine a view that better sums up many people’s image of the Canadian Rockies! When I’m in the Canadian Rockies, I usually drive along the Bow Valley Parkway to get between Banff and Lake Louise. The parkways runs parallel to the much faster main highway, but there’s ample opportunities to see wildlife if you take the more scenic parkway. Near the Lake Louise end of this road, the famous Morant’s curve can be easily seen, and I’ll usually pull over and have a quick listen to see if I can hear a train coming. On this particular occasion, I was in luck!
Equipment Used for This Shot
- Canon 5D Mark IV
- Canon 24-70 f/2.8 L II
- Formatt-Hitech Firecrest Circular Polarizer (use coupon code “DanCarr10” to save 10% from Formatt-Hitech.com and Formatt-HitechUSA.com)
- I use the Peak Design Clutch strap and Leash straps on all my cameras.
- All my cameras are equipped with the indispensable Really Right Stuff L-Plates.
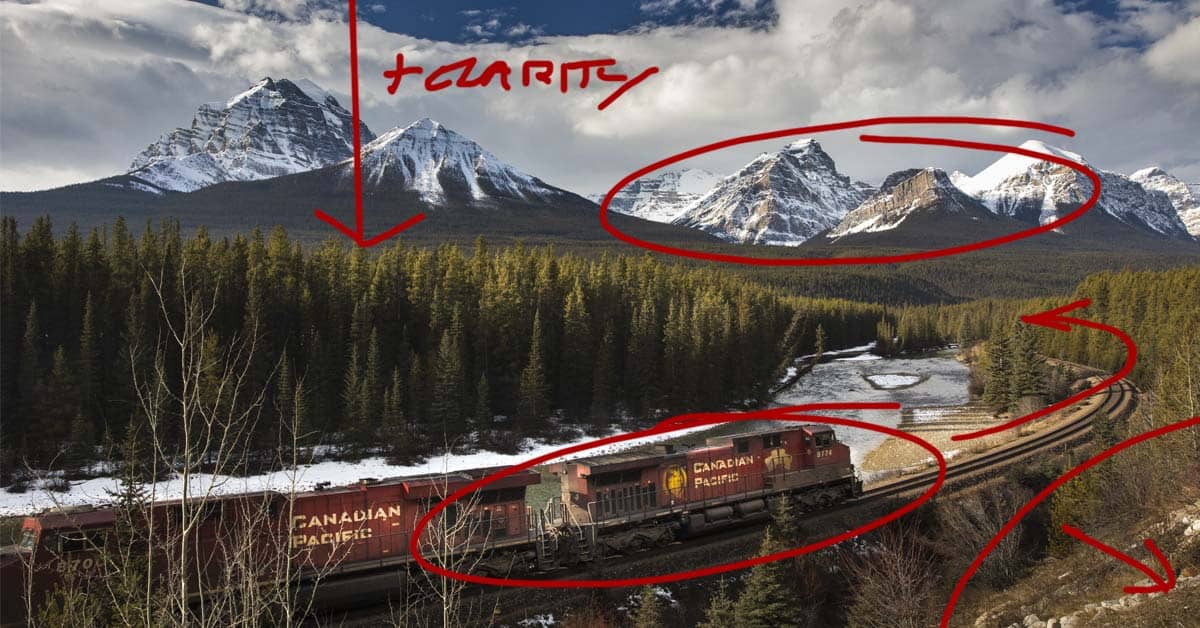
The majority of images that I’ve seen from this spot actually have the train coming in the other direction, and I’ve shot that in the past as well. To be honest, I think I prefer it this way with the train going from left to right. We often “read” an image from left to right (if you’re a Westerner), because this is how we read text, so I think it flows pretty naturally, and gives an impression of the train heading into the Rocky Mountains. This means the eye follows the train, then the tracks, and the tracks lead you to explore the mountains at the back of the image. I was luck that this day the clouds were particularly dramatic looking, and of course I used a circular polarizer to enhance their contrast, as well as deepen the blue in the sky.
As you can tell from the angle of the sun hitting the treetops, the sun was almost exactly 90 degrees to the left of the image. A circular polarizer’s effect is is at its greatest when the sun is at 90 degrees to the camera’s direction, so this had the maximum possible effect on the blue skies and cloud contrasts.
Editing the Image
The most significant edit that needed to occur was the brightening of the entire right-hand side of the train. This side was in the shade, and was therefore far too dark. I used the selective adjustment brush in Lightroom CC to paint over the train, and then used a combination of the shadow slider and exposure slider to brighten things up in that area. I was really glad to be working with the new 5D Mark IV, because it preserves a much larger amount of shadow detail the its predecessor, and it does so with very little noise.
The next major step was to work on the sky, which I did with a graduated adjustment layer. I lowered the highlights to bring back a little details, I lowered the exposure to darken the whole sky area and then I bumped the whites up a little to add some more contrast with the newly darkened sky. Finally, I added used the clarity slider to bring out even more of the drama and interesting contrasts in the cloud layers.
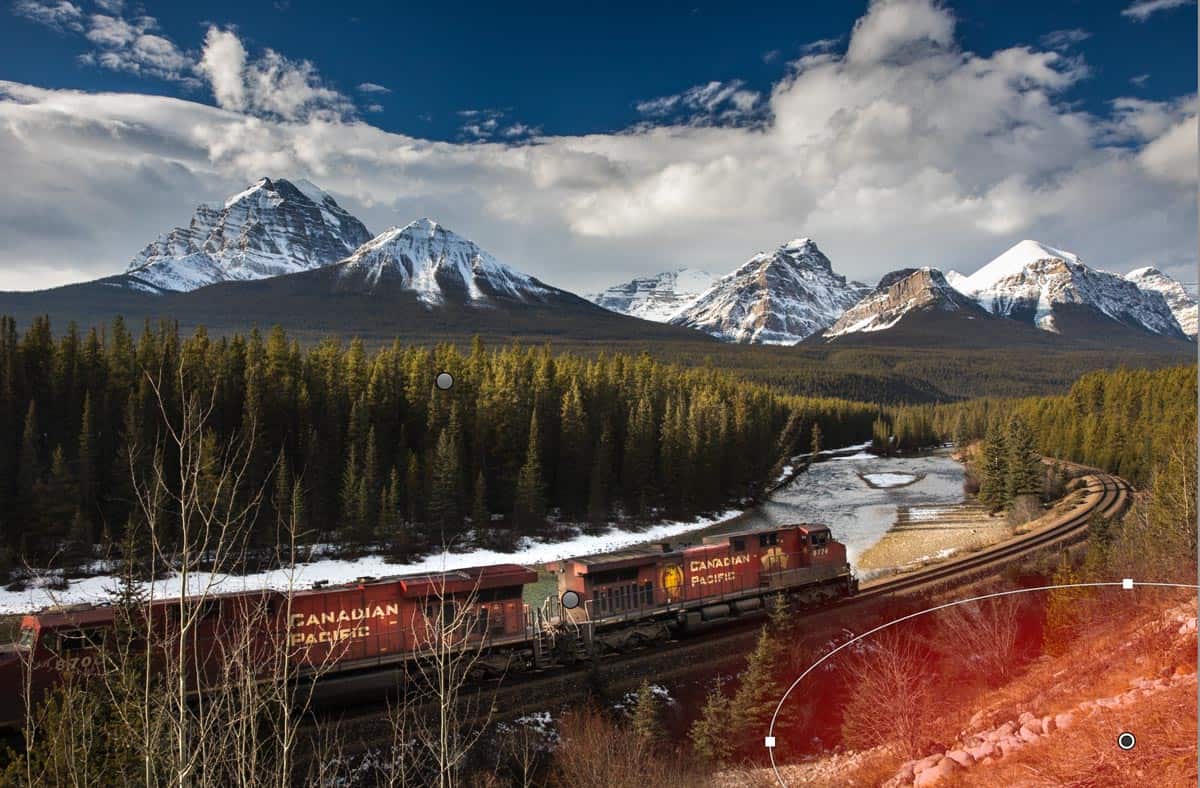
The third edit I made was to place an elliptical adjustment over the lower right-hand corner of the image and darken it. Kind of like vignetting an image, except that I only applied it to that one corner. The corner had previously been far too bright, and it was capturing too much of my attention, when really there was nothing much to look at there, other than rocks and gravel. Not a good place to sent your viewer’s eye! Darkening it and lowering its contrast really helped to focus my attention back on the intended sight lines: train->track->mountains->clouds.

Finally, I wanted to highlight the lovely side lighting that was just hitting the tops of the green trees, so I used an elliptical adjustment to quickly brighten this area up a little.
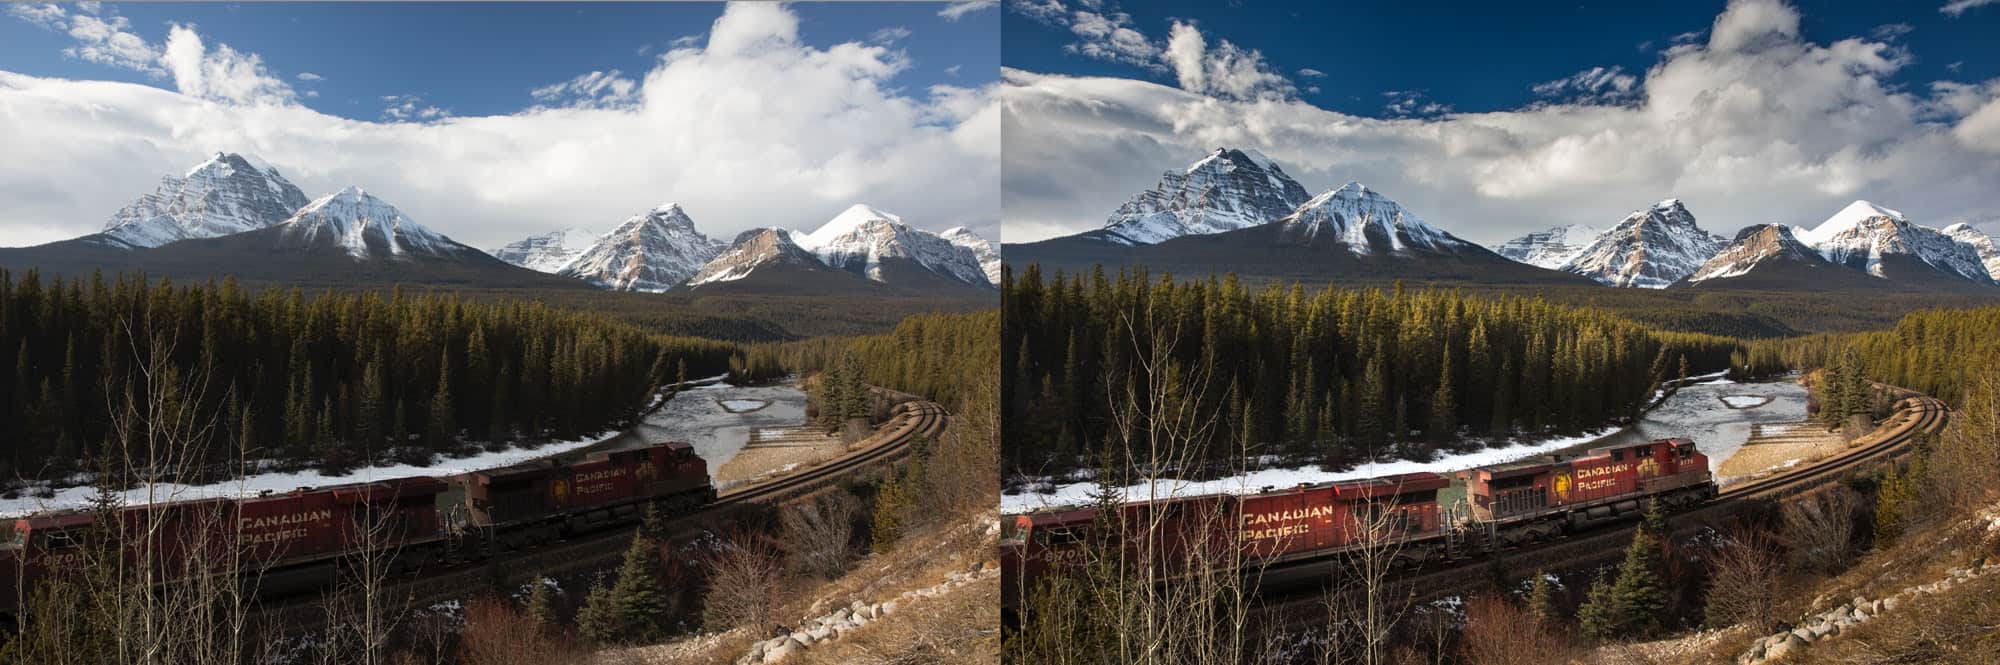
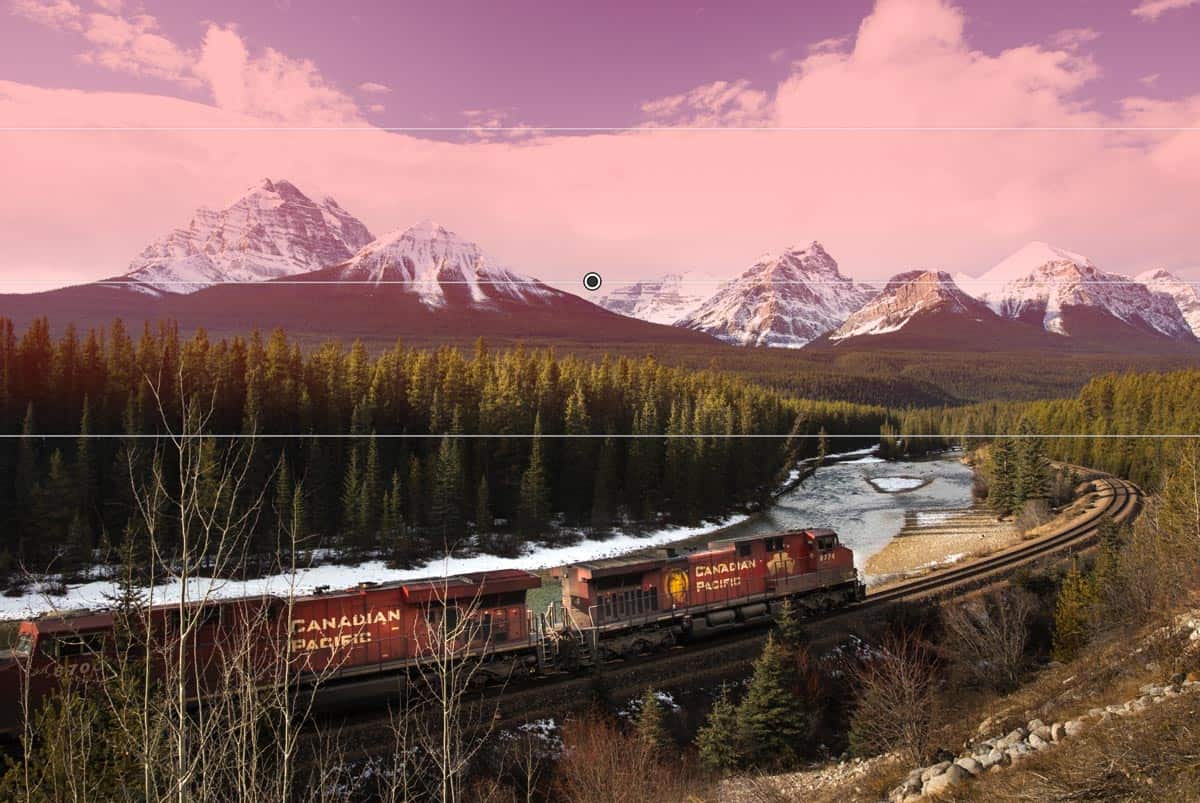
As usual the main adjustments were all applied, as you can see, with selective adjustment tools, rather than using the global sliders in Lightroom. RAW files inherently need some contrast and saturation adjustment globally, by design, but all finessing of the composition is done with selective tools. The helps me to control exactly where a viewer will be looking in an image. As you can see from the before and after shots, the difference is quite dramatic. All the information is there in the single RAW file, but you need to extract it in a way the helps you guide the eye though the photo.
Before/after