
Last week I posted a packing list and mentioned I was headed to an area near Vancouver Island to photograph Stellar sea lions and I thought I’d follow it up right away with one of my BTS posts!
Gear Used for this Shot
- Canon 5D Mark IV
- Aquatech Elite water housing with PD-85 dome port
- Canon 16-35 f/4 L IS
- ProGrade Digital SDXC Cards
Gear Chat
For this trip I took three lenses with me for the underwater housing: Canon 16-35mm f/4 L IS, Canon 24-70 f/2.8 L II and Canon 8-15 f/4 L fisheye. I didn’t end up using the fisheye at all, and I don’t think I would bother to take it next time. I had anticipated that the 16-35mm focal length would be ideal for this kind of work, but was worried about the f/4 aperture and figured on cloudy days I might need the 24-70 f/2.8 L II to get fast enough shutter speeds in the murky pacific waters.
In some respects I was right, I did feel like having the faster lens was necessary. But I much preferred the 16-35mm range because the sea lions were often coming very close to me. In fact I have some shots of the insides of their mouthes as they tried to chew the dome port. The ideal lens for this would have been a 16-35mm f/2.8 – but alas that wasn’t something I had in my gear cupboard. Next time I’ll make sure I have one though! My favourite shots came around the 21-28mm focal length and the f/2.8 aperture is always nice – whether you use it or not – because it feeds more light to the autofocus sensor at any aperture setting. More light=faster autofocus! So even if your aperture is set to something like f/5.6, the autofocus acquisition and tracking is all done with your lens at its widest aperture, and the aperture only closes down to your chose setting at the point at which the photo is taken.
As it happened, we has a lot of sunshine and the f/4 lens did the trick on most dives this time, so it didn’t prove to be a major issue.
In terms of the underwater housing, the Aquatech Elite proved to be a stellar solution once again. I can’t tell you how much I freaking LOVE having this thing in my arsenal. I have used it for everything from event photography to wildlife and even underwater photos of my dog while he’s swimming. No kidding, those are my best selling stock photos! Go figure.
I took a flat port with me that’s suitable for the 24-70, but in the end I preferred the PD-85 dome port and it only vignettes a tiny bit with the 24-70 at 24mm anyway, so I didn’t mind using it for both the 16-35mm and 24-70mm lenses. The dome port gives you better options for doing under/over style shots at the surface of the water, and the images under that water are tack sharp. Next time I’d leave the flat port at home to save some space in my pelican case. Always learning!
For this trip we were freediving. Scuba really wasn’t necessary and would have added many complications. It was better to enter their environment in the simplest way, without all the added gear and bubbles of a scuba setup!
As usual I used back button focus (read my hugely popular back button focus guide here) and I settled on AI Servo with Large Zone AF positioned on the central stripe of AF points. I wouldn’t work this way on the ground, but the complexities of shooting with a housing, being underwater, holding your breath for extended periods and being surrounded by circling, rapidly moving 600lb+ sea creatures necessitates a few simplifications!
I tested quite a few AF options but in the end this is what was working for me best!

About the Shot
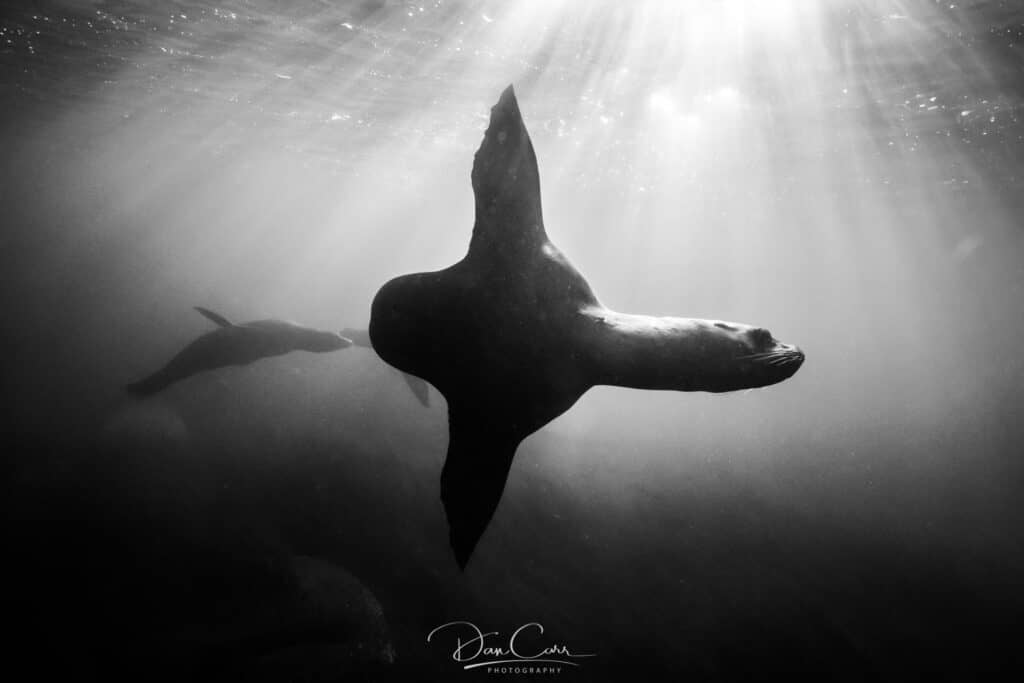
On this particular dive we had some strong overhead sunshine on a cloudless day. Honestly when you are underwater in those conditions, there are merits to shooting in several different directions relative to the sun. If you shoot into the sun then you stand the chance of capturing these wonderful ray patterns, but it also backlights all the particles that are floating in the water and that can be a distraction.
In this case the water was relatively clear, as it tends to be in the winter, and it was also deep enough that my fins weren’t kicking up sand and other crud from the bottom. What little particulates there are in the shot actually seem to help add to the feeling of depth.
The settings were ISO3200, f/10, 1/800. I knew I needed 1/800th of a second to freeze the sea lion’s fast motion, and I set my ISO to a limit that I’m comfortable with on the 5D Mark IV. After that, the camera selected f/10 which is more than enough depth for this situation where background details are minimal.
Note that I also had -1ev dialled into my exposure compensation! After years working with the 5D Mark IV, I can predict how its auto exposure algorithms will work in any given scenario. I knew that a predominantly dark frame, with only a small amount of a bright backlit sea lion in the middle would have caused it to completely over expose, had I not overridden it with the compensation.
I found that the sea lions out often do these swooping “fly-bys” just a few feet from my lens, but what makes this one stand out above the others is the dramatic light rays and the sea lions in the background that really help to add depth to the murky waters. I knew as soon as I clicked the button on this one that I had captured something I was going to be proud of.
About the Processing
High contrast situations that have little native colour in them just scream for black and white conversion! The faded green pacific waters didn’t add anything to this shot, so removing the dull colour just simplifies the shot and that always makes for a stronger image. Strive for simplicity!
Sometimes I move my black and white conversions to Nik Silver Effex Pro after an initial conversion in Lightroom, but in this case the whole thing was done in Lightroom Classic because I didn’t need the more selective controls that Nik provides.
In Lightroom, I first switched it to black and white mode and after that I dragged a graduated adjustment over the top half of the image to selectively add some clarity to sunny area. Clarity adds contrast in the mid tones, and that helped to bring a bit more definition to the edges of the sun rays to help them stand out a little more. After that I did some minor noise reduction.
In total this image was processed in less than a minute! Just the way I like it.
About the Sea Lion Experience
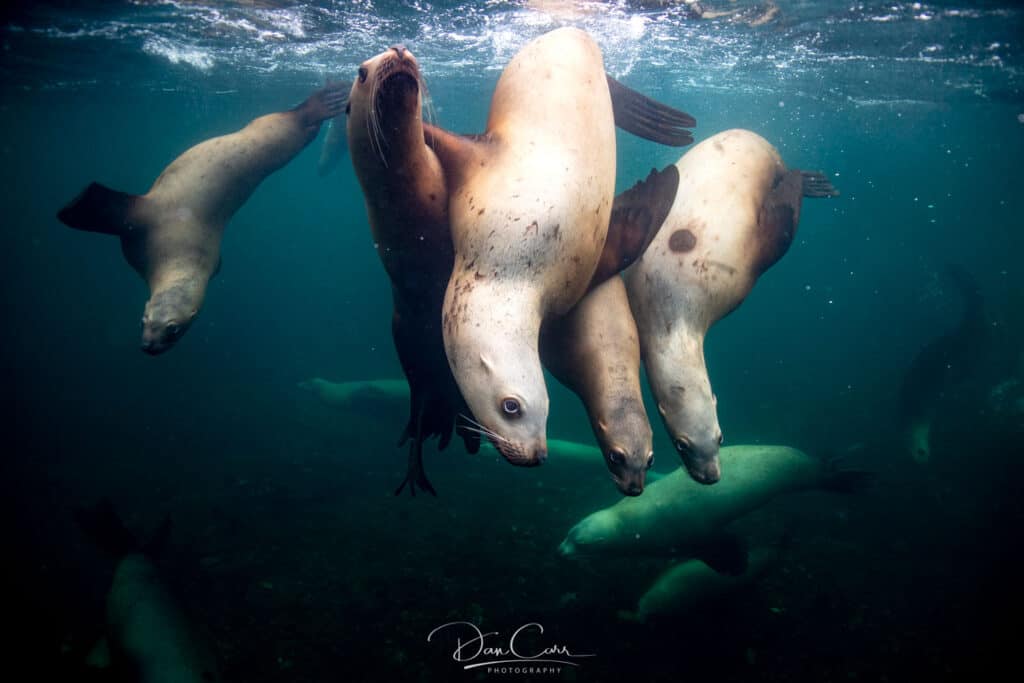
This particular trip was a real eye-opener for me. The frigid winter water presented a physical challenge, particularly when you factor in freediving with the buoyancy of an underwater housing, and the unpredictable nature of huge numbers of very large animals. On occasion, we did get bitten! Not enough to do lasting damage, but hard enough to keep you wary and keep you on your toes.
The female Stella sea lions can reach nearly 1000lbs as they get older, and given that they swim at 30mph it can be a little unnerving when you are surrounded by them. I got used to it as the dives went on, but I was definitely cautious on the first day as I learned to judge their behaviour. They really feed off your own energy and movements, so it was important to slow down and make gentle movements where possible if you wanted to try and keep them calm and inquisitive.
In the video above, kindly provided by Matt Townsend from Oceanoid, you can see one of the cheeky sea lions swoop around me and bite me on the shoulder, causing me some surprise!
Here’s to new experiences and great adventures with a camera!
See you in the sea.

