

Gear Used
- Canon 5D Mark IV
- Canon 100-400 f/4.5-5.6 L IS II
- Breakthrough Photography X4 Circular Polarizer
- Processed with Adobe Lightroom CC and then Nik Silver Efex Pro
It’s definitely winter in Canada now so the BTS posts are likely to be snowy ones for a while! This is a recent shot from a hidden valley near Whitehorse in the Canadian Yukon Territory. I’ve always had a bit of a thing for long lens landscape photos and for that reason I always carry a Canon 100-400mm lens with me whether my day’s objective is adventure, landscapes or wildlife. It’s an incredibly versatile tool that has come up many, many times on this blog.
The useful thing about a zoom lens in big landscapes is that you can really isolate interesting areas of light and contrast. These are the things that often ‘make’ an image, but they don’t always cover the whole view in front of you. Sometimes that interesting pocket of light, through the gaps in the clouds, falls only in one small area.
Zooming my 100-400mm to 300mm in this case, I was able to isolate one such pocket of light that fell on a hoar frosted forest just behind a row of taller trees that encircled a frozen lake. That front row of darker trees is important because that is what provides the interesting and eye-catching contrast in the image. It wouldn’t have worked without that! The frosted trees in the second ‘layer’ behind the tall trees give us a lovely looking texture, and texture is another thing that captivates the eye in an image.
Camera Settings – 1/640, f11, ISO500
The light was changing fast so I didn’t bother to set up a tripod. I literally stopped the car in the middle of the road and jumped out to shoot this show when I saw the cool light forming on the hillside. (Side note: stopping the car in the road in the Yukon isn’t much of a problem… not a lot of traffic!)
No tripod meant I had to have a decently fast shutter speed to work with the long focal length and still get a sharp shot. I was also using a polarizer and that cuts about a stop of light. F11 is the sweet spot on this lens for ultimate sharpness and with so much fine detail in the frost, I wanted to maintain that sharpness. Incidentally, that’s also why I use the Breakthrough X4 CPL. It doesn’t mess with the sharpness of my lens! A crappy, cheap filter will soften your photos and make that nice sharp lens you bought completely pointless.
In reality, I probably could have got a sharp enough shutter speed with a 1/300th of a second shutter, and hence lowered the ISO a stop. But ISO500 on the 5D Mark IV is totally clean anyway so there’s nothing to be gained from that, and this way I’m guaranteed a sharp shot instead of flirting with failure whilst photographing a scene that’s changing every few seconds.
But why make this black and white?
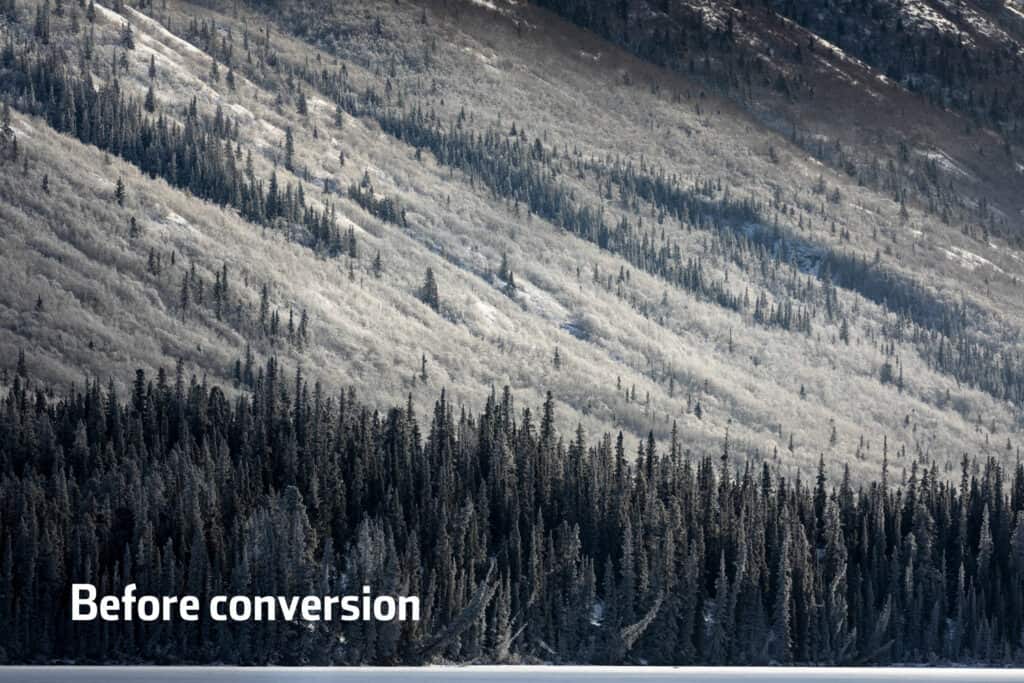
Dark trees and white snow meant that this image had a somewhat monochrome look to it already. What little colour there was, was simply a distraction for me. It didn’t help to tell the story in any way. A hint of dark green wasn’t necessary to tell us that these are trees, and whilst there was a cooler (temperature) look to the shot, I felt the fact that these trees are frozen, was already enough of an indication to convey a cold feeling.
When you take a photo, and then edit a photo, you have multiple opportunities to decide what information you give people. In this case I used two major tools: lens choice and black and white conversion. My zoom lens helped me to exclude much of the surrounding landscape, and my B&W conversion excluded the colour. This leaves a much simpler and stronger image that focuses the viewer on exactly the things I wanted to show them about this scene.

