
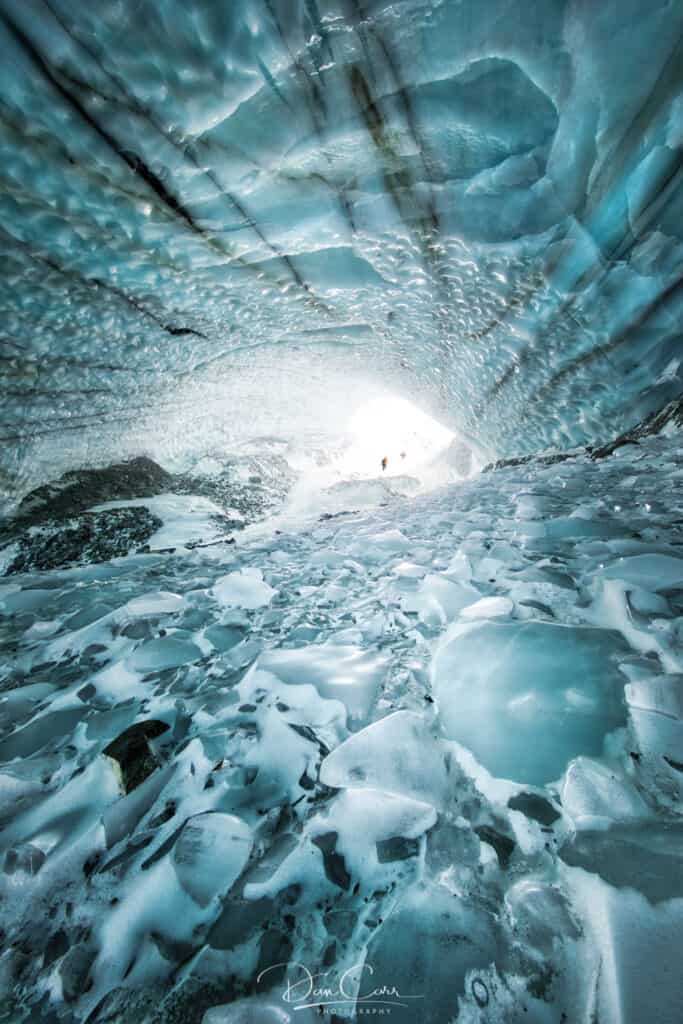
On a recent trip to the Yukon I captured this photo of a gigantic ice cave that exists year round near Haines Junction. Local photographer Matt Jacques and I set off on this little adventure, expecting a relatively easy hike, but mother nature had other plans! The trail gradient was relatively shallow, but in the second half of the hike we were blasted in the face by incredible arctic winds that had the gusting strength to knock you off your feet. Sometimes you had to really lean into the wind to keep moving forwards!
Once we reached the cave I was staggered by how big it was. Seriously, you could park several large airplanes in it and still have room for a good sized house! Actually, to call it a cave is perhaps not accurate. It used to be a cave, but in recent years the far end of it has opened up to turn it into a gigantic tunnel.
Gear Used for This Shot
- Canon 5D Mark IV
- Canon 11-24mm f/4 L
- Really Right Stuff TVC-24L tripod
- Really Right Stuff BH-55 ballhead
- Aurora HDR from Skylum Software
- Adobe Lightroom
The Process
From a technical standpoint I knew this was going to be quite a tricky situation. With the tunnel being so long, it meant that very little light was reaching the central area where I wanted to take this photo, yet I needed to include the much brighter tunnel exit in the same shot. The dynamic range in this scene far exceeded what any good camera is currently capable of capturing in a single shot, so I knew I would have to do some sort of exposure blending if I wanted to maintain maximum detail and low noise. It’s possible that you could create an approximation of the final result from a single image, but you’d need to push and pull the shadows a highlights a lot, which add additional noise and softens fine detail. If you’ve got a good tripod and some good software, an HDR blend is the best way to go for a situation like this.
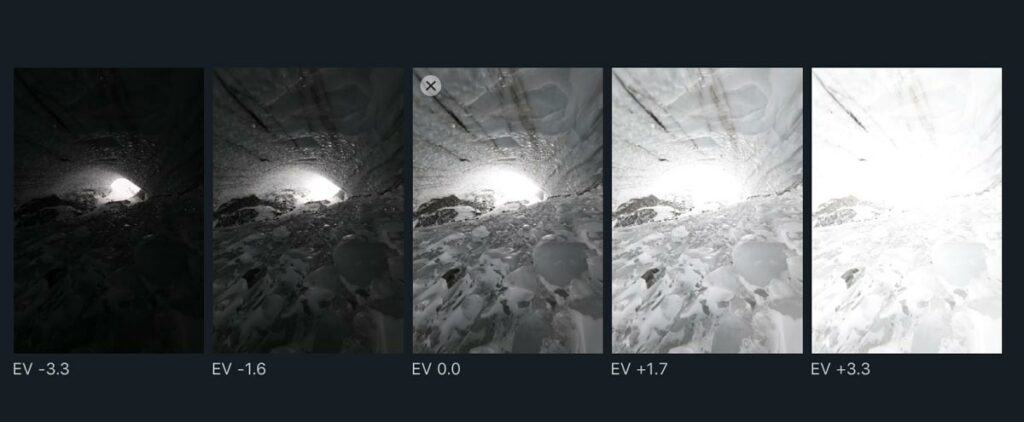
Using the exposure bracketing feature of the Canon 5D Mark IV, I took a 5-shot bracket that stretched as far as +- 3.3 stops , carefully reviewing the results on the LCD screen as I went. At the time, I wasn’t sure if I was going to maintain detail in the exterior of the cave. I suspected that in the final edit I was going to want to leave it bright white, with a nice glow entering the cave, but I did space the exposures far enough apart to capture that external detail just in case I needed it.
With the images imported into Lightroom, I then sent them to Aurora HDR to combine the exposures. I really like this HDR software and I find that it has enough controls in there to create a huge variety of HDR styles. Personally I try hard to trick the mind into assuming that it is a single image. I don’t like the garish images that people often associate with HDR photos, so hopefully you’ll agree that this photo has a natural look to it. I’ve seen some really intense HDR shots created in Aurora HDR and I don’t want people to think that this is the only thing this software can do!
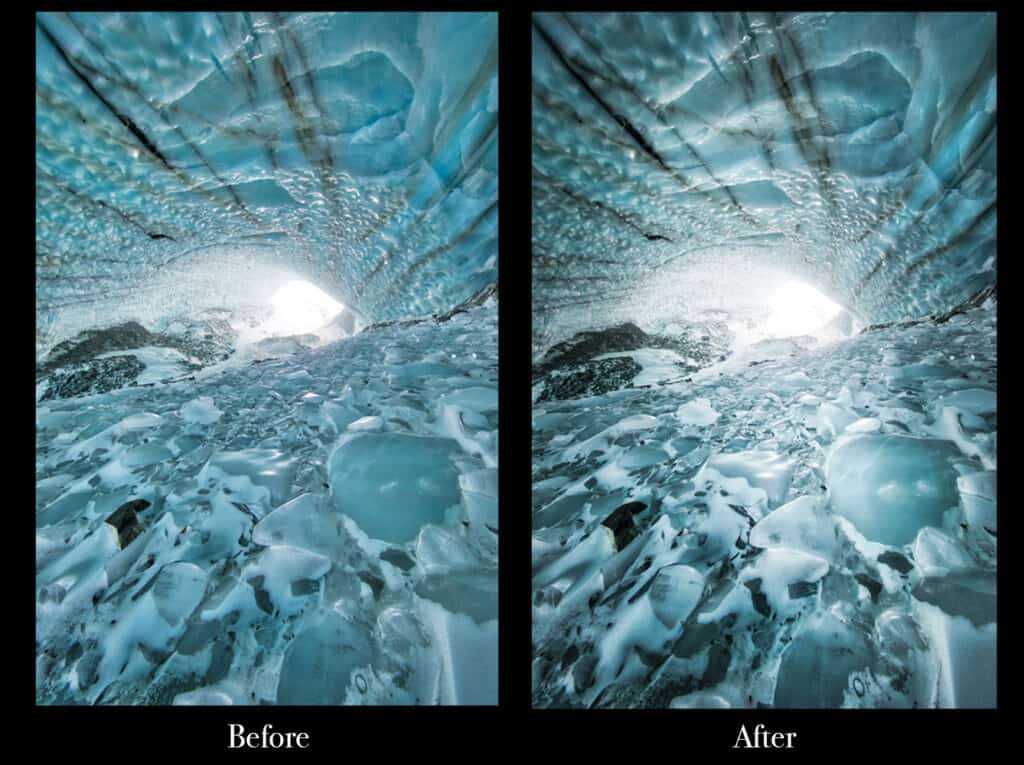
Once the exposure blend was done in Aurora HDR, I took it back into Lightroom to apply some local exposure adjustments. Essentially what I did there was dodging and burning the image in a few areas to help control the visual path through the image. Ultimately people will be drawn to the bright exit of the cave, but I didn’t want people’s eyes to get there too quickly and skip straight over some of the cool details in the ice floor and ceiling. By darkening the edges of the floor a little, this pushes people towards the centre of the image, and then I carefully highlighted certain edges and lines in the ice there with the local adjustment brush.
Remember that the editing process is just an extension of the photographic process, and all the time we are trying to control exactly where people’s eyes are looking ,and how they move through an image. Rather like those magicians or mentalists who use psychological engineering to make you think of a specific card or number, a good photographer and editor can precisely predict the path of someone’s eye through an image, by manipulating brightness, colour and contrast.
With bright, snowy or icy scenes you have to be very careful not to remove all the contrast from an image if you do an HDR blend. By definition, an HDR image is one that allows you to even out the brights and the darks, but it’s this difference in levels that also creates contrast. As photographers, we’re often looking for interesting contrasting light, so HDR methods are sometimes counterproductive if they are used too heavily. Our eyes are used to seeing contrast, and if you remove all of it then things look very unnatural.
At this point I also made adjustments to the overall colour temperature of the image to cool it down, as well as using the split toning panel to add some blue hues into the highlights and shadows. This creates a dramatically different looking image, but I felt that this kind of blue ice is probably the colour most people would expect to see in an ice cave like this. Simply playing with the blue luminance and saturation slider showed me that there was a lot of blue in the ice, but the lighting conditions in the cave weren’t really making it as evident as I would have liked.
I could have spent hours photographing this cave, but unfortunately a tight time schedule meant I only had time to get a couple of photos before we had to begin the decent back to the valley. If the headwind hadn’t been so strong on the way up, we probably would have had more time, but those are the cards we were dealt that day!

