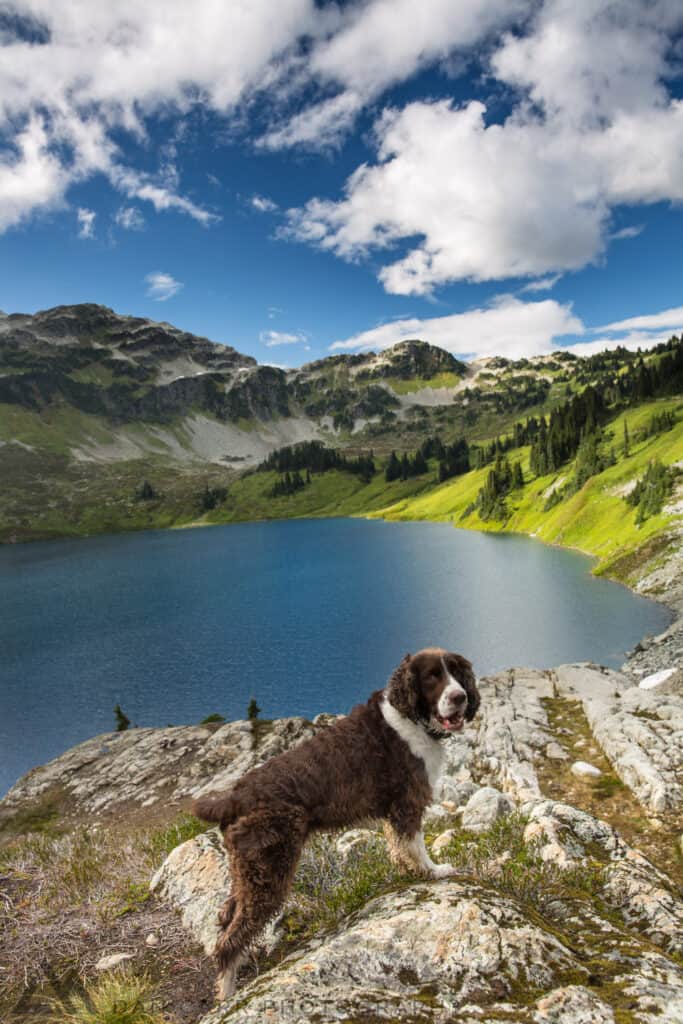
I took this photo of my dog on an overnight camping trip to Cirque Lake near Whistler, British Columbia. I thought I’d include it in the Behind The Shot series because it gives me an opportunity to discuss backpacking with photography gear, specifically when you’re also carrying a tent, sleeping bag and other overnight kit.
Equipment Used for This Shot
- Canon 5d Mark III (now replaced with 5D Mark IV)
- Canon 24-70 f/2.8 L II
- Really Right Stuff TFA-01 Ultra pocket tripod
- Mindshift Gear Multimount Holster 20
- Formatt Hitech 6-Stop 77mm Firecrest ND filter (use coupon code “DanCarr10” to save 10% from Formatt-Hitech.com and Formatt-HitechUSA.com)
- Formatt Hitech Firecrest circular polarizer
- I use a Peak Design Clutch strap and Leash strap on all my cameras.
To access this camping spot above Cirque Lake requires a kayak to cross nearby Callaghan Lake, and then a hard scramble up a boulder field into the alpine. There are occasional ropes along the trail in the woods, so that gives you some idea as to how steep the hike can be. When embarking on a trip like this it’s very important to carefully consider every item you take with you. In the early days of my photography career I was definitely guilty of always carrying everything but the kitchen sink, but over time I have learnt that a lighter kit contributes significantly to my own personal enjoyment of the experience. Yes I’m fit enough to carry another 20lbs of camera gear if I need to, but it’ll be a hard slog and I want to remember my outdoor experiences fondly, and not as though they were torture. It also contributes to a faster recovery time after a particularly strenuous adventure, and that helps to keep me more productive. Important, given that this is all part of my job. I know these things aren’t talked about very often, but it’s a consideration for me.
On this trip I took a Canon 5D Mark III (recently replaced by my new Mark IV), and a 24-70 f/2.8 L II lens. These were packed into a Mindshift Gear Multimount 20 holster. I find that a 24-70mm, or a 24-105mm lens is the best focal range to have for this kind of trip. I’ve been using the 24-70 f/2.8 L II for some time, although I intend to switch to the brand new 24-105 f/4 L II as soon as I can get my hands on one. On a full frame camera, 24mm is wide enough for landscapes, and the f/2.8 aperture is nice if I want to do night time star shots. For this reason, I’ll still be keeping the 24-70 even when the new 24-105 shows up, and I’ll base my decision as to which one to use, on what the night sky will be looking like at the time.
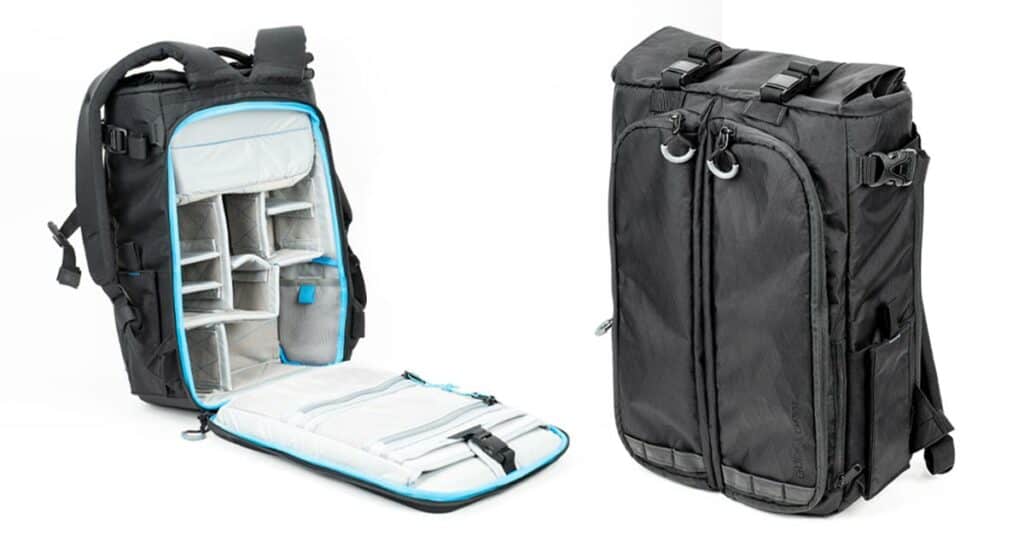
The Multimount 20 holster is a thing of genius. It allows me to safely pack a camera into my 65L backpack, or I can clip it to the front straps when I’m hiking. If my pack is full, I can also strap it to the back or top of the pack. The front pocket is big enough to house a couple of filters, a spare battery and my cable release. These are my absolute essentials, and I also stick my RRS TFA-01 Ultra tripod in there. This means my photography kit is entirely self-contained, and easily removable from my big pack when I get to my camp spot.
The Dog Has a Purpose
Ok, enough about the gear, let’s talk about this shot! This was taken using a circular polarizer to help cut down the reflections on the lake, and also deepen the blues in the sky between the clouds. I’ve said it before, and demonstrated it before, a good circular polarizer is ESSENTIAL for a landscape photographer. Due to having to carry a lighter kit for this trip, I didn’t have a graduated ND filter with me. If I’d had one, I would have used it to balance the foreground and background exposure a little bit more, but the differential wasn’t too big, so I was able to use RAW file adjustments in Adobe Lightroom to achieve the same effect.
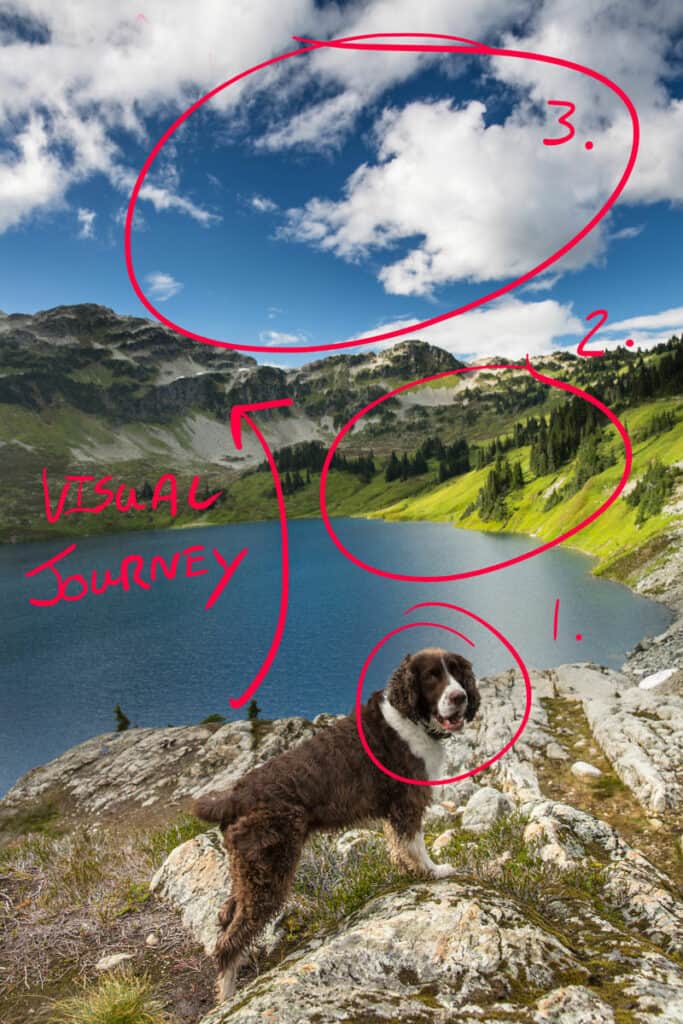
Now, you might all be thinking that this is just a photo of my dog, and whilst it obviously is, there’s also another purpose to his inclusion in the image. Balance. The dramatic looking sky, the deep blue and the shocking green grass are all in the top half of the frame. This creates an imbalance in the composition, so I needed something visually striking in the foreground as well. If I was down on the edge of a lake I might find some reflections, or interesting foreground rocks for this purpose, but theres was nothing like that right here. Instead, I got my dog to stand in front of me, and he becomes the subject of the photo, creating a perfect visual balance between him and the surrounding landscape. When the viewer looks at the photo they will first look at the dog, but then the background elements are strong enough to capture their attention and invite them to explore the landscape in the background.
Post Processing
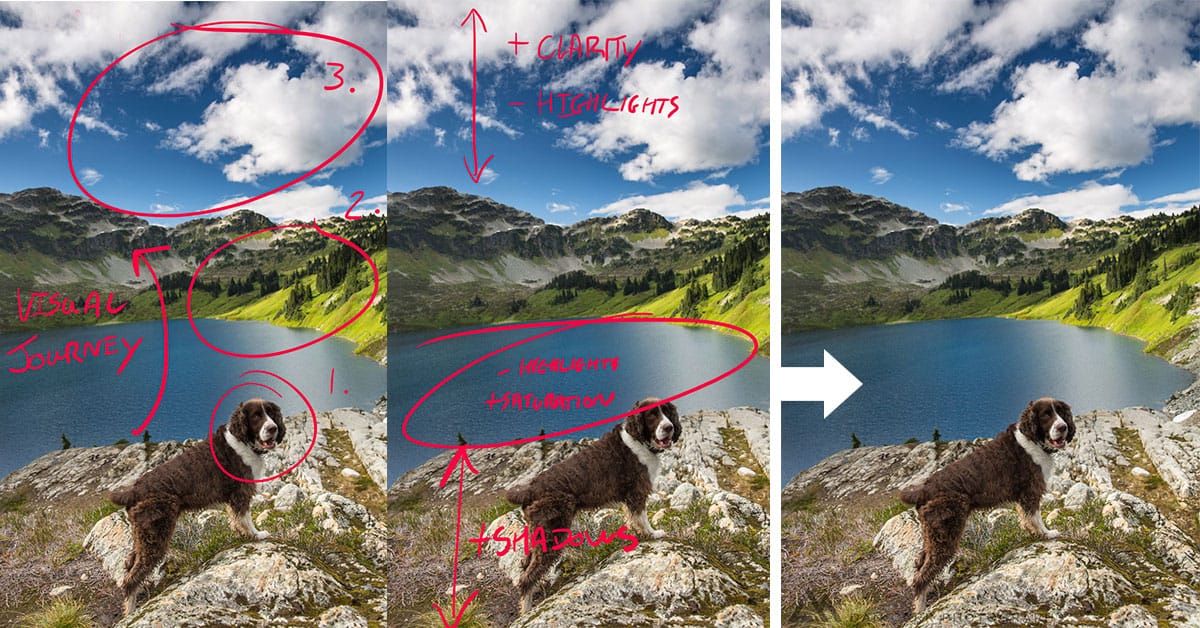
The editing for this image concentrated into three specific areas: the sky, the foreground elements and the lake. Almost nothing was done to the central-right portion of the photo – the grass really was that green when viewed through a correctly adjust polarizer!
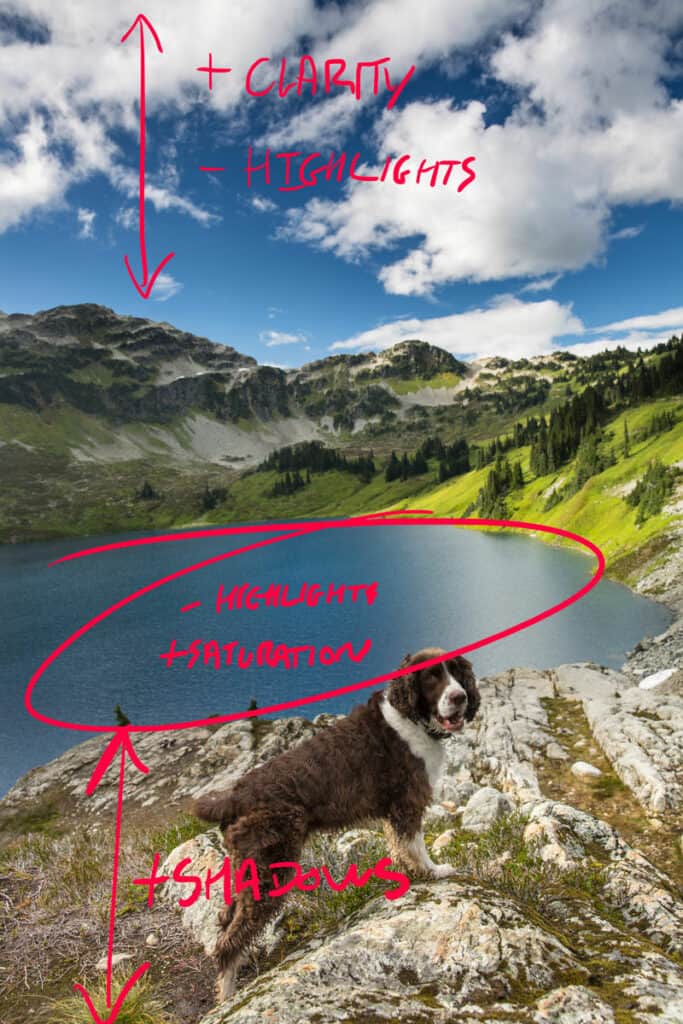
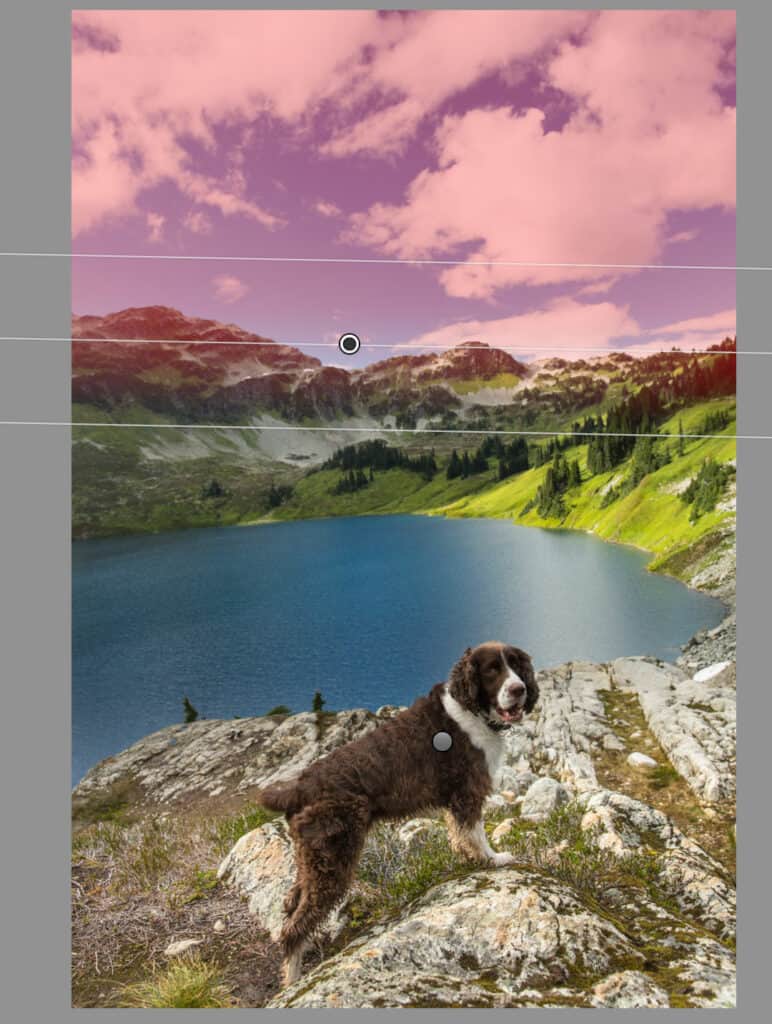
In the top half of the photo I dragged a graduated adjustment tool from the top to cover the clouds, and I adjusted the black level slider to darken the blue sky just a little. I then used the blue channel luminosity slider to lower the luminosity of the sky. Since there are no other blues in the photo, this is a great trick for making deep looking sky. In the sky’s graduated adjustment, I also lowered the highlights a touch, and added some clarity to bump local contrast in the cloud’s tones. In the photos below, you can see the mask for the adjustment and where I placed the transition. As you can see, I placed it so that it didn’t affect the grass and trees.
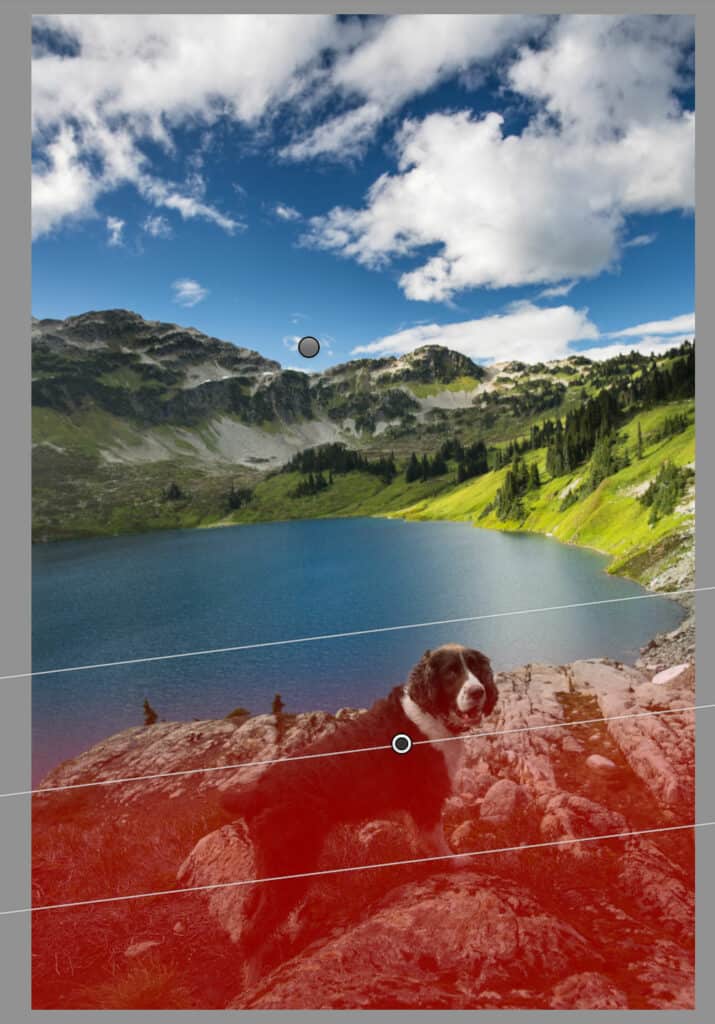
The next set of local adjustments were applied to the foreground of the shot. In this case I also used the selective adjustment eraser tool so that I could adjust the transition and keep it on the dog and not the lake behind him. I brightened the shadows significantly here, and also added some overall exposure increase. When I bump the shadows up a lot like this, I also apply some selective noise reduction to hold back the inherent increase in grain.
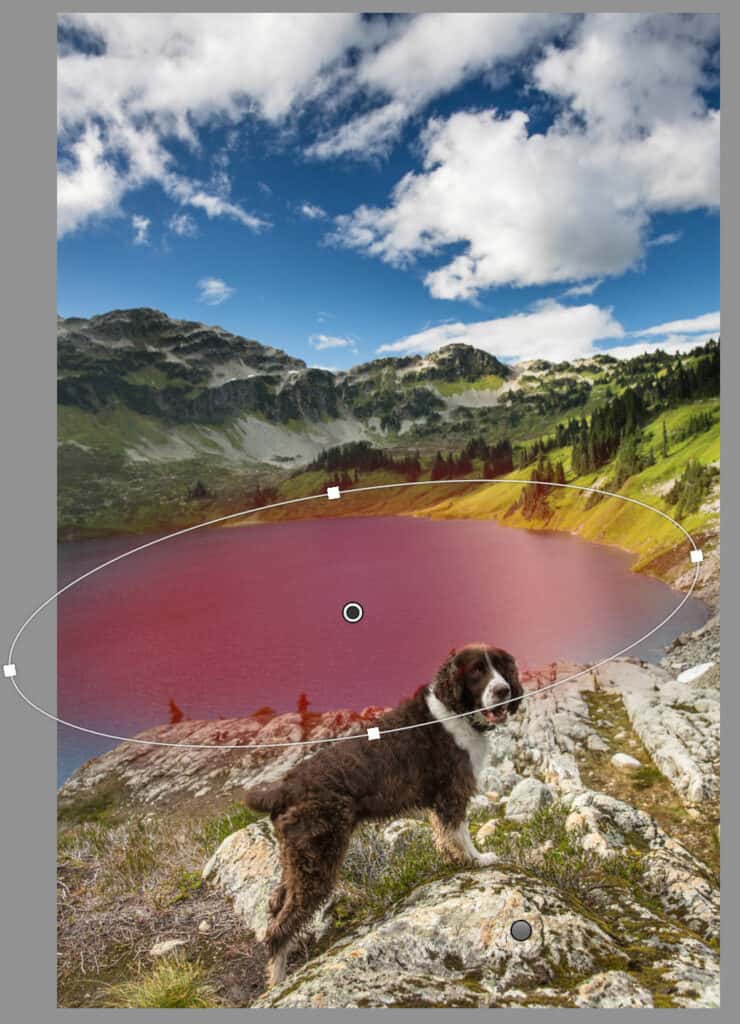
Finally, I added a circular adjustment tool to the lake and again used the eraser to mask around the dog’s head. You can clear see from the screenshot below, how the dog’s head is left out of the adjustment section in this way. The adjustment to this are was very minimal, just a small increase in saturation and a decrease in the highlight slider to darken some of the spectral highlights. Job done. Total editing time… less than 5 minutes. Just the way I like it 🙂

