Equipment Used for This Shot
- Canon 7D Mark II
- Canon 400mm f/4 DO IS II
- Canon 2x Extender III
- I use the Peak Design Clutch strap and Leash strap on all my cameras.
- All my cameras are equipped with the indispensable Really Right Stuff L-Plates.
The stunning Canon 400mm f/4 DO II blew my mind once again in this situation. On this particular trip to Banff, I was there to create some landscape images, not for the wildlife. Since the 400mm DO II is so small though, I can stash it in my bag just in case an unmissable opportunity presents itself. This lens is Canon’s best performer with extenders in my opinion, and I have no qualms using it with either a 1.4x or a 2x extender. Both combinations produce stunningly sharp images and still give you an easily hand-holdable package. This photo was taken at an FOV equivalent of 1280mm, in high winds, with no tripod! The stabilization of this lens also appears to be better than that in other Canon super telephoto lenses, although from the specifications alone there doesn’t seem to be a reason for this, but from my continued usage of it it’s certainly the impression I get.
Compositional Considerations and Planning

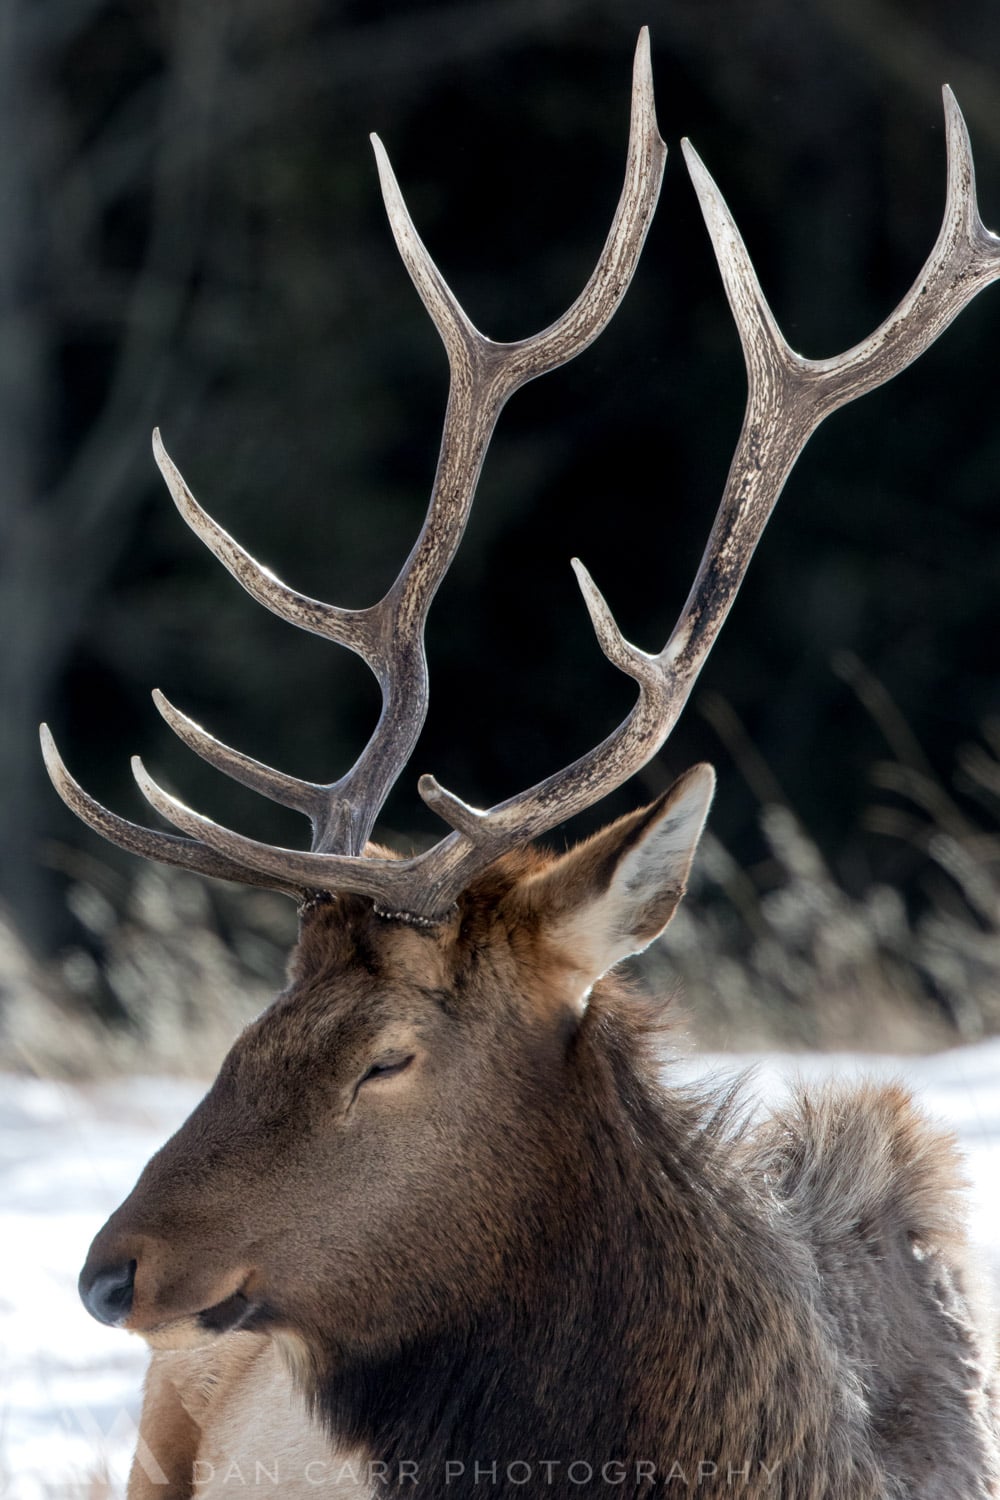
I knew I wanted to create a dramatic contrast between the bright antlers, and a dark background, so I positioned myself to make this happen. Patch sunlight was falling on the trees in the background, but the beauty of using long focal lengths like this is that a change of just a couple of inches in my own positioning, can place an entirely new background behind the subject in the image.
Once I had myself in the right place to get a dark background, I also wanted the antlers to line up in a pleasing manner. The most important thing for me was that his left and right antlers didn’t overlap in any way. Had they done so, it would have over complicated the visuals quite a bit, and you would have lost some of the nice ends of the antlers as they overlapped. In the diagram here, I have marked out the main locations where I did not want the left and right antlers to intersect. I achieved this partly by altering my own position, and partly with patience, waiting for the elk to have his head in the right spot.
Pre-visualizing the entire final image is always something that helps me to think about these smaller things. In the moment of nice light, presented with such a beautiful creature, it’s all too easy to lose sight of these small compositional things that can have a large impact.
Image Editing
Watch the video below for a comparison between the edited and unedited images.
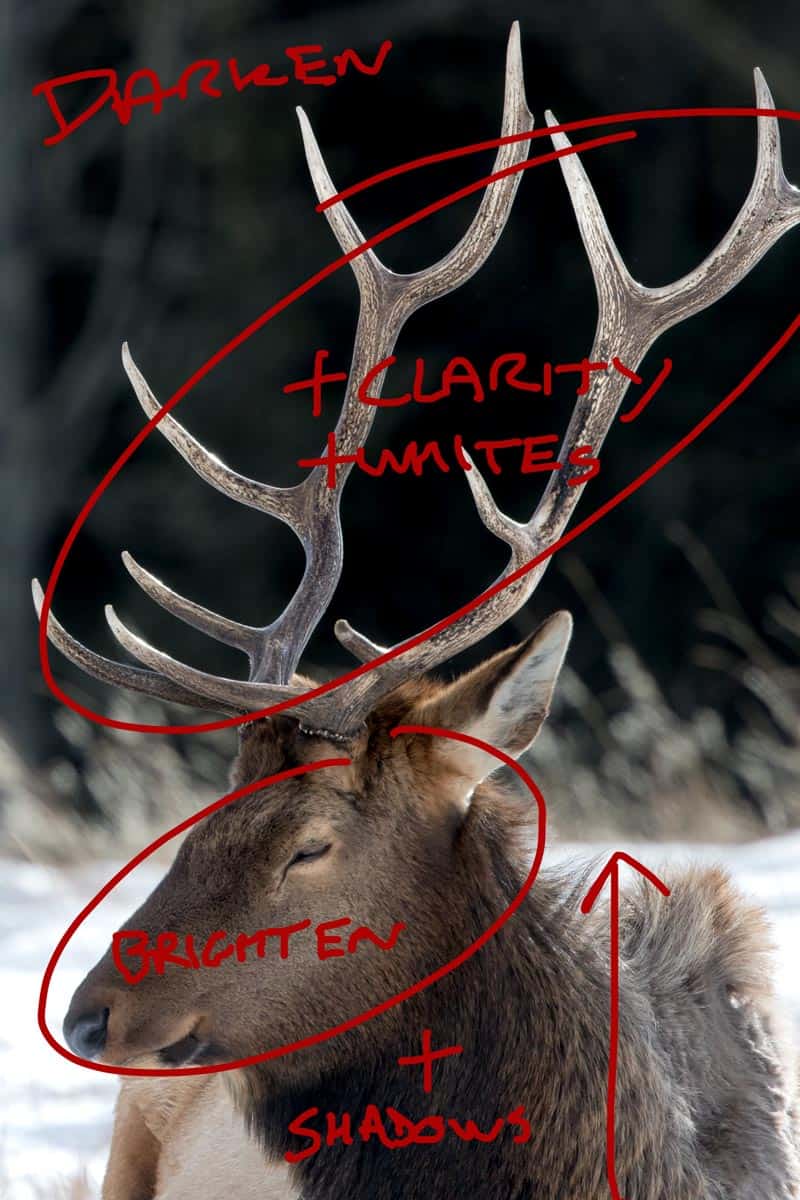
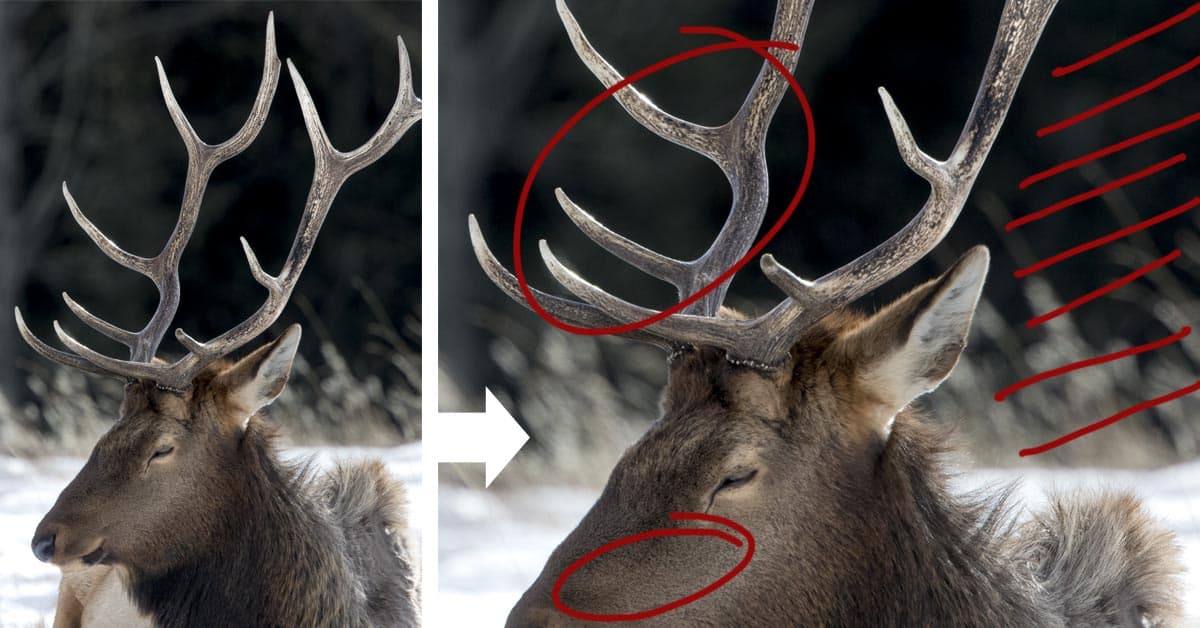
There’s nothing overly complicated about the editing that was done in Lightroom, but as usual, most of it was performed with the selective tools instead of the global sliders. Firstly, I used the brush tool to paint over the antlers, then I added clarity to them, and bumped up the white slider to brighten them against the dark background. The background was darkened with the black slider.
With brighter antlers, the face of the elk needed to be a little brighter as well because it didn’t look natural, so I used an elliptical adjustment over the face to add some exposure to this area. Finally, I used a graduated adjustment over the bottom third of the image to lift the shadows and reveal more detail in the fur.

Photoshop Content Aware Fill + Clone Work

It’s actually quite rare that I take my images into Photoshop, I prefer a faster workflow in a single program such as Lightroom CC or Macphun’s Luminar. In the case of this image though, I needed to remove two stray blades of long grass that were in the foreground, and obscuring part of my lovely elk. This is easily done in a couple of minutes of Photoshop work, mostly using the Content Aware Fill tool. Simply draw a selection around the blade of grass, then use the Fill command set to “Content Aware”. On the right-hand blade of grass, the fill was totally seamless, no additional work was needed. On the left blade, it looked a little unnatural, so I also used the clone tool to paint some more fur texture over the filled section.
Many people might not bother with this step, thinking that t he grass doesn’t detract that much from the final image. I disagree, I think this is a key step in the process of creating this final photo.

Once the grass blades were cloned out, I then went on to remove some darker marks of thinned out fur from the elk’s face. To be honest, this isn’t a step that I would always take, although I do think the final image is better for it. Removing objects from an image like this obviously crosses the line in terms of ever using an image for any sort of photographic contest. Since I was already jumping well over that line with the necessary grass removal, I figured I might as well touch up the animal’s face as well. I used the clone tool here as well, the healing brush, even when set to “content aware”, doesn’t do a good job with fur at all.

