
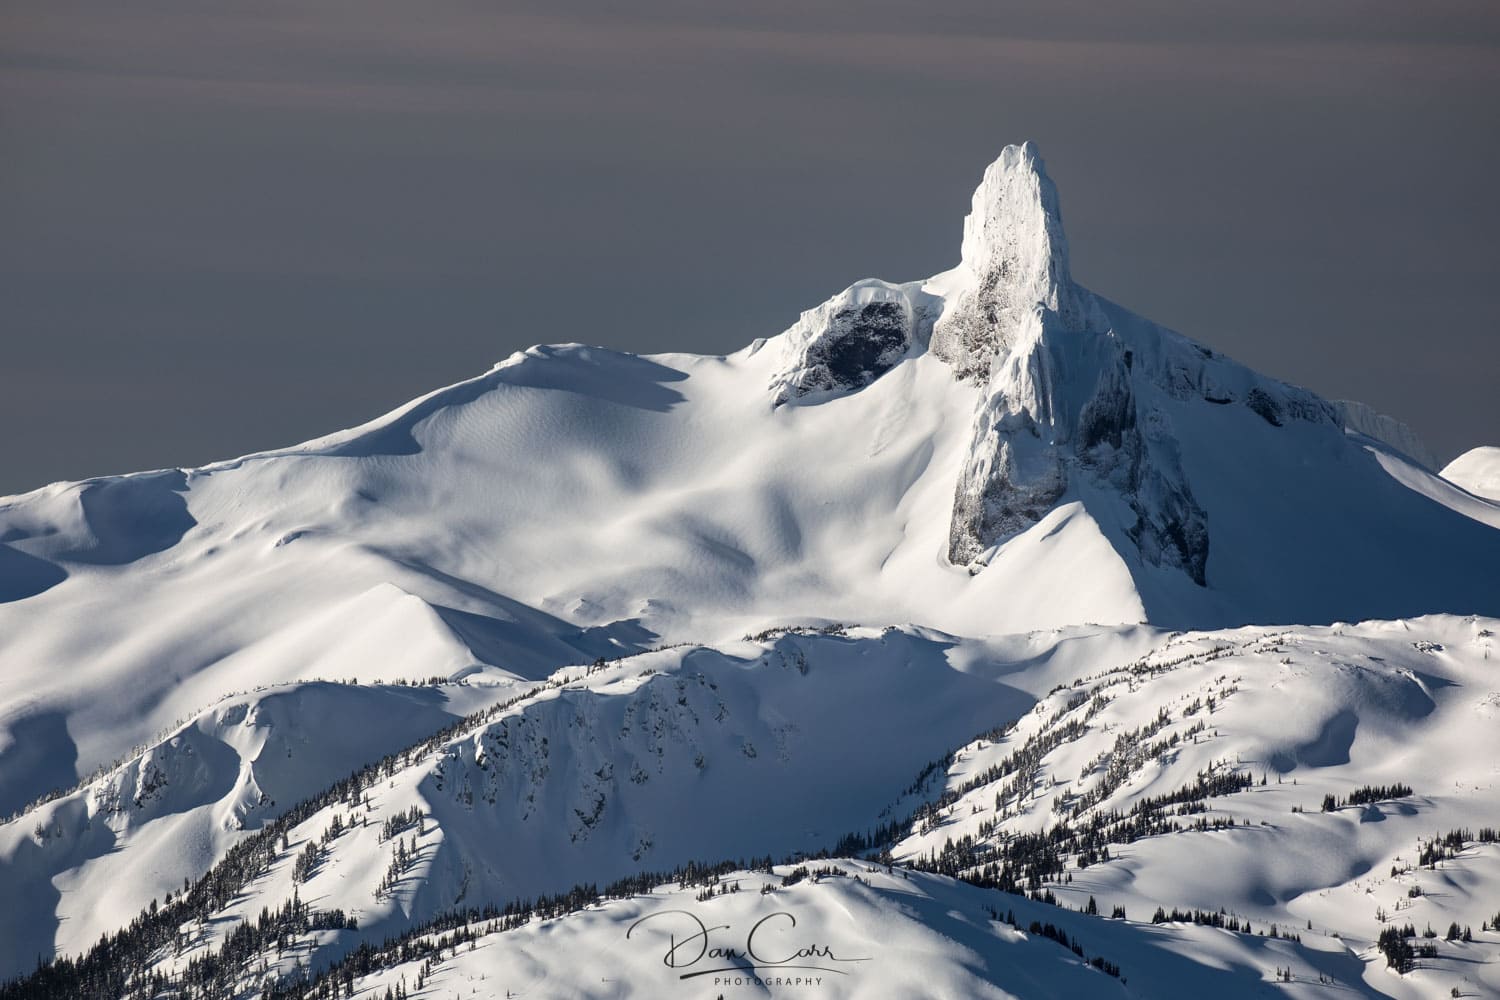
This shot is a pretty classic view of Black Tusk in Whistler, British Columbia. You can get this view at the top of the Peak Chair on the ski hill, but the dramatic lighting in this one is courtesy of sunrise light while we were filming the Choose To Be Bold film about my work.
I love the dramatic contrast between the white peak and the dark clouds, but this was hugely enhanced by the use of my Breakthrough Photography X4 circular polarizer filter. CPL filters have the largest effect on images when the sunlight is coming from 90 degrees to the camera. As you can tell from the long shadows in this image, the sun was off to my left at almost exactly 90 degrees.
Here’s an animated GIF to show the difference before and after using the X4CPL.
Pretty amazing, right?
Now you know why I never go anywhere without one of these filters in my bag. Actually I usually have at least a 77mm and an 82mm one i my bag, but sometimes I just carry the larger one and then bring the matching brass step-up rings. I also have an X4 Dark CPL which is a combination of a circular polarizer and an ND filter. It’s nice to have those two filters combined into one because it cuts down on the possibility of vignetting on wide angle lenses.
Final Image
Equipment used for this shot
- Canon 5D Mark IV
- Canon 100-400mm f/4-5.6 L IS II
- Breakthrough Photography X4 CPL Filter
- MindShift Gear BackLight 36L Backpack
- Really Right Stuff TVC-24L Tripod
- Really Right Stuff BH-55 Ballhead
- I also use Peak Design Clutch straps and Leash straps on all my cameras.
Post Processing?
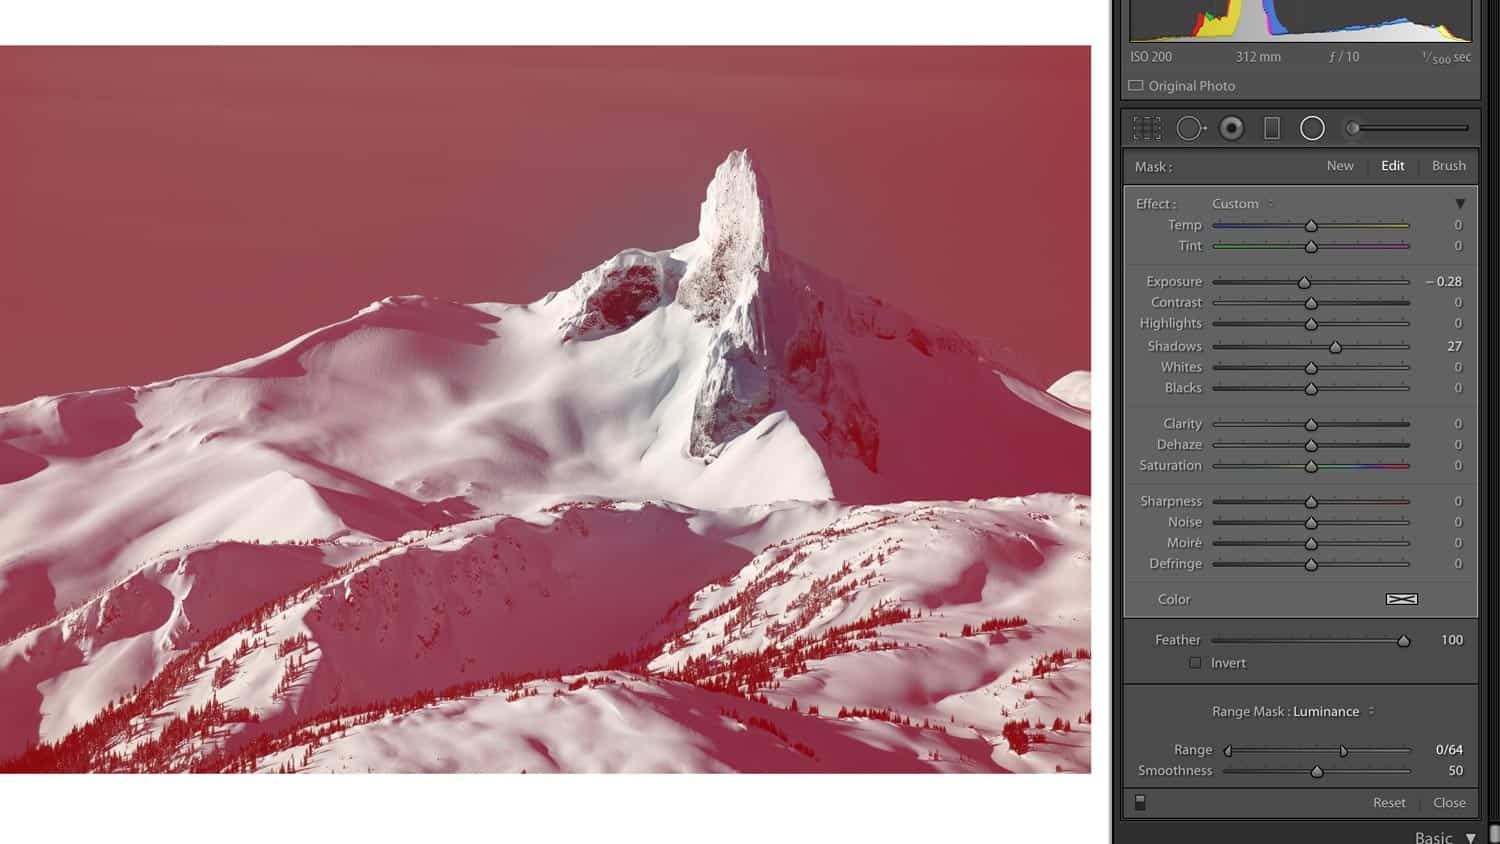
Very little indeed for this one! I set the white and black points with the respective sliders in Lightroom to make sure I was just below the clipping point with both of them. After that I used a radial filter over the point of the mountain, and I turned off Invert mode by unchecking the little Invert check box. This means the sliders for the radial filter now control everything outside of the radial filter (coloured red in the screenshot). As you can see from the sliders on the right, I darkened everything just a tiny bit, and brought back some of the shadows. Ultimately this has the effect of leaving the peak a little brighter and more contrasty than the surroundings. This helps to focus your vision on it, essentially like using the vignetting slider but giving you much more control over the shape and placement of the darkened areas. A negative .28 change in exposure is very subtle, but it helps!
All in all, because I used the polarizing filter, the total post processing time was under a minute! Now THAT is my kind of photo editing session. Time to get back outside…

