Today, I’m pleased to announce a new partnership with Adobe and their Creative Cloud Photography plan. I’ve been a subscriber to the Photography plan since its inception a few years ago, and as mobility has become increasingly important to my business, the Creative Cloud has been right there with me. The Photography Plan gives me access to Lightroom CC, Photoshop CC and Lightroom mobile, as well as added benefits in mobile apps such as Adobe Slate and Voice. As far as I’m concerned, the less time I can spend in my office, the better! Tools like Lightroom mobile, allow me to sync my new image collections to my iPhone and begin the sorting and editing process seamlessly from anywhere in the world.
In a world where social media promotion plays an increasingly large part in marketing my work, having my image collections with me on my iPhone makes it quick and easy to add photos to my Instagram feed or my Facebook page. Any edits I make to the photos on my computer, are instantly reflected in the collections on my phone so it’s not only great for social sharing, but also for having an up-to-date portfolio in my pocket all the time.
The other thing that I love about the Creative Cloud Photography Plan, is having instant updates to great new features. The recent update to Lightroom CC, from Lightroom 5, added one of my all-time favourite Lightroom features; merge to Panorama. Let’s take a look at how I used it on a recent shoot in Banff, Alberta!
Vermillion Lakes Sunrise
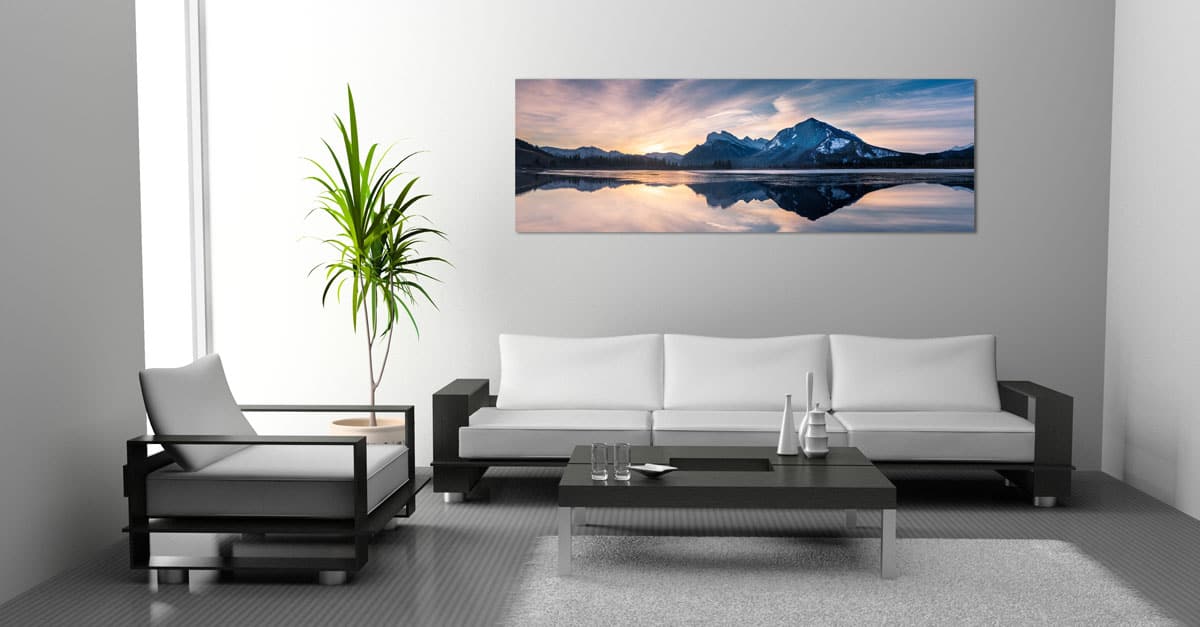
Final Image
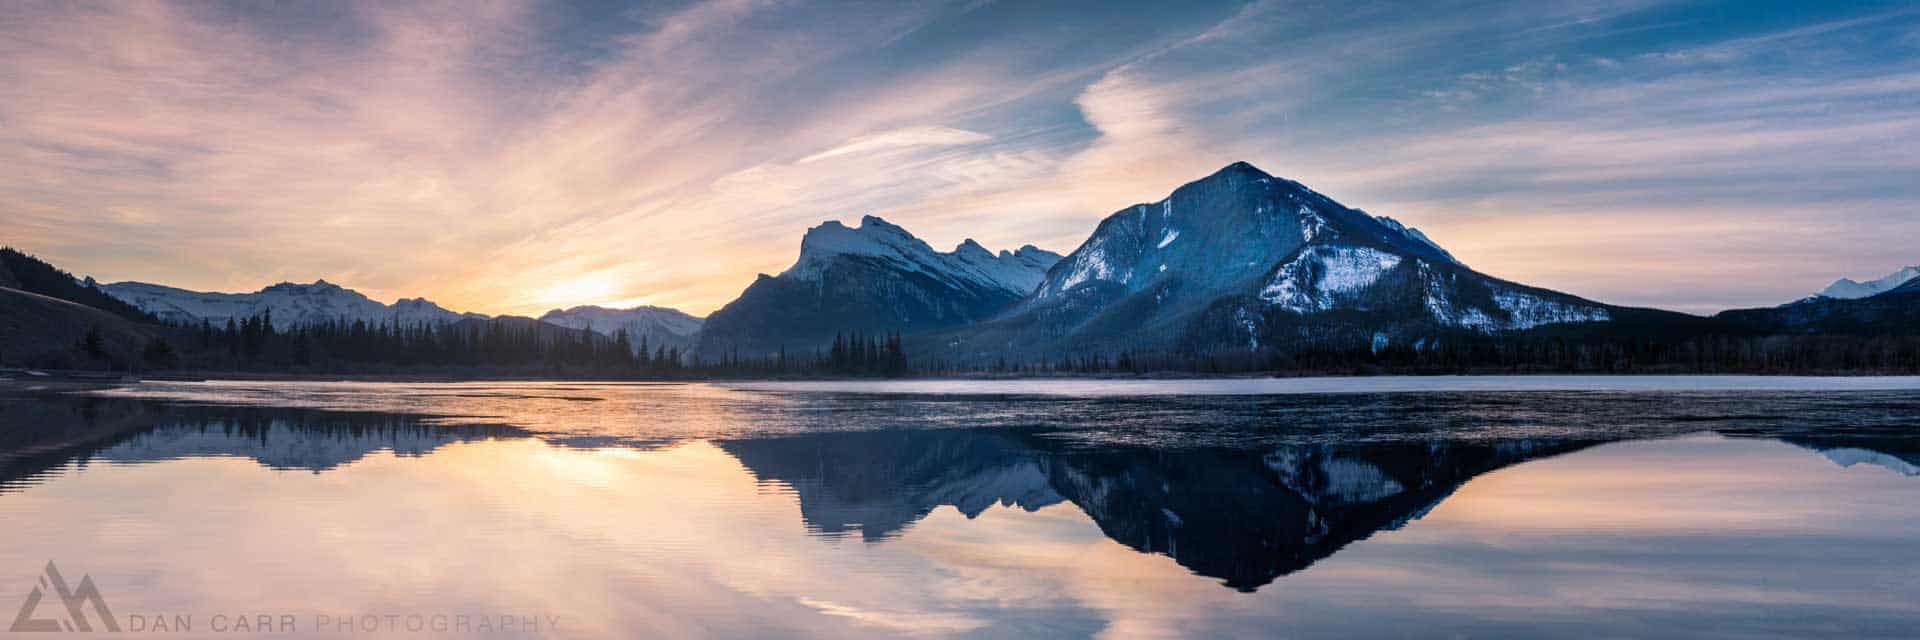
Vermillion Lakes Sunrise, Banff, Alberta. – Click image to view larger, buy limited print here.
The Story Behind This Image
A Sight to be Seen
White-tipped mountains, all manner of wildlife and wildflowers, and aquamarine, glacier-fed lakes and rivers: these are the Canadian Rockies. It’s hard to believe that I’ve lived in Canada for nearly ten years but until recently, never taken the time to explore what many photographers consider to be one of the best landscape locations on the planet.
Clearly, this had to change. At the start of 2015, I made it my mission to become more familiar with this famed location, and planned several trips there from my home in the neighbouring province of British Columbia. On my most recent trip, there was much to see, but it was this shot of Mt Rundle and Vermillion Lakes at sunrise that stood out for me.
Shooting in the A.M.
Morning shoots always start much the same way. As the best light is often in those few seconds before the sun crests the horizon, it’s important to get up early enough to get into position, all while in the dark. I’m the first to admit that I’m not always a morning person. However, I am nothing if not determined, which usually results in rushing to my car, bleary-eyed and clutching a large vat of coffee as I head off into the darkness, long before it’s possible to tell exactly what the weather is going to be like.
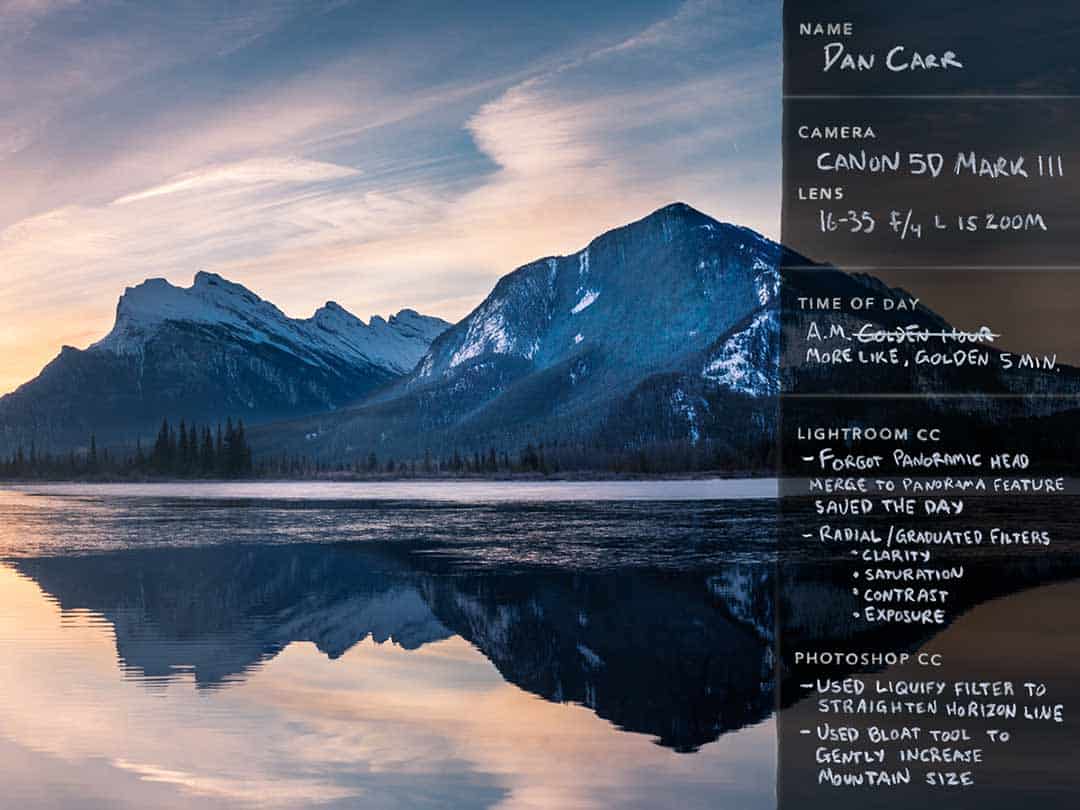
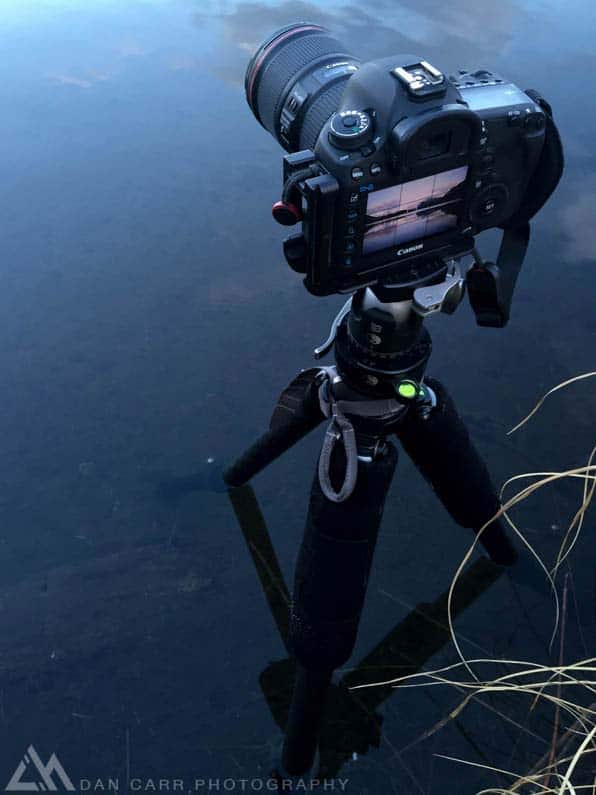
As a rule, I always pack my bag the night before in order to avoid forgetting anything important in the morning rush. My landscape photography essentials are my Canon 5D Mark III with a 16-35 f/4 L IS zoom, a 24-70 f/2.8 L II zoom, my Formatt HiTech graduated filters and polarizer, and a Really Right Stuff TVC-24L tripod with a BH-40 ballhead. I pack all this into my favourite MindShift Rotation 180 backpack and toss in a head torch, Peak Design camera straps. and my trusty Arcteryx Thorium AR down jacket to keep me warm while I wait for the light. (View my full gear list here)
Dark was the Night
Under cover of darkness, I left my home base in the town of Canmore to make the 20-minute drive to Vermillion Lakes in Banff National Park. Though a few stars still blinked in the sky, I wasn’t quite sure about the weather. A few twinkling stars told me it wasn’t overcast, but it’s rarely possible to tell in advance if we will be gifted with that incredible flash of color we crave. All I could do was be there, and be patient.
My plan this day was to make the trek to Jasper that afternoon, so I’d chosen Vermillion Lakes as a sunrise spot for its incredibly easy access just off the Trans-Canada Highway between Banff and Lake Louise. As I pulled into the parking lot, I saw the beginnings of brighter sky peek through the clouds, an encouraging sign for a spectacular sunrise. Interesting clouds can really take a photo to the next level, so I was beginning to get excited at what I was seeing…that is, until I realized that I forgot to bring the panoramic head for my tripod!
Remember what I was saying about packing my gear the night before?
To be fair, I did do that, but the panoramic head is too big to put in my pack and now it was enjoying a much warmer morning than I was, on the floor right next to where my camera bag had been parked all night. It wasn’t a total disaster — I’ve shot many panoramic photos without a pano head — but I was kicking myself for my mistake, and knew it would mean more time to finesse the final result in Photoshop once the image stitching had been completed in Lightroom.
The Golden 5 Minutes
As photographers, we often talk about the “Golden Hour”, but in reality, that ideal time should really be called the “Golden 5 Minutes”. Light conditions change fast at dawn, but there will always be a perfect point to take the photograph. As these changes occur, you rarely know exactly when that optimal point will be, so you just keep shooting and adjusting to the changing light and colors. It’s only when you look back through your photos that you’re able to spot that peak moment when everything was at its best.
Whenever I’m shooting a scene with a reflection, I always use a graduated neutral density filter. The reflected image will often be about 3-stops darker than the actual scene, so using my Formatt HiTech grad filter over the top half of the image holds back the light in that area to even things out with light in the reflection. The result is consistent exposure across the the whole image.
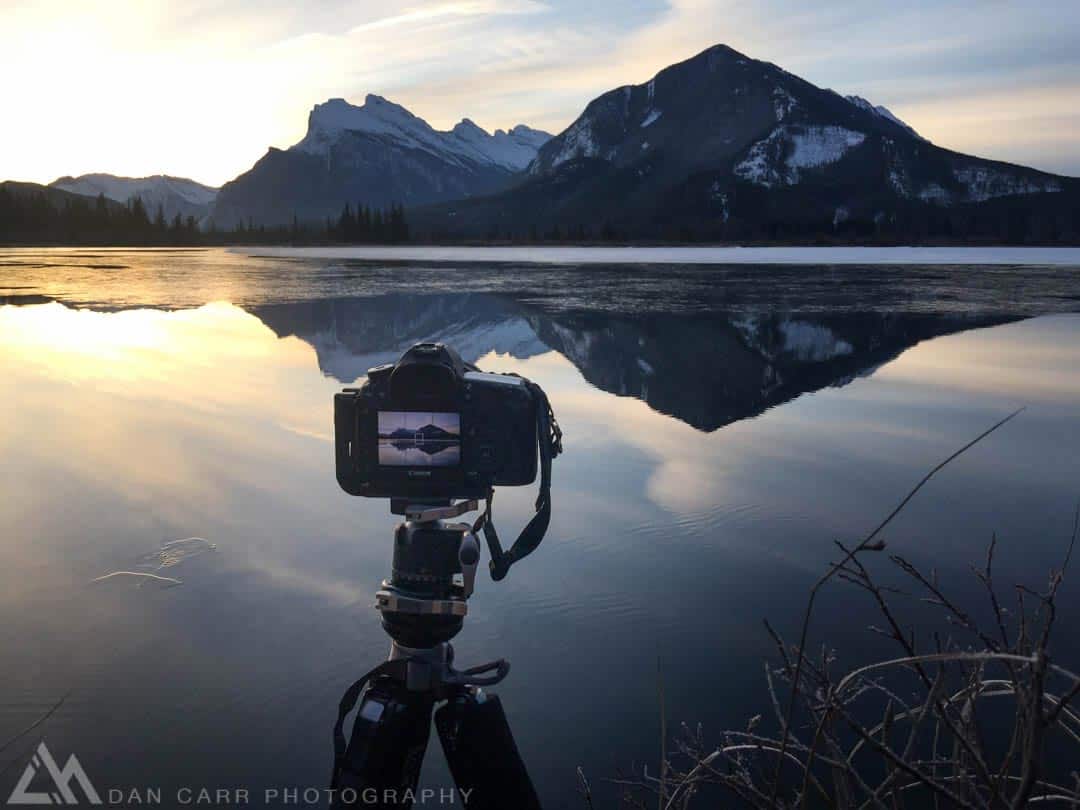
Getting the Shot
I shot this photo at f/13, ISO 400 and 1/10 of a second. My 16-35 lens was zoomed all the way to 35mm and the image is stitched together from three separate photos that I purposefully overlapped to help with the panoramic stitching I was going to do in Lightroom CC. As I’d forgotten my panoramic tripod head, I spun the camera around on the ballhead to take the three shots, a suboptimal method as it can introduce parallax errors, particularly if there are foreground objects close to the lens. However, with the lens zoomed to 35mm and little in the way of foreground detail, I was sure I could get what I was looking for, albeit with a little post tweaking.
Mother Nature really gave me a beautiful scene that morning and when that happens, I am forced into autopilot because it only lasts a few minutes. The orange glow emanating from the rising sun caught the streaking clouds beautifully and I knew right away I was capturing something special that would end up as part of my print collection. That magic moment only lasted for a few short minutes, and then it was gone as daylight swept over the mountainous landscape.
When it all comes together like that, I get a real rush of adrenaline and find myself staring at the scene for minutes afterwards, enjoying the view with a big grin on my face. It was the third time I’d been to that location on the trip, but it was first one that had yielded the kind of photos I was hoping for. It wasn’t even seven in the morning, but it had already been a good day!
Merge-to-Panorama in Lightroom CC
The new merge-to-panorama feature in Lightroom CC has really changed the way I look at my panoramic images. I don’t like spending hours and hours in front of my computer; I’d much rather be outside exploring with my camera, so I’m always looking for ways to speed up my workflow. Now that I can create panoramas without having to leave Lightroom, not only am I shooting more of them in the field, but I’m also going back through my archive and rediscovering ones that I’d shot on previous trips but never had the time to put together before.
I’ve used Lightroom since version 2, and this single feature has got me more excited than anything else that Adobe has ever added. Not only does it do a great job at stitching the images together, it also creates a new RAW DNG file, instead of just a TIFF or JPEG like all other options. This means that I am able to maintain the latitude and adjustability of a RAW file, even when the images have been combined into the final panorama. Prior to this feature, you either had to make the same adjustments to each individual RAW file before stitching them, or you had to stitch the RAWs together and then edit the resulting TIFF file.
After the panoramic merge created by Lightroom CC, the information maintained in this new DNG file allowed me to make several important adjustments to the image without perceivably reducing image quality.
Selective Adjustments
I first dragged a graduated filter over the entire top half of the image and minimally increased the clarity and saturation to encourage the sky and clouds to pop a little more. I then used a radial filter over the two dominant mountains, and increased their exposure in order to draw the viewer’s eye . Using Lightroom CC’s new ability to edit radial and graduated filters with a brush, I was able to quickly erase the areas of sky that got caught in the radial filter so as to only affect the mountains, and not the surrounding landscape. Increased exposure of the mountains highlighted low-contrast areas caused by the morning’s atmospheric conditions. To combat this, I used the brush adjustment tool on the nearest mountain and painted over it, then increased the contrast of the specified area. The right side of the image was also looking a little brighter than the left, so I used another graduated filter, pulled in from the right edge, and decreased the exposure by about ? of a stop.
Lightroom’s selective adjustments tools are an incredibly quick and easy way to make changes to an image and help to direct the viewer’s gaze. Every time I make an adjustment, my goal is to subconsciously control how someone views the photo. Where do they look first? Where do they look second? What path do their eyes follow to get between the main subjects in the image and how long can I captivate their attention?
Lightroom’s tools give me the power to control the answers to those questions.
Global Adjustments
On top of the selective adjustments, I also made a few global ones to increase the range of tones in the photo. I reduced the highlight slider and bumped up the shadows to stretch the tones across the histogram and reveal more of the information contained in the panoramic DNG file.
At this point, the image was nearly done, but I still had one big problem. The lack of a panoramic head, and the rush to capture the shot in the rapidly-changing light meant I’d shot the last of the three images of my panorama at a slight angle. The result was that the horizon line across the panorama curved quite sharply upwards in the right-hand third of the image. Horizon lines should always be horizontal so I knew I needed to fix it. Thankfully, Photoshop has an amazingly powerful tool that can help: the liquify filter.
Final Touches in Photoshop
I opened the image in Photoshop CC, loaded it into the liquify filter interface and selected a very large brush size. I then anchored the corners of the image so that the liquify filter wouldn’t pull the extremities of the image inwards, allowing me to gently nudge the horizon line down with the forward warp tool until it fell straight across the whole image.
Whilst I was in the liquify filter, I also used the bloat tool very gently to increase the size of the closest mountain in the photo, making it more of a focal point. Using the pucker tool, I then did the opposite to the mountain in the background, which helped to even out the overall balance of the image where the prominent, dark-toned mountain was fighting against the bright light of the rising sun to the left-hand side.
A fairly recent change to the liquify filter is that you can now apply non-destructive changes by using it as a smart filter, so I was able to go back and forth, refining my edit as necessary without fear of degrading the image more than absolutely necessary.
The Finished Product
With the image saved, it synced back to Lightroom CC where I applied the final 3:1 aspect ratio crop to it, which is my preferred crop for panoramic images. The result was magic, exactly what I’d been hoping for when I saw the first rays of light in the sky that morning. It all came together beautifully, despite my leaving my panoramic head at home!
Buy A Print Of This Image
I’ll be offering prints of this image as part of my limited collection. Click the green button for more information on prices and sizing.