 For people that shoot fast moving action with strobes like myself, we are always worrying about sync speeds and flash durations. Today I’m going to talk a little bit about flash sync and give a quick example of how you can push the boundaries of what can often seem like a very limiting factor with DSLRs.
One of the first questions people ask when they start experimenting with flash is “why does my camera not allow me to use a shutter speed higher than 1/xxx second?” If you scan through the specifications of a camera you will see one called x-sync. Typically listed as between 1/180 and 1/250 of a second, this is the fastest useable shutter speed of your camera when using flash. The best way to get to grips with it is to understand exactly what is happening in that split second after you press the shutter button.
The cameras shutter consists of 2 curtains. When the shutter button is pressed the first curtain opens exposing the sensor. A fraction of a second later the second curtain follows the first, racing across the sensor in the same direction and blocking it from receiving any more light. At slower shutter speeds, there exists a point in this cycle where the first curtain has fully exposed the sensor and the second curtain has yet to start covering it up. At this point the sensor is entirely exposed and when a flash is fired at that point, its resulting light will appear evenly spread across the whole photo. A camera’s X-sync is defined as the fastest shutter speed at which there still exists a point where the sensor is entirely uncovered and exposed.
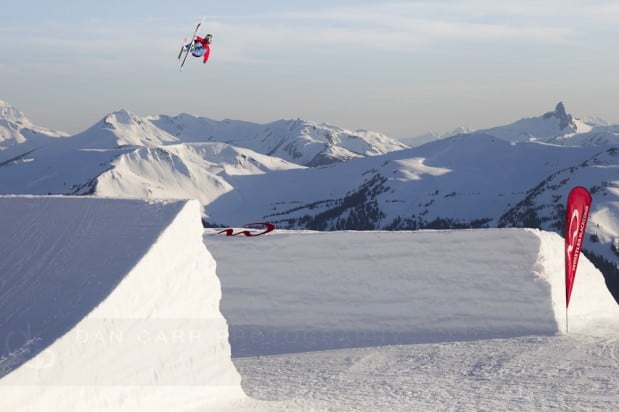
At faster shutter speeds, the second curtain begins moving across the sensor before the first curtain has finished opening. The result is that at any one moment in time, only a portion of the sensor is exposed at once. The “slit” between the 2 curtains rolls across the sensor exposing the final image evenly but at no point is the entire sensor exposed at once. Any flash fired during this process would only effect the portion of the photo being exposed by the slit between the 2 curtains. This causes dark bands to appear on your photo where light from the flash was blocked by the curtains from exposing the sensor. Most SLRs will automatically limit you to using the maximum X-Sync speed unless you are in manual exposure mode or using remote strobes which is where this tip comes into play. If you are shooting in a situation with bright ambient light where the strobes you are using are only lighting a small portion of the frame then there is not necessarily a need to expose the whole image to the light from your flash. The black bands I described above would only appear if there was no ambient light to expose the area where the bands are. If you can position your subject in an area of your frame that is exposed to the the flash between the “slit” then it doesn’t matter if the rest of the frame did not get exposed to the flash. Take this image at the top of the post for example. I shot this while working on an ad campaign for the ski resort Whistler Blackcomb in British Columbia. The shutter speed was 1/640 which is far above the 1/250 x-sync speed of the Canon 1dMKIV. But the key thing here is that I only wanted to strobe the skier at the top of the frame. The ambient light is exposing the rest of the frame, but the strobe is needed on the skier to fill in his shadows and really make him “pop” against the background. I know from experimentation, which areas of the frame are exposed to the flash burst at various shutter speeds. In this case a horizontal band covering about 1/8 of the image at the top will be exposed to the flash burst. By positioning my subject in that safe zone, I can work with a much faster shutter speed. This has the compensating benefit that your overall exposure is vastly different to what it would be if you were limited to 1/250. Overcoming the ambient light with your strobe power is a constant battle for location photographers and squeezing every last 1/3 stop of shutter speed is very useful.
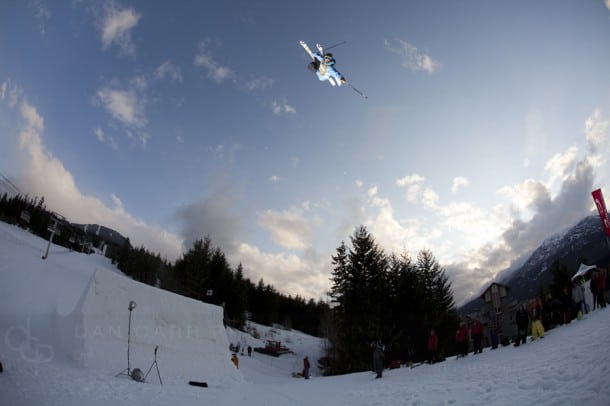
In this image above, the same technique is applied where the subject is at the top of the frame and the shutter speed is 1/400. In this shot though you can also see the strobe that is providing my fill flash on the subject. Looks like it didn’t even fire right ? Well it did ! If you image those shutter curtains moving across the sensor, then simply imagine one of the curtains blocking out my Elinchrom Ranger flash head at the exact moment it fired. The “slit” between the curtains was positioned over the skier. And you don’t have to have the subject at the top either, you could have them at the bottom, and simply hold the camera upside down! Or if you are shooting in portrait orientation then your subject would need to be off to one side. If you shoot with a camera with a large enough resolution you can even shoot horizontally with the subject at the top or bottom, but with the intention of cropping a vertical shot out of it. On my Canon 5DMKII the 21MP images are often big enough to crop a vertical shot out of a horizontal one so that gives you 4 options of placement of the subject in the flashed area. Left or right side by rotating the camera , or top and bottom by shooting horizontally and cropping a vertical shot from it! Get creative and see what you can do with it!


